As is known to all, VirtualDub is a free and all-powerful video capturing and processing utility for Windows. Although the lack of advanced editing features, it is still proficient in video resizing, cropping, filtering, re-compression and more. Without an open-and-shut interface, there may be obstacles for novices when performing some actions in it like cropping a video properly. To facilitate cropping video with it in a valid method, the following goes onto detail a guide on how VirtualDub crops video, accompanying with an introduction of VirtualDub alternative - Joyoshare Media Cutter.
Part 1: How Does VirtualDub Crop Video
Kindly note that VirtualDub applies solely to Windows operating system and it does not manage to open formats like MP4, WMV, MOV. Please ensure that pre-conditions are met and then follow the steps to implement the video cropping with VirtualDub.
Step 1 Open VirtualDub and add a video
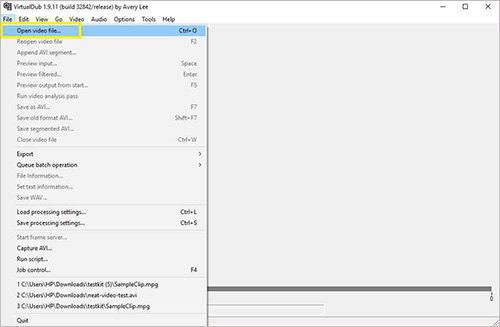
To crop video using VirtualDub, you must first download and install the software from a lawful calculable website. Then, have it launched on your Windows computer and add video by way of "File" - "Open video file" or by dragging.

Step 2 Set filters to crop video
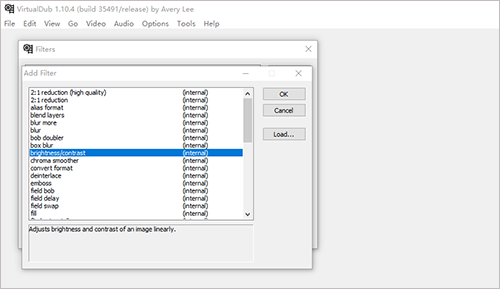
Whereafter, go to "Video" option in the top menu bar and then to "Filters". In "Filters" window, click on "Add" buttn to add "brightness/contrast" filter and touch "OK" for guiding you to set "Brightness" to "Normal" and "Contrast" to "100%".

Step 3 Crop video in VirtualDub
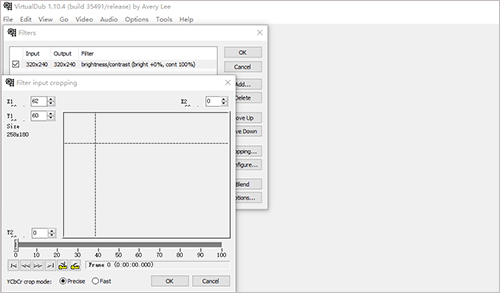
After confirmation with "OK", you return to the "Filters" interface and go to "Cropping" to enter the cropping window. You could input the value of 4 offsets (X1 - left side, Y1- top side, X2 - right side, Y2 - bottom side) to crop your video or manually move the border line of the cropping dashed box. Preview the cropped video. If you are satisfied, hit on "OK" to get back to the main screen.

Step 4 Save and export the cropped video
Lastly, head to "File" and followed by "Save as AVI". Please name the cropped video file and choose the storage path prior to pressing on "Save" button to export it.
Part 2: How to Crop Video Using VirtualDub Alternative
Regarding the drawbacks of VirtualDub (like for Windows only, incompatible with some general formats - MOV, MP4, WMV, etc), a comprehensive VirtualDub Alternative - Joyoshare Media Cutter is proposed here. In comparison with VirtualDub, Joyoshare Media Cutter not simply goes for Windows as well as Mac but also plays nicely with various and sundry media formats, such as MP4, MPEG, AVI, WMV, DVD, VOB, FLV, TS, MP3, OGG, ASF, HD, web videos, device-compatible formats, and many.
An additional enticement of Joyoshare video cutter is that two modes are featured. The high-speed mode provides a lossless method to achieve video cutting and trimming at mind-blowing speeds. The other one, encoding mode, allows retouching videos by parameter customization and various editing items application. Its transparent interface generates both higher practicality and simpler operation.
Key Features of Joyoshare Media Cutter:
- Powerful video cropper to crop a video flexibly
- A lossless mode to cut and split video at 60X speed
- Give preset aspect ratio - Full Screen, Pan Screen, 16:9, Original Resolution, etc
- Quickly extract audio from video, remove noise from audio and add background to video
- Built-in video editor to easily trim, rotate, flip video and enrich video with effects, watermarks, etc
Step 1 Upload the video to Joyoshare Media Cutter
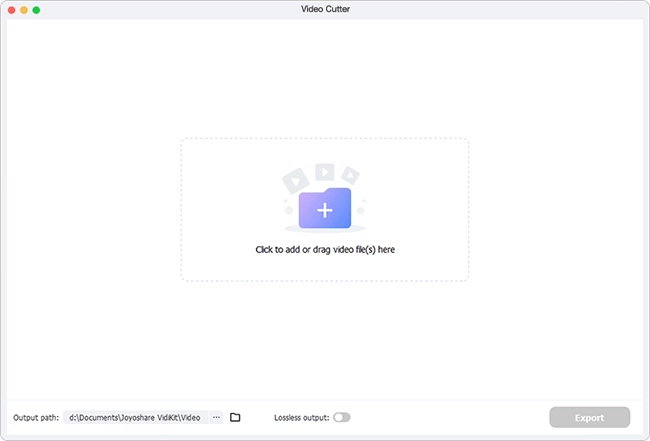
Click the "Download" button shown above to get the compatible version of Joyoshare Media Cutter on your computer. Next, run it and go for "Open" to upload your video files, which is one way of adding files. Besides, simply drag and drop video you need to crop to it.

Step 2 Specify output format under encoding mode
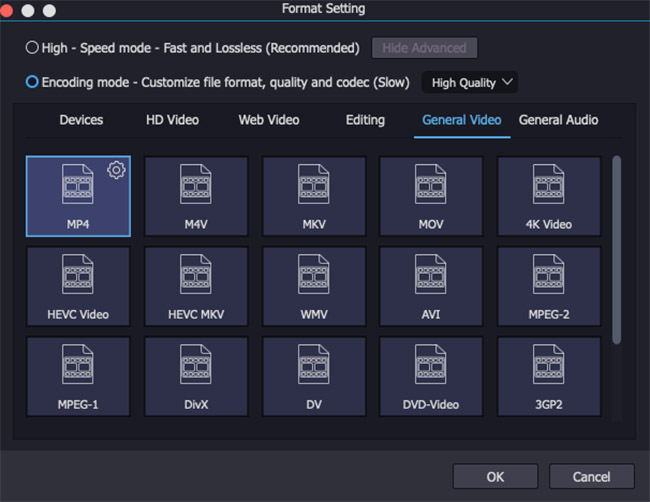
Once your video is uploaded, locate and press on "Format" to get into format setting window. Next, enable "Encoding mode" and specify a desired format for the output video. Remember that the "Encoding mode" gives you the privilege to perform further operations, such as changing parameters of codec, resolution, frame rate, bit rate, etc by means of an upper-right gear icon.

Step 3 Alternative to VirtualDub crops video
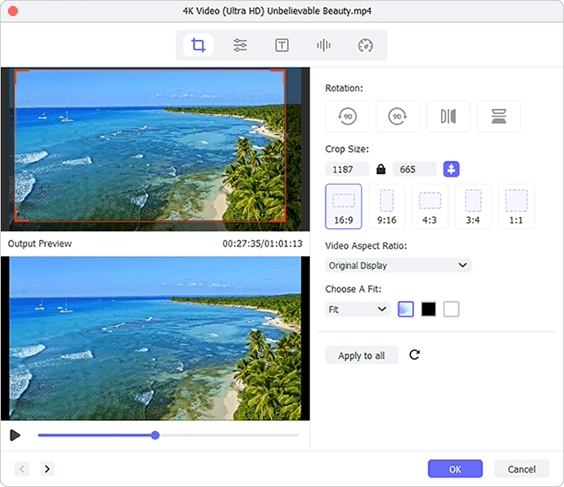
Now, click on "OK" to quit the format window and get back to the home interface. Find and touch "Edit"
 icon for the application of editing tools. In the editor window, move to "Adjust" - "Crop Area Size". Set the height and width for the cropped video in the input field. Or, you can drag the white dashed box for manual cropping to eliminate unwanted frames and black bars off your video.
Step 4 Start exporting the cropped video
Having cropped the video, preview it and proceed to adjust aspect ratio, trim video, add special effects and subtitles, design text or image watermarks, etc if desired. Finally, just tap on "Start" to export and save the cropped video in your local file folder.
Conclusion:
The question on how VirtualDub crops video has got answered step by step in this article. And also a VirtualDub alternative - Joyoshare Media Cutter and steps to operate it to crop video are detailed. Based on your individual conditions, choose one of them. VirtualDub is workable only when its conditions (Windows computer and your video format supported by it) are satisfied. Instead, Joyoshare Media Cutter is with no restrictions on use.
