Q:"How do you rotate a video in Final Cut Pro?" – From Quora
For some reason, you might film a video vertically on your phone and have no way but to use a video editor for post-processing. Just like the users in Quora, you may apply Final Cut Pro to do professional editing. However, how to rotate video in Final Cut Pro to make it horizontal if you are an inexperienced newbie? It doesn't sound simple, so we'll be there to teach you step by step. In case you are not used to using Final Cut Pro, we also share a great alternative to rotate video additionally.
Part 1: How to Rotate a Video in Final Cut Pro
Being excellent in video editing field, Final Cut Pro is developed with lots of stunning features. It's workable to rotate, crop, resize and cut videos with high quality. However, the overwhelming interface may distract you and cause inconvenience to find what you want. This is also the reason why we are going to guide you video rotation as follows:
Step 1 Import video to Final Cut Pro

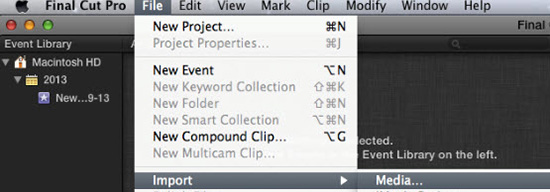
Launch the installed Final Cut Pro on your computer. Then you can navigate to click "File" on the top menu bar and press on "Media..." to add video file you'd like to rotate. You can also go direct to drag the video to Final Cut Pro.
Step 2 Rotate video in Final Cut Pro

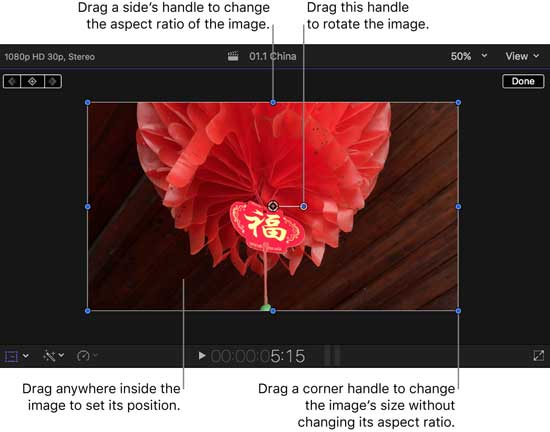
After importing video to Final Cut Pro, you can click on it in the timeline to select the whole video clip by default. Hereafter, go to the lower-right corner of the Viewer window to press on "Transform" option. Or you can utilize the shortcut "Shift-T" to open this function. Then the blue Rotate Handle will show at the center of the window. You need to drag the handle to rotate the video to a requested orientation.
Step 3 Export rotated video from Final Cut Pro
When you finish rotating video in Final Cut Pro, you can tap on "Export" option to export your edited video. You can set the output format as you wish, name the project and type in description to save on your computer.
Part 2: Rotate a Video in Final Cut Pro Alternative – Joyoshare Media Cutter
You can also get to know how to rotate a video on Final Cut Pro alternative, Joyoshare Media Cutter, here. It is honestly a superb tool to rotate, cut, trim, flip, watermark and crop videos.
Best of all, Joyoshare Media Cutter is a powerful program with broad compatibility to all multimedia formats, including MP4, 4K video, MPEG, WMV, MOV, WebM, FLV, MP3, FLAC, MKA, AAC, APE, ALAC, etc. To make the most of it, you can even specify parameters at your disposal, such as resolution, aspect ratio, sample rate, codec, brightness, hue, contrast, channel, etc.
Why Choose Joyoshare Media Cutter?
Cut and trim videos with up to 60X lightning speed
Offer lossless high-speed mode and customized encoding mode
Rotate videos clockwise or anticlockwise in any 90 degree
Support for rotating audio and video files in various formats
With advanced video editor to insert subtitle, apply effects, etc.
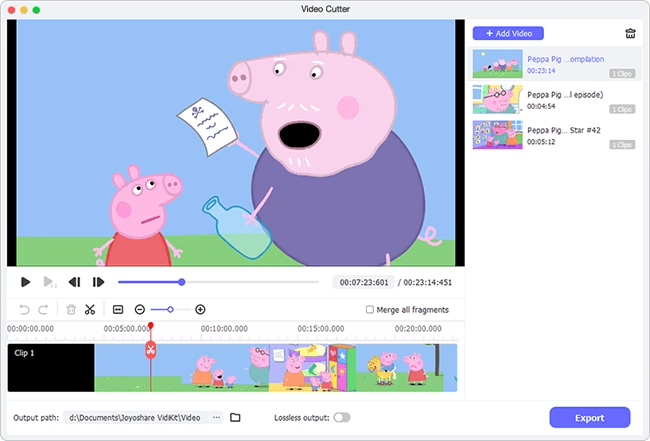
Step 1 Add video to Joyoshare Video Rotator

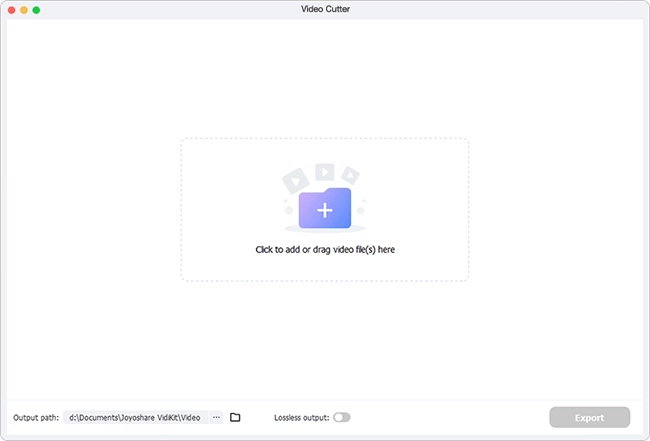
To get started, you have to download and install desired version of Joyoshare Media Cutter on your computer (it's available to rotate video on Mac and Windows). Then directly drag and drop the target video to the program or click the "Open" option to add.
Step 2 Start to rotate video

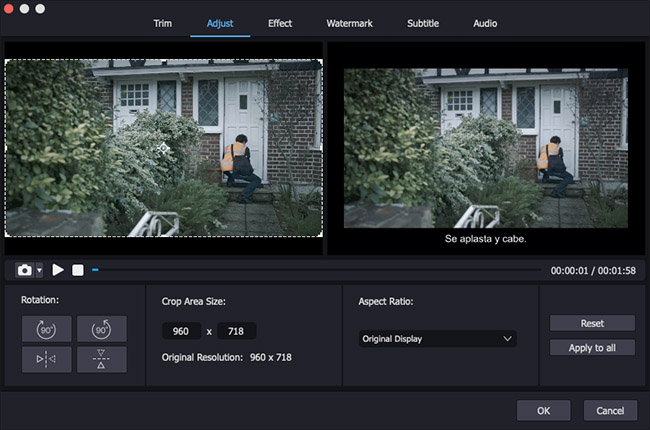
Click on "Show Segment List" button at the right bottom to display your imported video. Next, press the edit icon
 behind it to bring up a pop-up window. Then it's time to click the "Adjust" tab and locate at Rotation section. Joyoshare Media Cutter allows you to rotate a video left or right to 90, 180 or 270 degrees as you want. Every time you rotate the video, you can see the effect in the preview window on the right. Once it's finished, simple click "OK".
Step 3 Output the rotated video

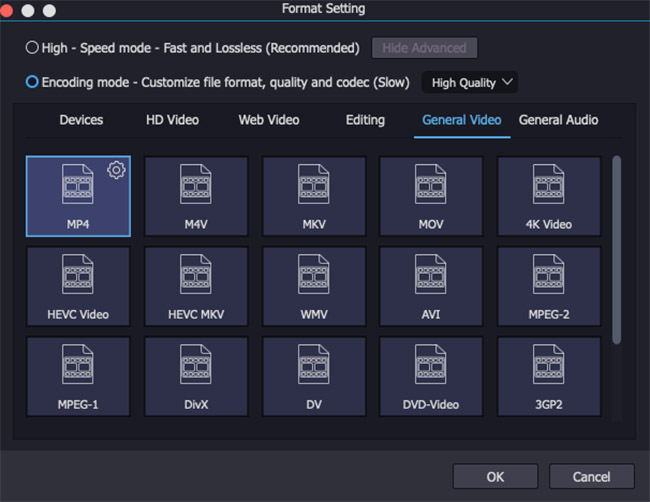
Afterward, you should click on the "Format" panel to choose "Encoding mode" and select a desired output format. Press on "OK" button to confirm and go back to main interface. Now, hit the "Start" button to begin video rotation and conversion in high quality. After a while, the completed rotated video will be saved on your computer's local folder for your further check.
