You should like to wonder how to make vertical video horizontal when you want a captured vertical video plays horizontally. How could it be achieved without much effort? If you are not coming up with any better ideas, a proposal to you is by reading this article. There are 3 well-liked and handy video editing software detailed in it to show how to convert a vertical video to the horizontal orientation.
Part 1: How to Make Vertical Video Horizontal in Joyoshare Media Cutter
Available for Windows and Mac as well as compatible with a wide range of media format, Joyoshare Media Cutter - a lossless cutting tool with a built-in video editor, is positively one of the most solid solutions to make a vertical video horizontal. With up to data technology, it is officially developed with 2 processing modes. With its customizable encoding mode, you can enable its built-in video editor to rotate your vertical video to horizontal one with ease. Besides, it also allows you to perform other editing tasks, like crop, adjust aspect ration, change video color, subtitle, watermark, extract audio from video, etc. Its use is convenient, requiring no skills.
- Rotate and flip video in a flexible manner
- Cut, split, and trim any video & audio in lossless quality
- Accept almost any type of video and audio files
- Two modes meet a variety of editing needs
- Customize output format codec, quality, resolution, etc
-
Step 1 Open video in Joyoshare Media Cutter
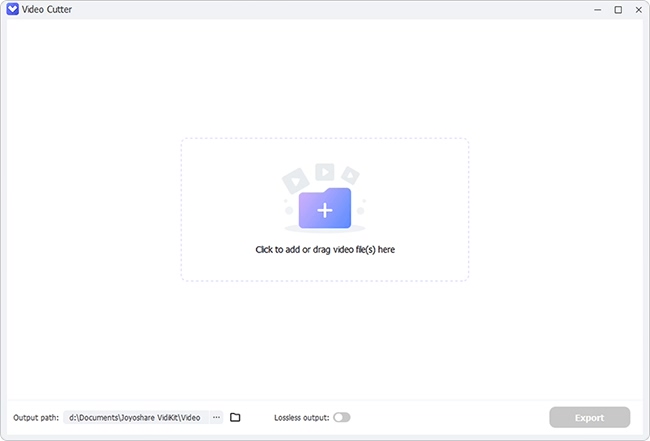
Download and install the requried version of Joyoshare Media Cutter on a computer to get ready for use. After launching it, click on "Open" option to upload the targeted video, or directly drag the video to the main interface.
-
Step 2 Select output format
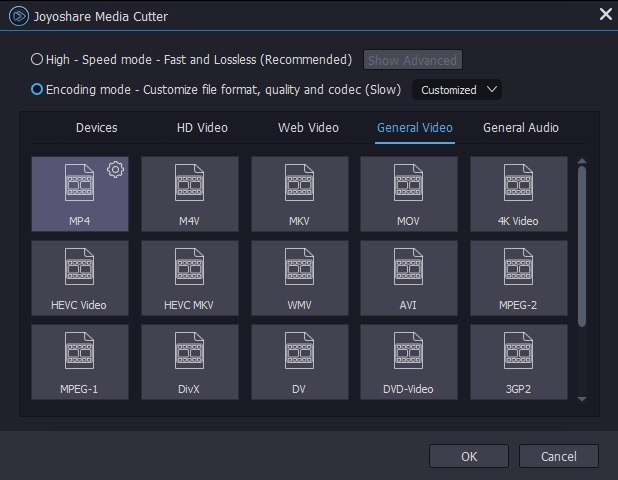
Proceed to the "Format" option. In the following interface, start the "Encoding mode" to make vertical video horizontal and select any output format under it. If necessary, you could even touch the gear icon to manually adjust output format codec, resolution, bit rate, frame rate, and more. Remember not to use the "High-speed mode", which only features the ability to cut, split, merge videos with the original quality retained.
-
Step 3 Make vertical video horizontal
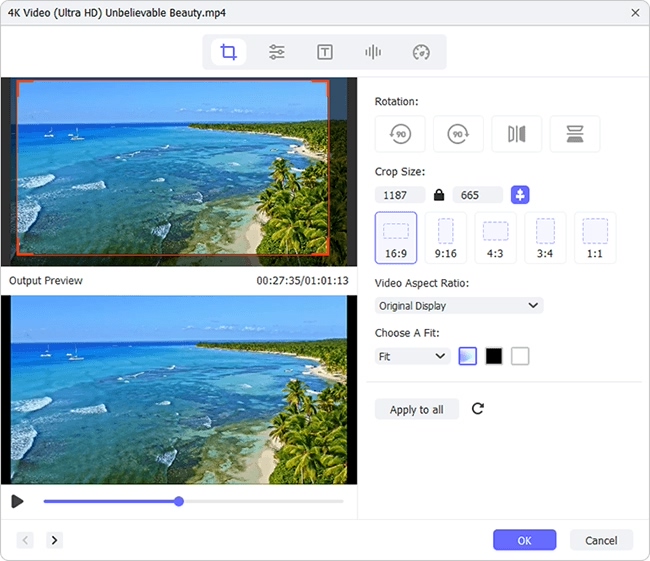
Return to the first window and tap on "Edit". Next, choose the "Adjust" tab from the top menu bar. To make your vertical video to be horizontal, go to "Rotation" and click "Rotate Clockwise" or "Rotate Anticlockwise" to get video played horizontally. Real-time preview the result in the right window. Joyoshare Media Cutter also provides other editing options. Do what you want and then confirm with "OK" button.
-
Step 4 Export the final video to system
Once you have everything set up, press the "Start" button to output the resulting video. Wait until the progress bar disappears. Use "Open The Output Folder" to find the saved video file.
Part 2: How to Make a Vertical Video Horizontal in iMovie on Mac
For Mac users, the built-in free video editing software - iMovie is also worth trying when it comes to making a vertical video horizontal. It includes a rich of excellent editing tools for flexible video rotation, video color correction, green-screen effects, addition of soundtrack, media files concentration, etc. Just apply iMovie video rotation effect to reach your goal after ensuring that your video file is accepted by it.
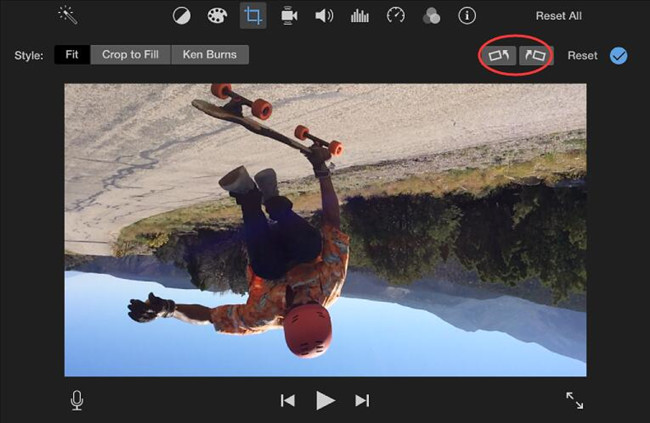
Step 1: Open iMovie on your Mac. Choose "File" and then to "Import" option to upload video file or dorectly drag and drop the video to the timeline;
Step 2: Among its editing tabs, go to "Cropping" to bring out rotation buttons. The left one is designed to rotate video counter-clockwise while the right one is to rotate video clockwise;
Step 3: Do desired rotation until your vertical video turns to be horizontal. To confirm changes, remember to click on "Apply" button;
Step 4: Last of all, touch "Share" from the drop-down list of the "File" option and followed by "File..." to save the final video to your Mac system.
Part 3: How to Make Vertical Video Horizontal in Premiere Pro
To let a vertical video play horizontally, another method frequently mentioned is using Premiere Pro. Developed by Adobe Systems, Premiere Pro is one of the top timeline-based video editing program, running on both Mac and Windows. All its editing tools are powered by Adobe Sensei, which allows you to creatively and effectively focus on what you want. Using the rotation editing option, you can make the vertical video horizontal by yourself. Below is the full steps. You could follow.
Step 1: Download, install and double-click to open Premiere Pro on your computer. Go to "File" > "New" > "Project". Set a name for new project and click "OK". Then, select your video and drag it to timeline;
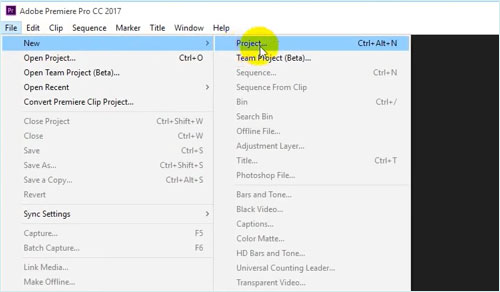
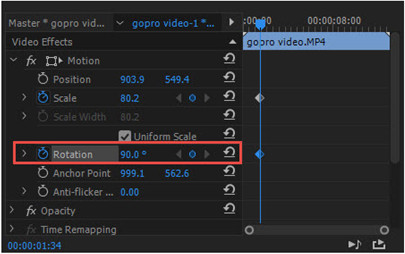
Step 2: Locate "Effect Controls" on the upper left of the screen, or reach "Effect Controls" from the drop-down list of "Window" option. Under "Video Effects", choose "Rotation". Customize the rotation degrees to make vertical video horizontal;
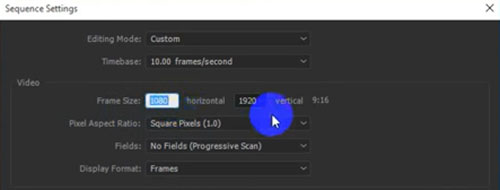
Step 3: Alternatively, you head to "Sequence" > "Sequence Settings..." to adjust frame size and horizontal value to get the thing done;
Step 4: Finally, export the edited video. You should select "File" > "Export" > "Media". In the pop-up dialog box, set output format and preset. It is also necessary to choose file name and output location. After all these settings, click on "Export".
