Benefiting from fully integrated services of Facebook, we can both keep up with friends in the faster way and do video sharing in it. Facebook accepts square and landscape videos. Though, according to data on Buffer - an application for the management of social media, square videos are well-received over Facebook, which will gain more views, likes, etc. How to create square videos for Facebook? We write this article to give a hand, which shares 3 methods to make a square Facebook video on desktop. Keep reading and you will be enlightened.
- Part 1: Crop Video for Facebook in Joyoshare Video Cutter
- Part 2: Create Square Video for Facebook in Adobe Premiere
- Part 3: Make Square Video for Facebook in PowerPoint
Part 1. How to Crop Video to Square for Facebook - Joyoshare Video Cutter
Joyoshare Video Cutter, besides serving the purpose of precisely and losslessly cutting any audio and video file, also works as a video cropper, allowing the flexibility to crop any video in a quick and customizable way. This is largely due to the fact that it is fitted with a video editor. Other than cropping effect, it as well provides the editing tabs of rotataion, adjustment, effects, watermark, subtitles, background music, audio extraction, and more. After the use of it, you will not just be amazed how powerful it is but also marvel at its compatibility. It can accept almost any media file format, covering YouTube, Facebook, Vimeo, FLV, HD WMV, TS, TRP, MP4, MKV, AVI, MPG, MTS, DivX, 3GP and then some.
Highlighted Features of Joyoshare Video Cutter:
- Two editing modes for different requirements
- 60X conversion speed to export video file quickly
- Crop video on Windows and Mac for social media
- Cut audio & video with millisecond precision losslessly
- Adjust aspect ratio, brightness, contrast, quality, codec, etc
Step 1 Upload video to Joyoshare Video Cutter
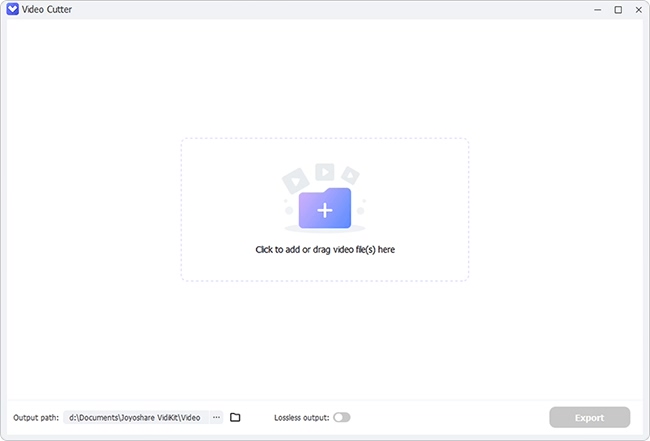
Get started by downloading and installing Joyoshare Video Cutter on desktop. Open it by double-clicking. Next, go to "Open" to import the video file to be cropped to square from the local. Simply, drag it and drop to the instructed area of the main interface.

Step 2 Start encoding mode for cropping
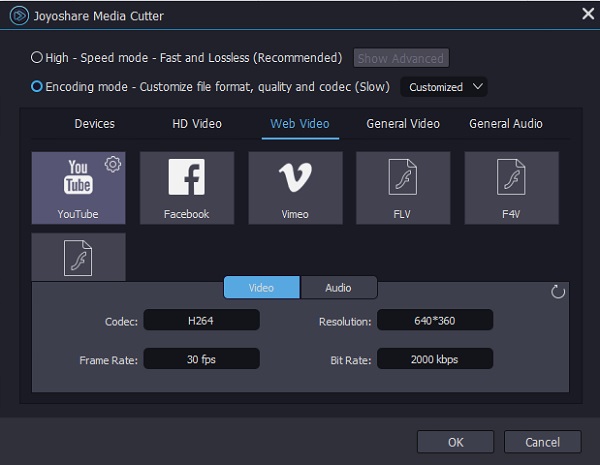
The following thing to do is getting access to the format window by the click of "Format". For video cropping, you need to mark the encoding mode and then specify a video output format. Although the program supports a large number of export formats, it is better for you to select "Facebook" as the output format from "Web Video" option, as what you are doing is to create square video for Facebook. This can avoid the situation where you chosen format is incompatible with Facebook. By the way, the gear icon at the top right of each output format under encoding mode is designed to custom video quality, resolution, codec, frame rate, etc. If you are professional, you are able to customize file format in your own way.

Step 3 Crop video to square for Facebook
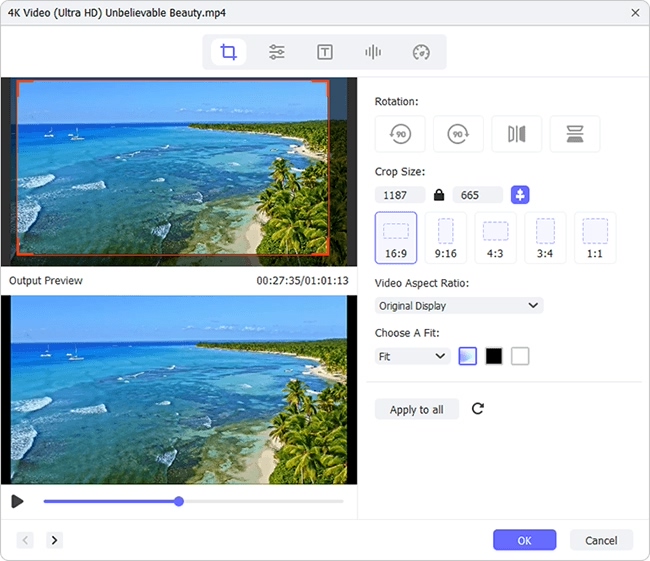
At present, it's time to start cropping video by hitting on the "Edit"
 icon. In the pop-up edit window, use the "Adjust" tool which includes the cropping option. It provides 2 ways to perform the cropping task. Depending on your requirements, you can choose to crop video to square by dragging the white cropping window, or input same values of width & height of your desired Facebook video under "Crop Area Size" to make a square video. Preview the result in the right window. If satisfied, click "OK".
Step 4 Output the square Facebook video
In the final step, tap on "Start" to export the cropped video. By default, the created video will be saved into a "converted" folder. If you want to change the output folder, head to "Menu" at the upper right corner of the beginning screen and then to "Preferences" > "Convert" > "Change".
Part 2. How to Create Square Videos for Facebook - Adobe Premiere
As a leading and robust video editing program, Adobe Premiere is introduced as the other solution to crop video to ssquare for Facebook on Windows and Mac. It is paid software, featuring lots of impressive editing functions to enable you to flexibly edit videos. In terms of cropping alone, it allows 2 means to make a square video. Operations are as follows.
How to crop video in Adobe Premiere for Facebook:
Step 1: Firstly, get your computer equipped with Adobe Premiere. After running it, go to "File" > "New" to create a new project. Then, click "File" > "Import..." to add the video that you want to square into the project;
Step 2: Drag the imported video to the timeline. In the the project panel, go down to "New Item" > "Sequence..." to open up the "New Sequence..." dialog box, in which you should select a preset for the video, like "DSLR 1080p", "ARRI 1080p", etc;
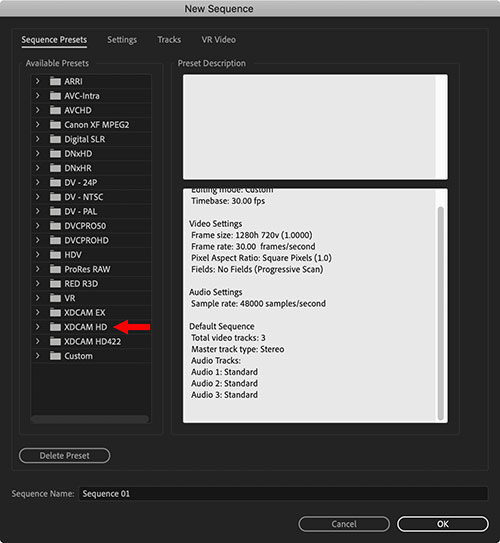
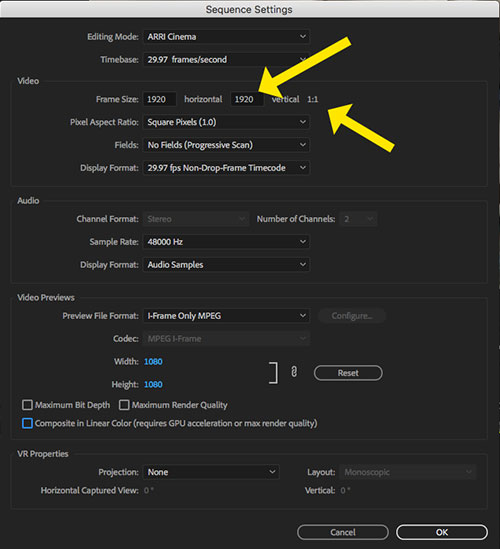
Step 3: After the selection of preset, press on "OK". In the next window of "Sequence Settings", go for "Video" > "Frame Size". To make a square video, keep the horizontal and vertical pixels same or directly set "Square Pixels" under "Pixel Aspect Ratio" tab;
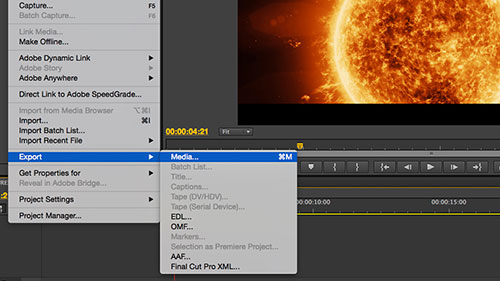
Step 4: Once finished, press on "OK" to confirm settings. Next, head to "File" from the top menu and followed by the "Export" > "Media..." to bring out the "Export Settings" box. Customize the output options as you like or simply check "Match Sequence Settings". After finishing the file name and file destination, click "Save" to start exporting.
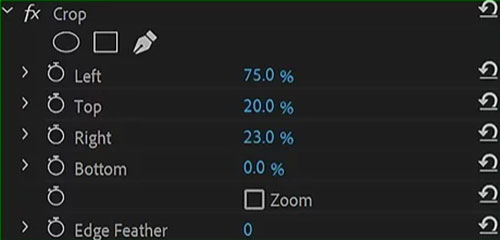
Note: To crop video to square for Facebook in Adobe Premiere, you also follow: drag the video to timline > click the video track to highlight it > select "Effects" from "Editing" menu > "Video Effects" > "Transform" > "Crop" > manually enter cropping percentages in the Effects Control panel.
Part 3. How to Make Square Video for Facebook - PowerPoint
On Windows PC, Microsoft PowerPoint is also an available method to create a square Facebook video. You might be surprised that PowerPoint designed to make and edit presentations allows adding videos and changing slide dimensions. But that's quite true. Many users have already done it. You may as well have a try following the instructions.
Stepwise guide on how to create Square video for Facebook in PowerPoint:
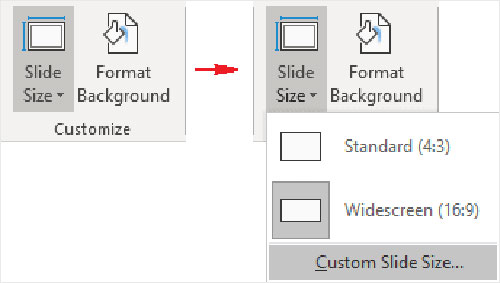
Step 1: Open PowerPoint on your PC. Then, go to "Design" > "Slide Size" > "Custom Slide Size...". Set the same pixels for the width and height to make a square slide. It is suggested that you set 1080 pixels in both "Height" and "Width" fields;
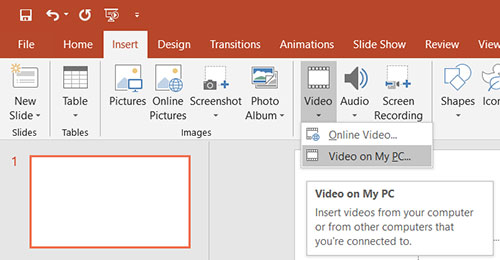
Step 2: Whereafter, choose "Insert" option > "Media" > "Video" to import your video to PowerPoint. Now, click the imported video > "Playback" > "Automatically";
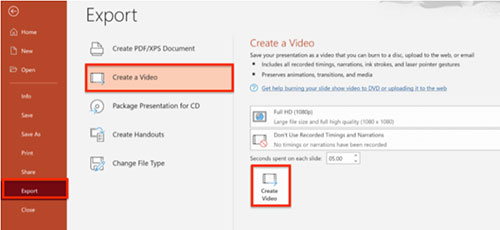
Step 3: Now, head to the "File" option and then to "Export". On the side menu of "Export" option, select "Create a Video" to save the presentation as a square video.
