As a free and open source video editor that brings great convenience, HandBrake is undoubtedly a must-have for most users' computers. If you surf the Internet, you'll find topics around it everywhere, such as convert, rotate or trim video with Handbrake. But often many people are confused because of lack of technical ability, the typical one is "HandBrake crop video". Worse yet, you may even not understand why the exported video is automatically cropped. Bogged with such series of problems? Stop running around and let's find a solution together here.
- Part 1: Way to Disable Automatic Cropping in HandBrake
- Part 2: How to Crop a Video Using HandBrake
- Part 3: How to Crop a Video Using Alternative to HandBrake
Part 1. How to Stop HandBrake Cropping Videos Itself?
Q:"Problem I am having is that HandBrake is automatically cropping the video. Any idea why? The original video is 1280x766 and after HandBrake's output, the result is 1206x734." - From VideoHelp Forum
Many times there will be black bars around our videos. Although it does not particularly affect viewing, in fact, loading the black bars increases the video encoding time and the amount of disk space occupied. Considering this situation, HandBrake has designed a special function to automatically detect black bars in the video and crop these areas. This is why most users complain that the exported video is automatically cropped.
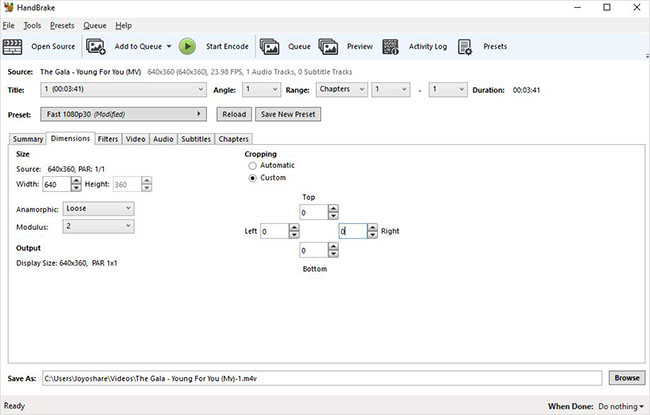
However, many feedbacks have confirmed that sometimes HandBrake's automatic cropping does not fully meet user needs. This requires us to manually adjust the corresponding settings to disable it. You can just go to Dimensions > Cropping > Custom > set Top, Left, Bottom and Right to 0, meanwhile keep "Anamorphic" on "Loose" and "Modulus" on "2".
Part 2. Crop Video with HandBrake by Custom
Although the automatic cropping option in HandBrake cannot achieve your expected result, it does not mean that you don't need to manually crop the unwanted black edges yourself. The following steps will guide you to complete it in a customized way.
Step 1 Add video to HandBrake
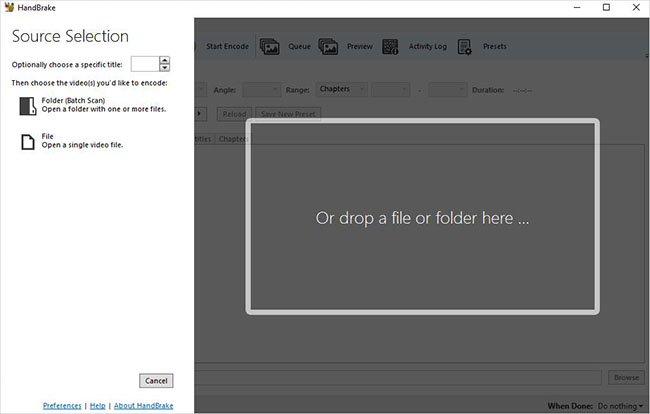
Download a newest and compatible HandBrake to your computer. Simply get it launched. Then drag a file or folder to its designated area as instructed. You can also click "Folder (Batch Scan)" or "File" in the left column to make selection.

Step 2 Crop video in HandBrake
Similarly as you disable automatic cropping, now head to Dimensions > Cropping > Custom. You can set Top, Bottom, Left and Right one by one according to the actual unwanted black border size of the imported video.

Step 3 Preview in HandBrake and save video
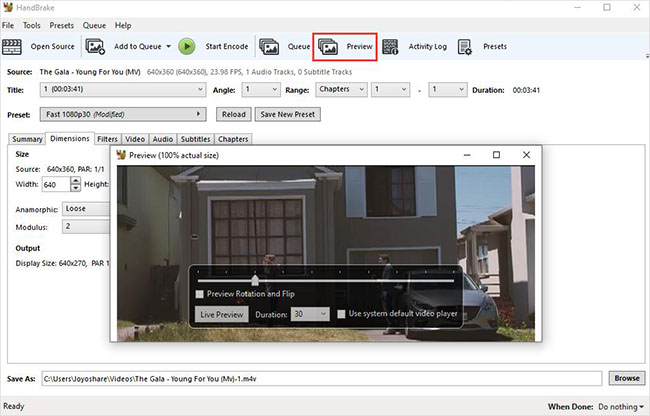
On the toolbar at the top, find the Preview option, and you can directly see the cropped video effect in the pop-up preview window. Adjust the corresponding value until you are satisfied. Then, go to "File" > "Start Encode" to export it locally.

Part 3: Crop Video with HandBrake Alternative
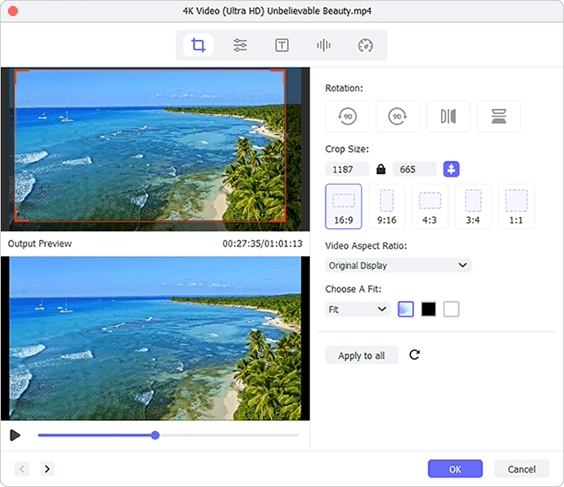
Some people may think that cropping video in HandBrake is not straightforward and intuitive enough. In this case, you might consider Joyoshare Media Cutter here. It provides you with a preview window to try and compare with the original video. You can also drag the area yourself to crop more freely. With other editing functions, such as adjusting aspect ratio, adding special effects, matching subtitles, etc., your video can be more unique!
Key Features of Joyoshare Media Cutter:
- Offer dual mode to fulfill lossless cut and customized edit
- All video processing can be previewed immediately
- Crop videos on Windows 10 and Mac 10.15
- Adjust desired area and set values to crop video
- Allow simultaneous adjustment of aspect ratio to achieve the best output
Step 1Add a video to Joyoshare Media Cutter
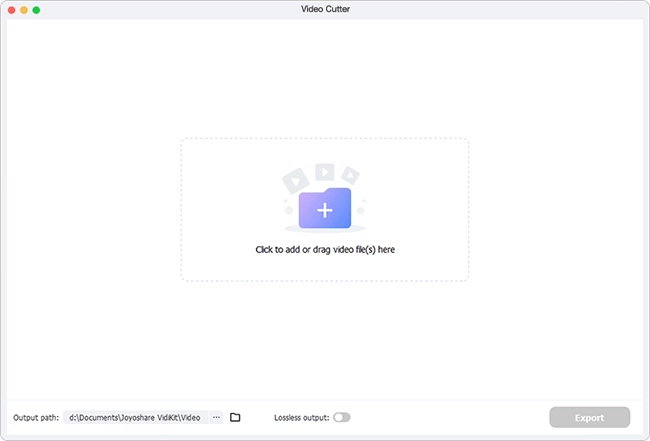
Quickly download, install and open Joyoshare Media Cutter on your computer. Prepare the video you're going to crop and directly drag it to the main interface. Or you can import it using Open button to select locally and load handily.

Step 2Set an output format
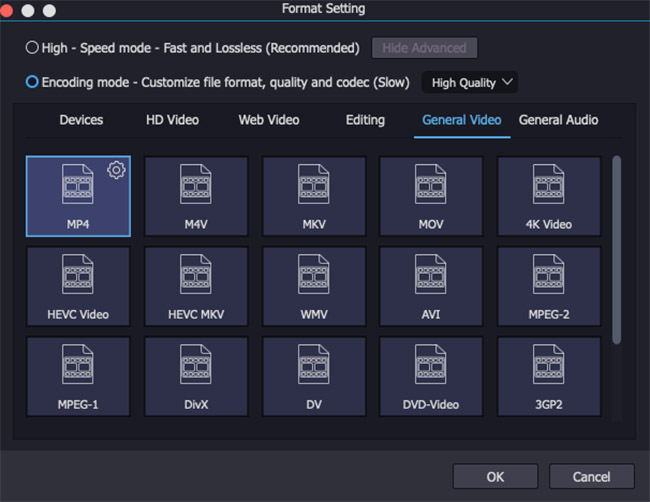
Before cropping the video, you need to specify the appropriate mode. Just click the Format button to put you in encoding mode. Next, select the target output format as needed. Once chosen, you can enter the settings button in the upper right corner to freely configure the corresponding parameters, such as frame rate, resolution, bit rate, etc.

Step 3Crop video in Joyoshare video cropper
Now, use your cropping tool under "Edit"
 > Adjust. You will see the default white cropping box. You can drag it directly to zoom in or out and select the area you want to leave. For more precise cropping, you can set the width and height in Crop Area Size. If necessary, select an aspect ratio, click OK and output the video with Start option in the main interface.
Conclusion:
If you are a loyal user of HandBrake, you don't have to be bothered by video cropping problems. Of course, for some new users or those pursuing different cropping methods, Joyoshare Media Cutter is also worth trying. Obviously, they all have their own advantages. So, you can choose the most suitable one to complete your editing work after measuring.
