Based on Microsoft Advanced Systems Format and compressed with Windows Media compression, WMV file is also known as Windows Media Video. It is popularly used in online video streaming on account of its small storage space. Sometimes, having had downloaded several movie segments saved as .wmv file extension, you might need to edit them, like remove blank segments from it, crop black bars or commercials, merge them into a single one, embed subtitles in your native language, etc. In all cases, you can follow the instructions below, which looks at how to edit WMV files on Windows 10 in 2 ways.
Part 1. How to Edit WMV Files on Windows 10 by Joyoshare Media Cutter
Joyoshare Media Cutter for Windows is referred to as an easy-to-use yet high-performance audio and video editor program. It comes with a clear and concise interface. Even for those who are new to video editing, they could easily manipulate it as well. Moreover, it provides full support to a whole bunch of media formats, covering WMV, MOV, M4V, MKV, VOB, MPG, AVI, 3GP, MP4, FLV, Apple, game consoles, smart TVs, and others.
Developed with Pentium III 800 MHz and higher processor, it has the ability to cut, convert, split, merge WMV video files at a blazing-fast speed with no sacrifice of quality. In addition to these basic editing tools, it also help to crop and rotate WMV videos, change its aspect ratio, add video and sound effects, design own watermarks, stitch audio and video together, rip audio from video, insert multilingual subtitles to videos, and more.
Highlighted Features of Joyoshare Media Cutter:
- Handily cut, split, merge WMV files without re-encoding
- Provide 60X-speed (lossless) mode and encoding mode
- One of the best video editors to edit WMV on Windows 10
- Allows extracting audio from WMV, add music to WMV video, etc
- Support full media formats, like WMV, MOV, VOB, MPEG, MP4, AVI, FLV, etc
Stepwise guide on how to edit a WMV file on Windows 10 using Joyoshare Media Cutter:
Step 1 Start the program and import WMV files
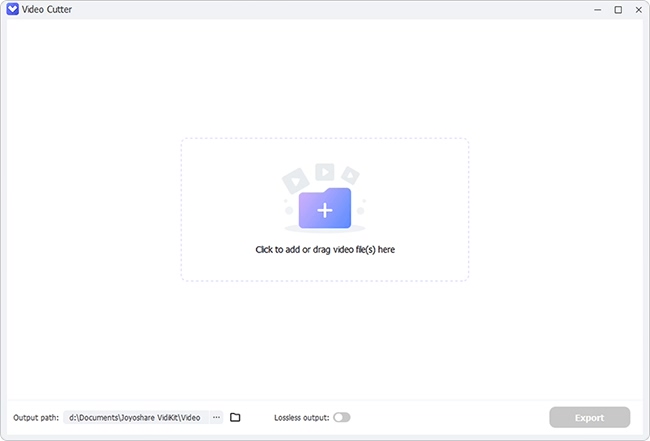
First of all, please download and install the Windows version of Joyoshare Media Cutter on your PC. After that, open it and set about adding your WMV files. You can do it by means of "Start" button or simply dragging and dropping.

Step 2 Choose mode and format
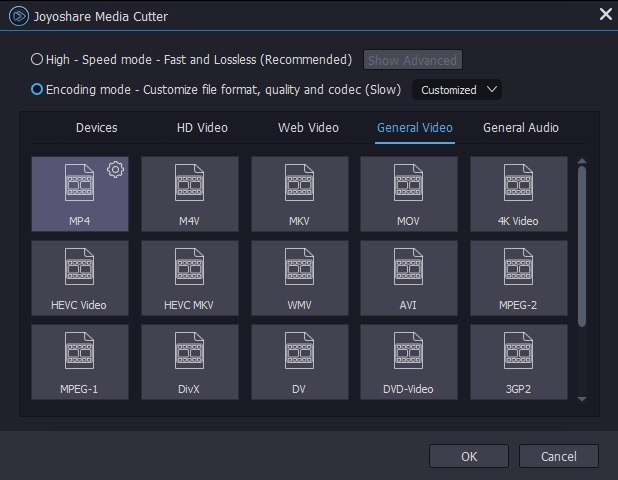
As what mentioned before, Joyoshare Media Cutter is provided with 2 modes, namely, high-speed mode and encoding mode. For editing WMV files, please active the encoding mode and whereafter select an output format. You are enabled to ulteriorly customize the output quality and parameters with a click of the gear icon.

Step 3 Start editing WMV files
Get back to the main window after formatting. You're now ready to do editing on your WMV files as the following.
Cut WMV: You have 3 ways to cut anything you're not happy about off the WMV videos. 1) Preview WMV video to decide which segment you want to delete and then easily drag the time slider to make it happen; 2) To cut precisely, use key frame button and set segment start/end time; 3) You can also control the WMV segments to be kept with millisecond precision by setting up the temporal interval.

Split and Merge WMV: Click on "+" icon to create another segment. Cut it as the above solutions if necessary. Then, check the "Merge Segments" option to join split WMV files together.
Locate "Edit"
 and do further editing.
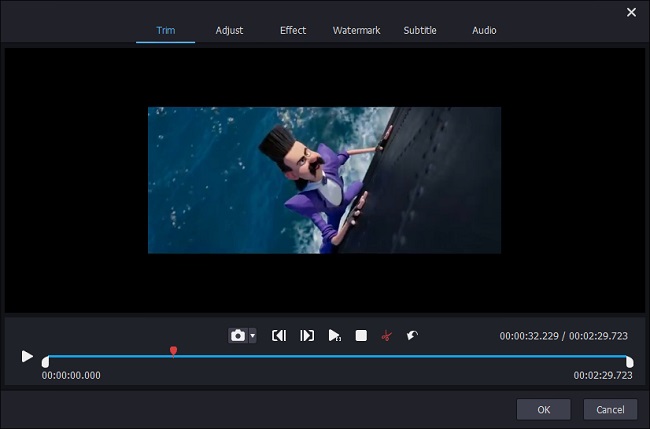
Trim: To trim WMV files, slide the timeline to determine what need to be retained and tap a scissor-shaped icon to trim. Besides, you are allowed to snapshot your favorite frame for wallpaper or other usage by the camera-shaped button.
Adjust: This editing option is for video cropping, rotation, flipping, and aspect ratio settings. To crop WMV video, move the white cropping window to zoom in and out or reset the crop area size. If needed, you could rotate your video 90°, 180°, 270° clockwise or counterclockwise as well as flip video vertically and horizontally.
Effect: In this section, what you could do is adjusting video brightness, contrast, saturation, and hue, applying manifold video effects and frames, such as Bubble, Stage, LOMO, TV, etc.
Watermark: "Watermark" editing tool is designed to create individual image/text watermarks and edit watermarks, like font, color, position, transparency, etc.
Subtitle: With "Subtitle" tool, besides tapping "..." to embed subtitle files of SRT, ASS, SUB, SUP, SMI, SSA, etc to your WMV video, you are also able to change the font, position, margin, scale, color, transparency of subtitles.
Audio: "Audio" option empowers you to add background music to video by pressing on "..." icon, control volume and weight, using sound effects including Full Bass, Pop, Sharp, Rock, and son on.
Step 4 Export edited WMV files
After completing all the required editing and setting, hit on "Start" situated at the lower right corner of the first interface to export and save the edited WMV video file. When the process bar comes to an end, proceed to "Open The Output Folder"
 to manage your WMV file.
Part 2. How to Edit WMV Files on Windows 10 by Built-in Photos
As we all know, the original built-in video editor on Windows system - Windows Movie Maker has been already discontinued by Microsoft in 2017, no more downloads allowed. On Windows 10 system, it is replaced by Microsoft Photos. Below shows how to edit a WMV file on windows 10 using Photos app.
Note: On Windows Vista/XP/7/8, you can still make use of Windows Movie Maker to edit WMV video file.
Step 1 Add WMV video to Windows 10 Photos
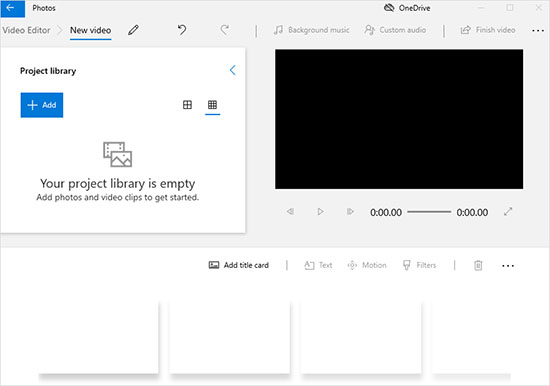
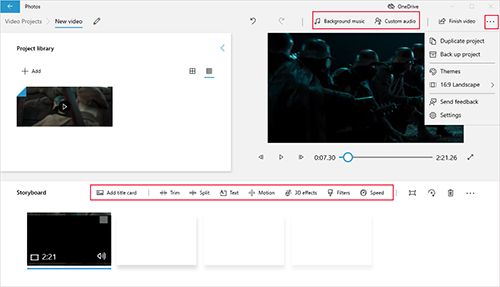
Click "Start" in the lower left corner of your Windows 10 main screen to locate and start "Photos". Next, go to "Video Projects" or "New video" - "New video project" - name your video project - "Add" to import WMV files to it.

Step 2 Preview and edit WMV files
After uploading, drag the WMV file to the storyboard for editing. You can do: 1) Add title card and customize duration, animated text style and background; 2) Drag timeline to trim WMV video; 3) Split WMV file; 4) Apply a variety of motion and filters as well as 3D effects to your video; 5) Rotate WMV video 90°, 180°, 270° clockwise; 6) Remove black bars from video with one click; 7) Add background music or your own audio tracks and adjust music volume; 8) Change the aspect ratio by click "..." icon in the top right corner.

Step 3 Output WMV video after editing
In the last step, you only tap on "Finish video" to set up video quality and click "Export" to save your edited WMV video file. This process may take a little time. Wait with patience, please.
Part 3. Comparison
To edit WMV files on windows 10, both Joyoshare Media Cutter and Windows 10 Photos are available. Though, each has its advantages and disadvantages. To figure out which is better for you, take some time to look at the table below, which compares these two tools in every respect.
| Program | Joyoshare Media Cutter | Windows 10 photos |
| Supported OS | Windows XP and later; Mac | Windows 10 |
| Interface | Intuitive | User-friendly |
| Processing Mode | 60X-speed and encoding modes | Single mode |
| Compatible Formats | General/device-compatible formats; HD videos; Web videos; | MOV, M4V, WMV, AVI, MP4; Various Photos |
| Add Subtitles and Watermarks | Yes | No |
| Add Background Music | Yes | Yes |
| Extract Audio from Video | Yes | No |
| Basic Editing Tools | Losslessly cut, split, merge, convert, trim, crop, rotate, flip, apply effects and frames | Trim, split, rotate, merge, add title, apply video motion and filters |
| Adjustment | Aspect ratio; Sound volume, Video brightness, contrast, saturation, and hue | Aspect ratio and music volume |
| Price | $29.95/Lifetime | Free |
