As we all know, VLC Media Player is a reputable tool that has been applied for different usages, such as playing, cutting and recording video files, etc. Actually, what it can do is more than these. Taking an example, when you make a video recording in person with unexpected area included, you can ask this comprehensive tool, VLC, for help as well. It's good at cropping videos and saving files permanently. Now it's your time to read this guide and learn how to crop video in VLC on Windows and Mac.
Part 1. How Does VLC Crop Video
When cropping a video on Windows 10 and Mac, many users will actually encounter problems, and will be confused why the video is cropped but not saved. Are you also looking for a complete and clear solution? Let's take a look at the steps below.
Step 1 Open VLC to add video file

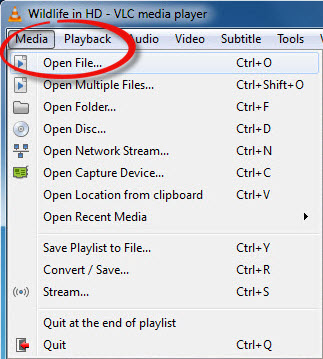
- Run VLC media player on your Windows 10 and go forward to "Media " > "Open File..." to add your target video.
Step 2 Crop video for preview in VLC

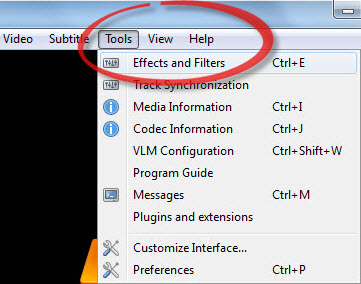
- After the video is loaded, go to "Tools" > "Effects and Filters" > "Video Effects" > "Crop".

- Now you have to enter specific values to Top, Left, Right and Bottom in pixels. Preview the video to furtherly adjust it so that you can crop out unwanted sections.
Step 3 Furtherly confirm video cropping operations

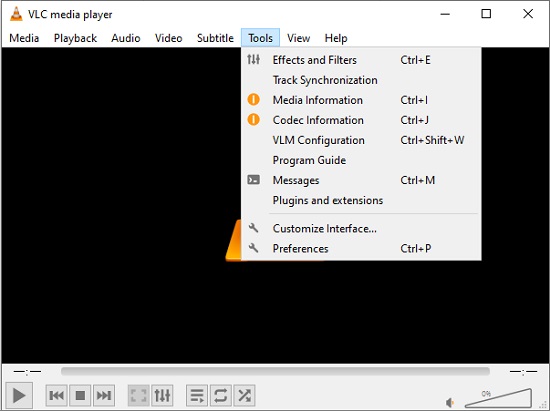
- To save and export the cropped video locally and permanently, you have to hit the "Preferences" option under the "Tools" tab.

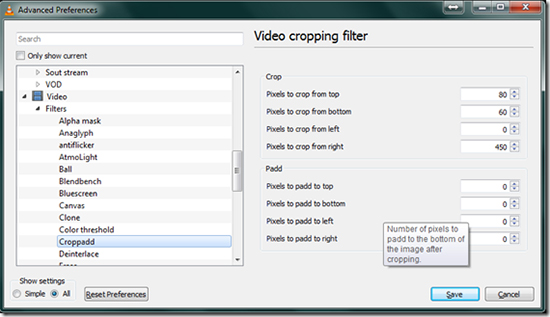
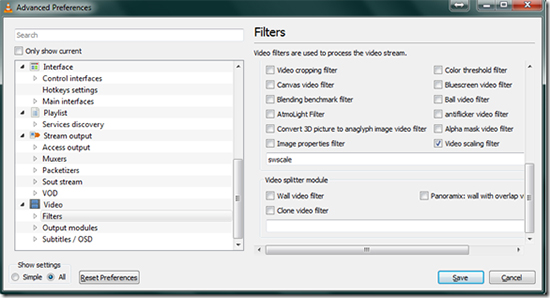
- In the lower left corner, you should choose "All" under "Show Settings" so that you can have right to see all accessible options. Scroll down the left panel and go to "Video" > "Filters" > "Croppadd". Then you can type in the previous pixels to crop from top/bottom/left/right under "Crop".

- Continue to hit the "Video" > "Filters", tick the "Video Scaling Filter"/"Video Cropping Filter" and click "Save" to confirm all changes.
Step 4 Save cropped video in VLC

- Return to your main menu bar and click "Convert/Save" from the "Media" tab. Just as the interface show, hit the "Add" button to select one local file to the cropping list. In the lower right corner, click the drop-down menu of "Convert/Save" and select "Convert". Next, hit "Edit" > "Video Codec" > "Filter" > "Video Cropping Filter". Then press the "Browse" button to decide a storage location and click "Start" button to save the cropped video in VLC.
- For Mac Users:
- Step 1: Launch VLC on Mac computer and head to "File" > "Open File";
- Step 2: At the top of the menu bar, click on "Window" > "Video Effects..." > "Crop";
- Step 3: Set Top, Bottom, Left and Right in pixels;
- Step 4: Close the pop-up window when you set the cropping values. Then go to "VLC" > "Preferences";
- Step 5: Directly press on the "Show All" button and go for "Video" > "Filters" > "Croppadd" to similarly set cropping values for top/bottom/left/right;
- Step 6: Go to "Video" > "Filters" > "Video Cropping Filter" > "Save" to apply all cropping operations to your target video
- Step 7: Find "Media" > "Convert/Save" in the main menu bar and click on "Add" to choose your video. Then go for "Convert/Save" > "Convert" and "Edit" > "Video Codec" > "Filter" > "Video Cropping Filter". Simply choose where your file to save as and click "Start".
Part 2. Crop Video in VLC Alternative - Joyoshare VidiKit
The instruction to crop video using VLC Media Player is perhaps a bit troublesome and inconvenience in your eyes. It cannot allow you to preview the video while cropping, and it easily fails to save after cropping, if you forget to click "Video Cropping Fliter". In this case, you may long for a more flexible yet easy-to-operate video editor. Here Joyoshare VidiKit (originated from Joyoshare Video Cutter) is highly recommended.
This VLC alternative can crop videos as per your own preferences, manually adjusting the cropping window or directly setting width and height. Besides cropping video, it offers an integrated solution to cut, convert, merge, repair, watermark, compress and record. Surely, anyone who has proficient skill in editing videos can personalize the output format configuration, like resolution, bit rate, sample rate, codec, etc. in professional way to generate high-quality result.

- Crop any video file to remove unwanted area
- With a preview window to handily display visual effects in advance
- Change aspect ratio make video more matchable
- Convert, cut and combine videos at 60X speed
- More tools to subtitle, effect, watermark, rotate, etc.
- Crop video on Windows 10 and Mac easily
Step 1 Run Joyoshare VidiKit to add target video
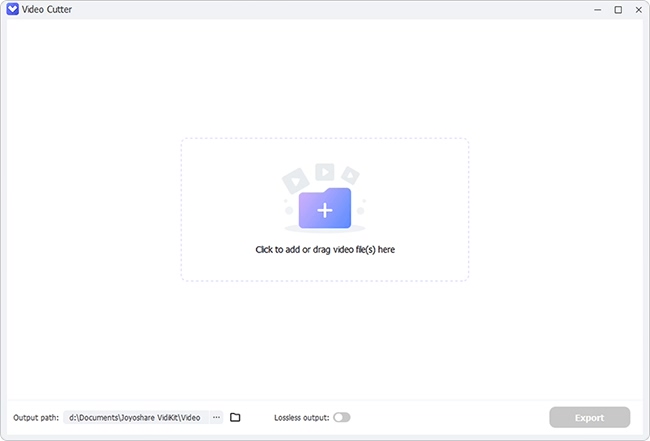
Launch the newest version of Joyoshare VidiKit on your computer's desktop and open "Video Cutter". Then just go to click the "Open" button to select a designated video from your local folder. Or you can straightly drag and drop it to the main interface.

Note: This video cutter in Joyoshare VidiKit only gives you permission to import one video file at a time. Once it is completely loaded, this program will play it automatically for you.
Step 2 Crop the video and customize desired area
Afterwards, you can get down to hitting the "Show segment list" icon
 at the lower right corner to present your video. Then you can see an edit button
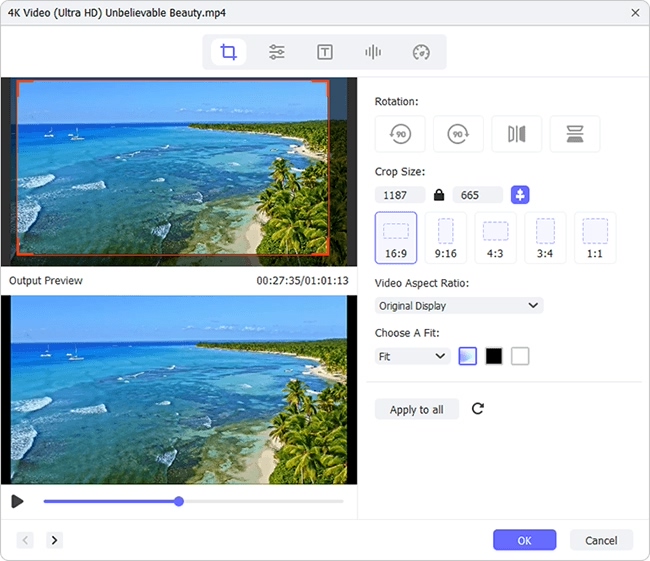
  located in the list. Hit it and enter the "Adjust" tab from the top menu bar. You are allowed to manually zoom in and zoom out the white cropping window to get specific area you want. Or simply customize both width and height for it by resetting the crop area size.
Note: Make sure that the aspect ratio of the cropped video keeps the same with that of the selected output format. Otherwise, black bars will appear to the left and right of the video clip.
Step 3 Export your cropped video

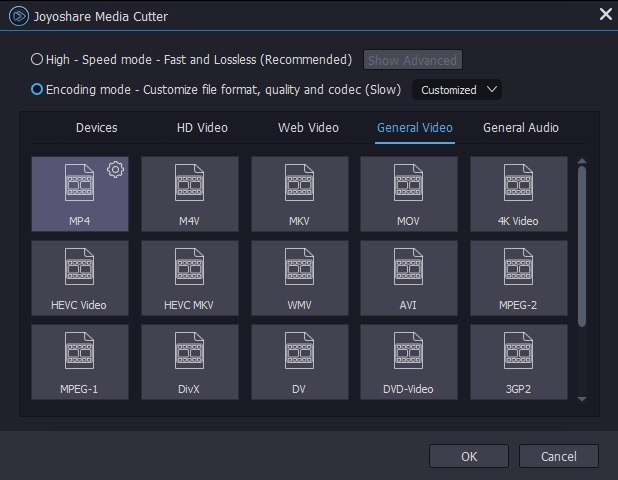
Now close the editing window and go to press the "Format" panel to choose output format. Guarantee that you opt for a new video format under the "Encoding" mode. Hereafter, you can stylize related parameters, like resolution, bit rate, codec, sample rate, channel, etc. for your video and the synced audio. Having finished all of these operations, you can click the "Start" button to begin to convert your video to a new one or transfer it to your mobile device. A moment later, you can enjoy it in the destination folder.
