Q: I am looking for a qualified tool to crop out one side of my video. My friends ask me to try Adobe Premiere Pro. However, when I prepare to crop video in Premiere, its main interface is puzzling, from which I struggle from finding the cropping feature. Could you please show me a quick guide? -From Videohelp Forum
Without doubt, Adobe Premiere Pro is taken into consideration for numerous users to edit video files as its high popularity. Nevertheless, as what described by the novice, without a clear guide, it's a bit difficult to manipulate it directly. To solve this problem, let's read on and see how to crop video in Premiere.
Part 1. How to Crop a Video in Premiere
Adobe Premiere Pro is a well-known professional video editing tool that can do a series of processes for your video files. However, its high-end user interface is somewhat complex for users to figure out the next step clearly. In order to give concrete help, the step-by-step guide to crop video in Adobe Premiere is kindly provided as below.
Step 1 Open a project in Premiere

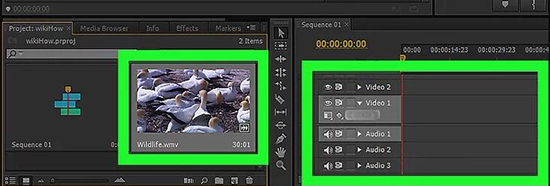
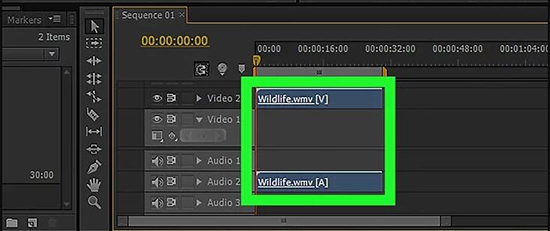
Launch Adobe Premiere Pro and go to "File" > "New Project" or "Open Project" to start a project. Afterwards, click on the video and drag it from the "project" tab to the timeline on the right section.

Hit the imported video to select it.
Step 2 Go for "Effects" tab

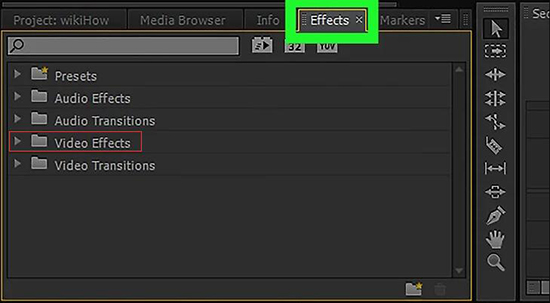
Continue to the lower-left part of the screen and click the "Effect" tab on the top menu list. Find the subfolder named "Video Effects". Hereafter, under the "Transform" folder, press the "Crop" tool and drag it to your video clip that is located on the timeline.
Step 3 Crop Video in Premiere Pro

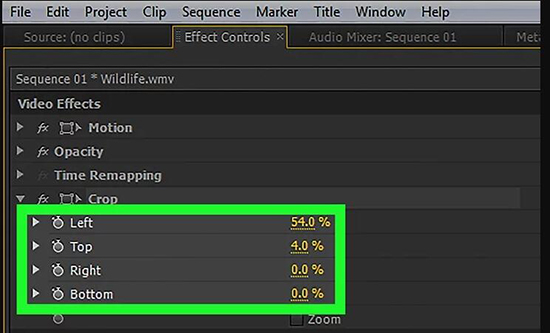
Just as the "Effect Control" interface show, you have right to adjust the "Left", "Top", "Right" and "Bottom" value to crop each side of the required video clip. Note that the percentage indicates the cropping level you have done for your video. While the appropriate value is set, the video will be automatically cropped.
Part 2. How to Crop a Video in Joyoshare Media Cutter
Considering the operation to crop a video in Premiere is not flexible enough, an capable alternative, Joyoshare Media Cutter will be highly recommended here for your reference. This powerful tool is sought after by a large quantity of users, especially new beginners, which is mainly used for editing purpose. With it, you can rescue yourself from video manage issue. Its well-designed all-round solution facilitates you to crop, cut, trim, rotate and merge any video clips at your own will.
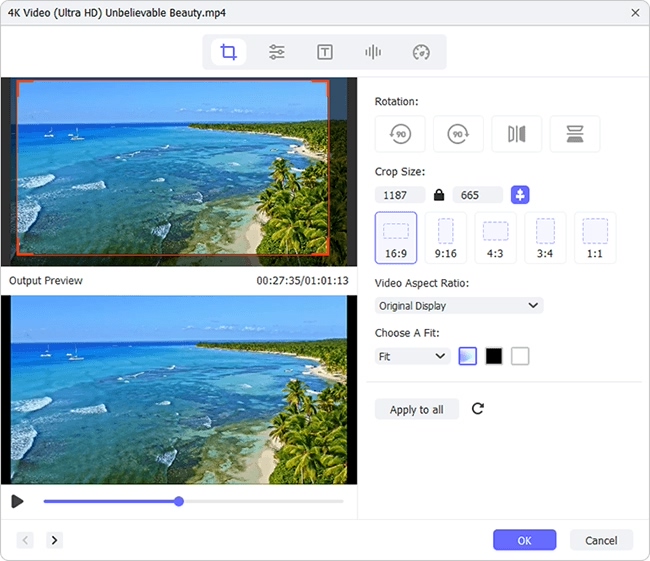
Most of all, it offers ability to auto-play your loaded video and give you change to see any changes from the preview window. With regard to crop video, you are enabled to manually control the adjustable cropping window and accurately set fixed value in your way. Besides, it also includes full supports to almost popular video formats, like MP4, M4V, AVI, MPG, MPEG, 3GP, 3G2, DV, WTV, OGV, WMV, ASF, RM, RMVB, DAT, MOV, FLV, MKV, etc. As you make full use of it, you can as well remove noisy parts, extract audio from video, create unique ringtone, add customized watermark, insert right subtitle, apply cool video/sound effects, etc.
Key Features of Joyoshare Media Cutter:
Crop certain video file to eliminate useless area
With comprehensive video editing tools to enrich your video
Have chance to watch edited video in preview window
Convert video to new format or transfer to portable device freely
Offer access to add sound effects to video and take snapshots
Step 1 Import target video to Joyoshare Media Cutter
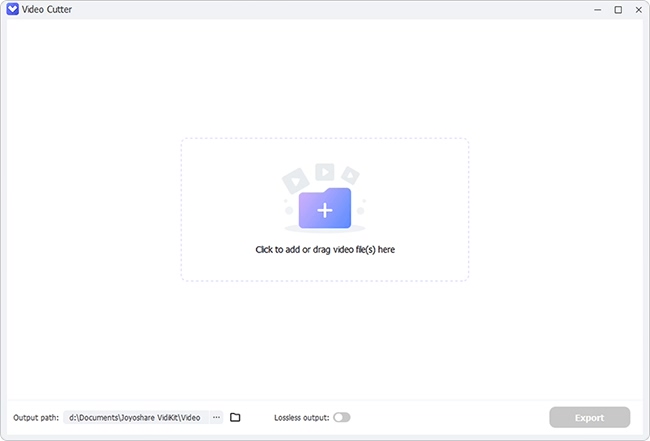
Run Joyoshare Media Cutter on your own computer to add the designated video file. You can make it in two methods: click the "Open" button and search your local folder to pick up a video; directly drag the selected one to the main interface.

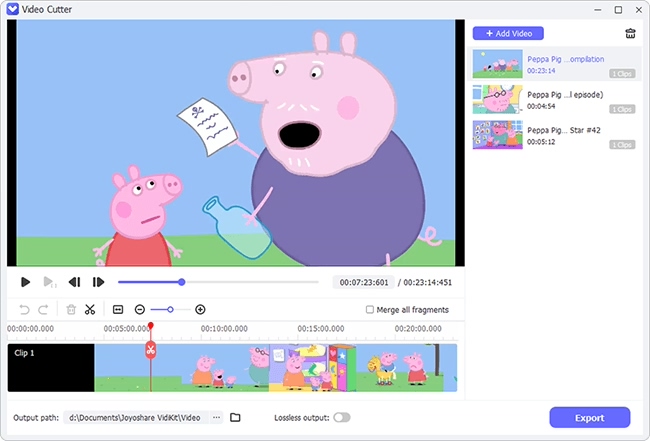
Note: You can deal with one video file at a time, which will be played automatically for you when it is completely loaded.
Step 2 Get to crop video in edit window
Press the "Show segment list" icon
 at the lower right corner and click the edit button
  in the list. By doing that, a pop-up window will be shown in your sight. Go forward to hit the "Adjust" tab in the menu bar at the top of the screen. Now you can zoom in and zoom out the adjustable window to set a specific area. Or you can type in exact width and height value to resize the crop area.
Note: Make sure that the aspect ratio of the cropped video keeps the same with that of the selected output format. Otherwise, the result will be generated with black bars.
Step 3 Initiate a task to output cropped video

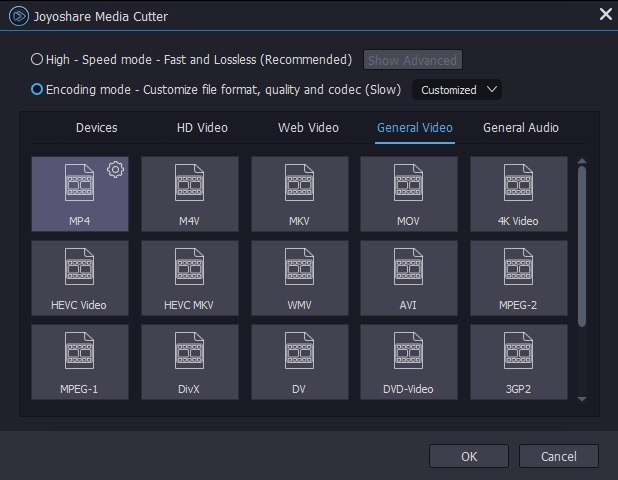
As you have gotten an ideal cropping area for your video, you can straightly leave the edit window and press the "Format" panel. Under the encoding mode, you are allowed to choose a preferred output format. On the top right corner, click the gear icon to customize configuration info, like resolution, codec, bit rate, channel, sample rate, etc. in your own way. Then you can go ahead to hit the "Start" button to let Joyoshare Media Cutter work for you. A moment later, the destination folder will contain your new video.
