Assuming that you upload a home-made video to your YouTube, only to find someone else re-edit it and even publish to his own social platform. What can you do to prove that this video is made from your hands? Obviously, a unique watermark is the best evidence, which can prevent others from using your video without consent. Hence, to keep our copyright and defend our intellectual right, learning how to watermark video online becomes our urgent priority. To give you the most support, we are going to show how to make it with ease.
- Part 1. Add Watermark to Video Online - Watermark.ws
- Part 2. Insert Watermark to Video Online - Kapwing
- Part 3. Embed Watermark to Video Online - Online Converter
- Part 4. Design Watermark to Video Online - Pixiko
- More: Customize Watermark to Video Offline
Part 1. How to Watermark Video Online in Watermark.ws
This online watermark maker can strictly protect your content's copyright from being infringed, including videos, images and documents. There are only 3 forthright steps: import, edit and export. Now let's jump to the next guide to see how to manipulate it.
Step 1 Upload your video
This all-round compact video branding tool can show you comprehensive solution to upload your video source from different platform and hard drive, like local computer, Facebook, Flickr, Dropbox, Google Drive, SkyDrive, Evernote, Picasa, Instagram, etc.

Note: The basic version only allows you to process one file each time while the premium one can support unlimited files at a time.
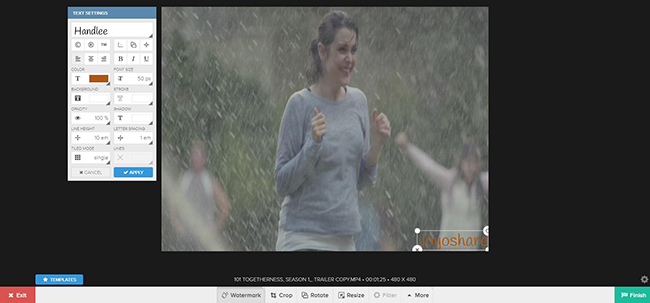
Step 2 Create a watermark to video
Tick one of the uploaded video you want and do further edit. Once this straightforward tool completed load it, you can go ahead to click the "Watermark" tab. It's feasible to make a customized text watermark, setting color, font size, background, stroke, opacity, shadow, etc. in your own way. Or you can directly import specific logo watermark from local folder.

Note: The premium version gives you access to utilize watermark templates, hi-res watermarks, 300+ premium fonts, filters, effects, etc.
Step 3 Produce watermarked video
Afterwards, you can click the "Finish" button to export your video. The designed watermark can be saved as your template for next time usage. Then you can decide to re-edit it, download to computer, send to email, output to Facebook, Flickr, or save to your own Dropbox, Box, etc.

Note: The video in full length over 30 seconds requires an upgrade. That is to say, to totally enjoy the best service, you'd better unlock all functions with a premium version.
Part 2. How to Add Watermark to Video Online in Kapwing
Kapwing is another free video watermark software online to help watermark a video to prevent unapproved content reposting and re-sharing from happening. It is a drag-and-drop web editor working with both videos and photos. It does watermarking by the way of adding text or images to the video. The operation is quite straightforward, which can be basically finished in seconds.
Step 1 Add video to Kapwing
Directly visit https://www.kapwing.com/tools/watermark-video and click "Get Started" to upload the video that you want to place a watermark. You can access your local system or paste a video URL to import file, denpending on your actual case.

Step 2 Watermark video in text or image

After the video file has been successfully loaded up, you can set about watermark your video. If what you want is inserting a text watermark to video, select "Text" and enter your desired text snippet in the pop-up textbox. As your needs, drag the textbox to adjust the position, or custom the font, size, color, outline of the text watermark, etc. In case you hope to protect your content by logo watermark, please choose "Images". Then, upload your prepared photo or directly search in Kapwing. You are offered the permission to freely crop, erase, adjust, zoom in or out the image watermark, etc.

Step 3 Export the new video
The last step is heading to "Export Video" button at the top right corner to create the watermark video. Wait until the process is done. You are required to tap on "Download" to get the resulting video saved on your system.

Part 3. How to Watermark Video Online in Online Converter
Online Converter besides provides fast and lossless solution for video conversion, it also includes a series of editing services, one of which is the video watermark option. This tool is capable of making both text and image watermark for videos in MP4, AVI, FLV, MOV, 3GP, and more formats simply and quickly. Something to be mentioned is that the supported max file size is 200 MB and there is no preview option in it. If you don't care these weaknesses, do the following to watermark video online with it.
Step 1 Select video to upload
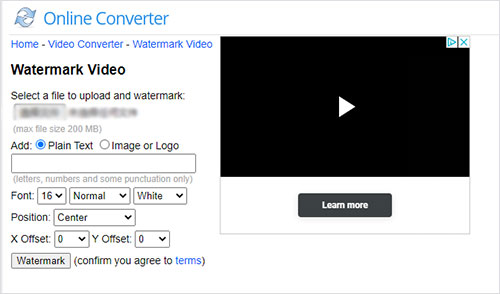
Get into the official website of Online Converter and select the "Watermark Video" tool. Next, click "Select files" to select the video file from local folder to upload and watermark.
Step 2 Choose text or image watermark
Enable "Plain Text" and enter text to create the text watermark for your video. It allows you to set font style, color, size, and position. Note, however, that the texts you can input only include letters, numbers, and certain punctions. Alternatively, start "Image or Logo" to upload an image as well as choose the background and position. It can but accept image file in JPG, PNG, BMP and the file size is no more than 10 MB.

Step 3 Create watermarked video
After everything else, touch the botton of "Watermark" to create a watermark video for you. Don't forget to tap "Download Now" to get the converted video when covnersion is completed.

Part 4. How to Add Watermark to Video Online in Pixiko
The last but not the least web service recommended to design watermark for video online is Pixiko video watermark maker. By it, you get permission to watermark your video by adding an image, place, name, or slogan with 3 quick steps, requiring no installation of extra application on computer. The concrete procedures are as follows.
Step 1 Add video to the watermark maker
Obviously, the first step is to get into the Pixiko video watermark editor official website and then click "Get started". In the next interface, click to import video from computer or drag and drop your video file to it.

Step 2 Make text watermark or image
You would be guided into the editing interface after the video had been uploaded. According to your requirements, you freely choose to create image or text watermark to your video. To watermark video in image, select "UPLOAD" to add the picture and locate it to the proper position. Or, click "ADD TEXT" to edit your text, set color, font, transparency, text effects, etc to make a special text watermark.

Step 3 Export and download the video
Once done, press on "Done" at the top right corner of the screen to start processing. If you need to save the watermarked video on system, you have to download after the process is finished.
Bonus Tip: How to Create a Watermark with Joyoshare Media Cutter
Other than online watermark creator, a desktop trustworthy watermark logo maker - Joyoshare Media Cutter can also satisfy your needs in high efficiency. As a incredibly professional watermark creator, this tool is capable of cutting off needless sections firstly and empowers you to add both text watermark and image watermark handily. You also have right to see the visual effects in preview window, take snapshots and adjust transparency at discretion.
In addition to watermarking video in picture or text, Joyoshare Media Cutter as well enables you to add background music to video, apply video & sound effects, change aspect ratio, adjust brightness, make ringtone for iPhone and Android, etc. Pleasingly, it has full support to a large number of video formats, such as M4V, AVI, MP4, MPG, MPEG, 3GP, 3G2, WMV, ASF, RM, RMVB, DAT, MOV, FLV, MKV, DV, VOB, WTV, OGV, etc.
Key Features of Joyoshare Media Cutter:
Support inserting text watermark as well as image watermark
Adjust location, size and transparency for edited watermark
Set font by personalizing its color, size, style, effect, etc.
Allow modifying file format, codec, quality, and other parameters
Cut, trim, crop, rotate and merge video files at 60X faster speed

Step 1 Load video to Joyoshare Media Cutter
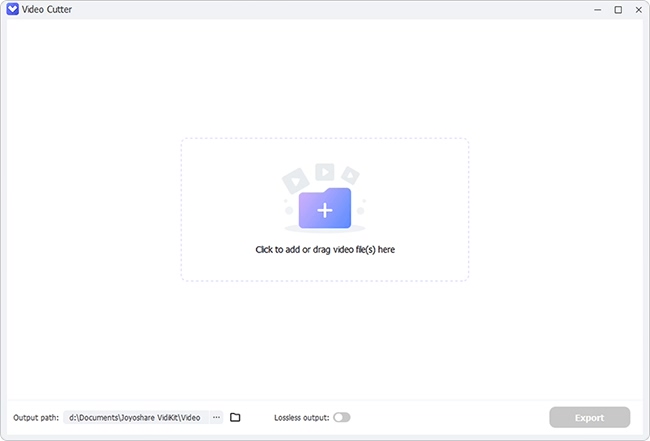
Run Joyoshare Media Cutter on your desktop screen to let it work for you. From its main interface, you can get to know how to add your video file. Straightly drag and drop it to this program or simply click the "Open" button to select a local file.

Note: In case you have multiple video files to add stylized watermark, you can utilize Joyoshare Video Converter. The fact is that Joyoshare Media Cutter cannot support batch mode currently.
Step 2 Set output format under encoding mode
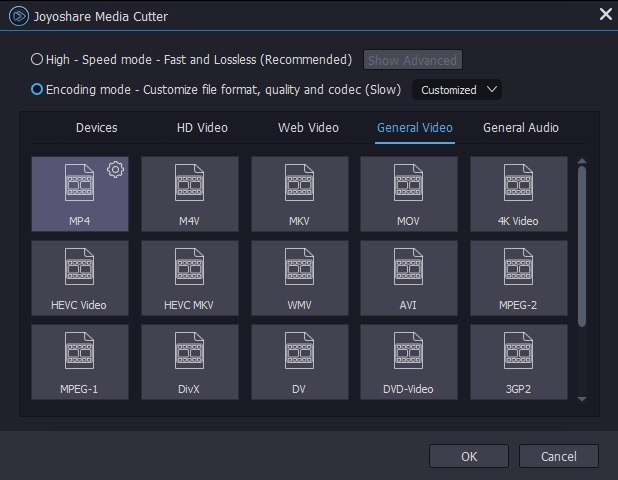
The next step is to get down to opting for one output format under the encoding mode. In this mode, almost all widely-used general video, HD video, web video formats and portable devices are supported. As your request, specify a desired export format. To do more, you can hit the gear icon on the chosen format to customize resolution, codec, bit rate, sample rate, etc. Once formatting is prepared, click on "OK" button to get yourself back to the main window.

Step 3 Start adding watermark to video
On the mian screen, preview your video. If there is a need to cut something abandoned off the video, you can move the yellow handles or fill in the time frames to set accurate time points for each video clip. Next, touch the edit button
 and enter "Watermark" tab from the top menu bar for watermarking video.
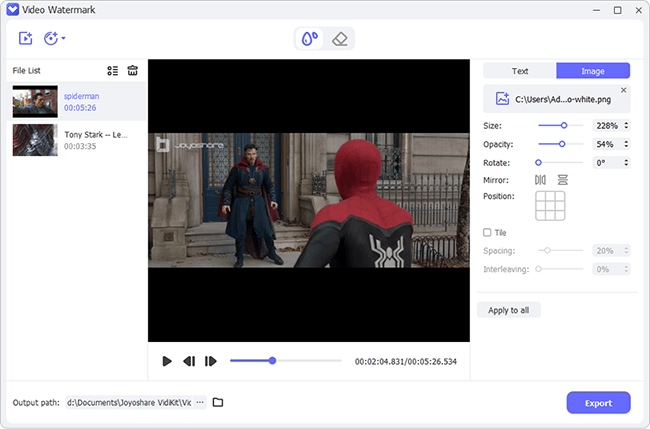
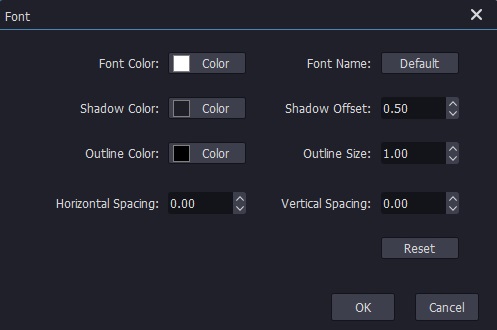
With this dedicated watermark maker, you can do following operations. 1) Add image watermark: click the "+" to search your own local folder and choose one required image. Usually, a brand logo is commonly used. 2) Embed text watermark: enter any text you want in corresponding frame. You can hit the
 icon to set font, including color, size, style and more as below. 3) Slide the controller from the end of left to the end of right to adjust the transparency value. Note that any changes can be seen in the preview window. Remember to tap on "OK" after the completion of watermark editing.
Step 4 Generate the watermarked video
In the last step, press on "Start" button to make the watermarked video saved on your computer's hard drive. As soon as the video is exported, directly go to "Open The Output Folder" to enjoy the new video file with a custom watermark.

