You have absolute freedom to record what you want using voice memos. It could be a songful melody, your baby's babbling, your first concert in life, a voice-over for video or a recording of an important meeting. But sometimes you may need to cut out unnecessary content in order to share it with others or keep it orderly. Questions, like "Can you edit voice memos on iPhone?", "How to trim voice memos on Mac?" etc., are often asked. To help you, clear instructions will be shown detailedly today.
Part 1. How to Edit Voice Memos on iPhone - Voice Memos App
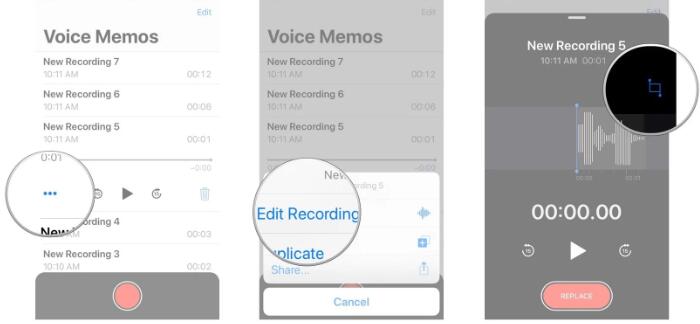
The built-in "Voice Memos" app on your iPhone is as simple as it looks. With it, you can create a voice memo, replace part of a voice memo, delete part of a ready recording, trim from the beginning to the end of a voice memo and share whichever you like to others. Here we will mainly show you how to use this app to edit voice memos directly on iPhone:

Step 1: Open "Voice Memos" app on iPhone and select a voice memo that you would like to trim;
Step 2: Tap on the chosen voice memo and click the "..." to go for "Edit Recording" option;
Step 3: Now click the ![]() icon in the upper right corner;
icon in the upper right corner;
Step 4: Move the yellow sliders to position where you want for both beginning and end;
Step 5: Press the "Trim" button to trim the voice memo: click "Trim Original" option to replace it with the original one or click the "Save As New Recording" option to create a new voice memo rather than overwrite the original one. Next simply tap on "Done" button to finish trimming voice memo on iPhone.
Part 2. How to Edit Voice Memos on Mac - Joyoshare Media Cutter
To be honest, the way to trim voice memos on Mac is similar to it on iPhone. As a result, here we additionally introduce another solution to trim and edit voice memos on computer. That is Joyoshare Media Cutter for Mac. It can exactly cut and trim both audios and videos without quality loss. Besides, this tool also has ability to crop, merge, rotate and edit media files at 60X faster working speed. More notably, it supports all popular audio formats and allows you to set bit rate, codec, channel and sample rate as you wish. You can also use it to add background track to your voice memo or apply sound effect to it. The one who takes it to edit videos can even embed subtitle file, customize text or image watermark, add video effect, specify resolution, etc. Now, just download it to see how it performs.
Step 1 Import voice memo to Joyoshare Media Cutter

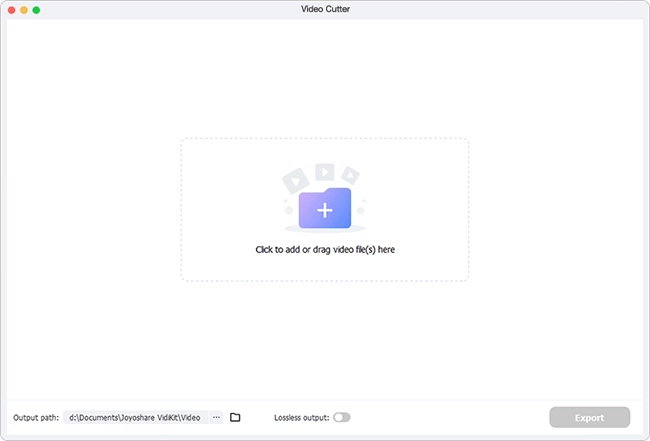
Get Joyoshare Media Cutter started on your Mac and click the "Open" option to add it from your local folder. You can also drag and drop it to this program.
Step 2 Confirm trimming points

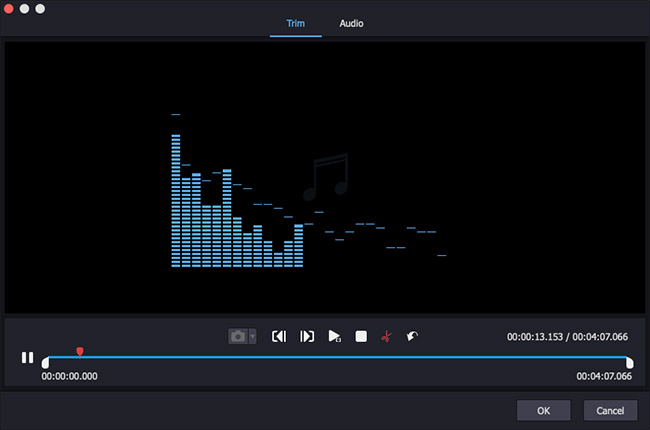
The yellow handles adjuster and temporal interval setter help you to accurately choose a section from your required voice memo. You can move both beginning and end sliders to locate a place as you want. Or put start time and end time at your disposal. Alternatively, this program develops the other option to trim audio file as long as you click the edit icon
 and utilize the scissors icon
  as the following interface shows.
Note: You should use the "+" button and the "Merge Segments" option if you are going to cut your voice memo to different portions and plan to combine them together.
Step 3 Choose output format

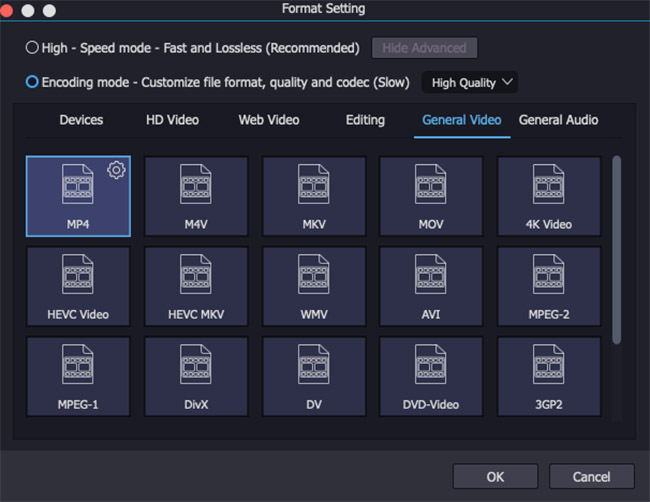
Select "High-Speed" mode to fast and losslessly trim your voice memo. However, if you desire to do more audio editing operations, you are suggested to choose "Encoding" mode, which is mainly used to customize media file, like adjusting codec, bit rate and more parameters, apply audio effect, etc. Then you can go to confirm the output format, such as MP3, AAC, OGG, M4B, M4R, M4A, etc.
Step 4 Start to trim voice memo on Mac
Click "OK" to confirm all settings and come back to the main interface of this program. Now you can tap on the "Start" button to begin trimming or editing the imported voice memo on your Mac computer. Afterward, head to the destination folder
 to have a further check.


