
Short for Audio Video InterIeaved, AVI is a kind of commonly used multimedia container format introduced by Microsoft. In media activities, it can be found that lots of video files are encoded with the extension of .avi. When your AVI video files is too long, you might want to shorten its length by trimming unwanted scenes. How can this be done? This article shares 3 helpful methods to trim AVI on Mac. For the Windows solutions, go to the recent post of 4 AVI cutters to cut AVI file.
Part 1. How to Trim AVI on Mac Using Joyoshare Video Cutter
Don't ignore Joyoshare Video Cutter when you need to cut and trim AVI video on Mac. Its strong compatibility and advanced cutting technology make it function as an outstanding Mac AVI trimmer besides Windows. Other than AVI, it also supports MP4, MPEG, MOV, MKV, WMV, MAV, HD, TS, MTS, FLV, 3GP, WebM, and many hundreds of. On its intuitive and productive interface, you can slide the timeline to simply cut as well as use the time setters or key frames to trim AVI with high precision. After trimming, it exports your created AVI video at 60X faster speed without surrendering the original quality.

- Cut any video on Mac without altering quality
- Compatible with Mac OS X 10.8 and later besides all Windows
- Trim AVI video on Mac with 3 flexible methods
- Outfit with 60X loss-free and encoding cutting modes
- Customize output format, quality, codec, resolution, etc
-
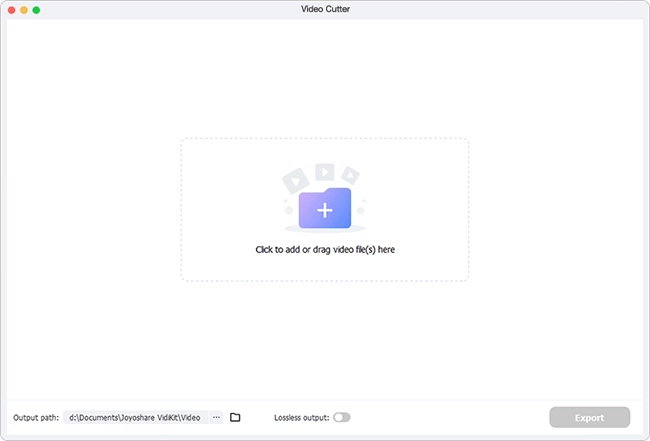
Step 1 Upload the AVI video
Officially download and install Joyoshare Video Cutter for Mac on computer. Open it and follow the on-screen instruction to drag the AVI video to it. You also use the "Open" button to import an AVI file from local.
-
Step 2 Trim AVI video on Mac
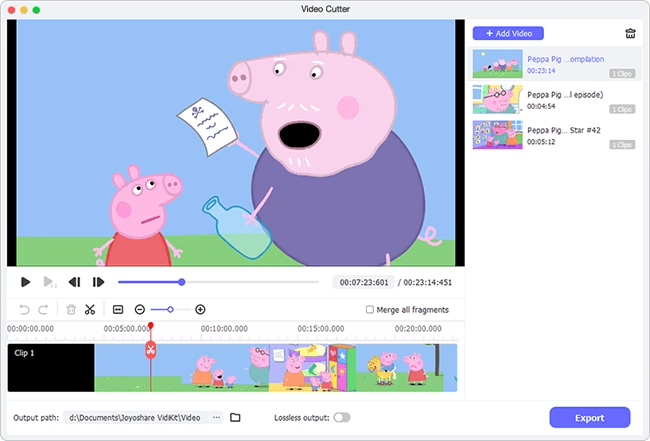
When your AVI video has been uploaded, start the cutting task. You are provided with 3 methods to cut and trim AVI on Mac. The simplest of these is to move the yellow time controllers to choose the section to be kept. The segments that are not highlighted by the yellow timeline will be cut out. Another one is to place the playhead to the start point and end point of your wanted AVI video segment; and then choose "Set Segment Start/End Time" buttons that are shaped by braces to trim. The last method is recommended to those who want to cut AVI precisely on Mac, which is to set specific time interval to millisecond in the field of "Start Time" and "End Time".

-
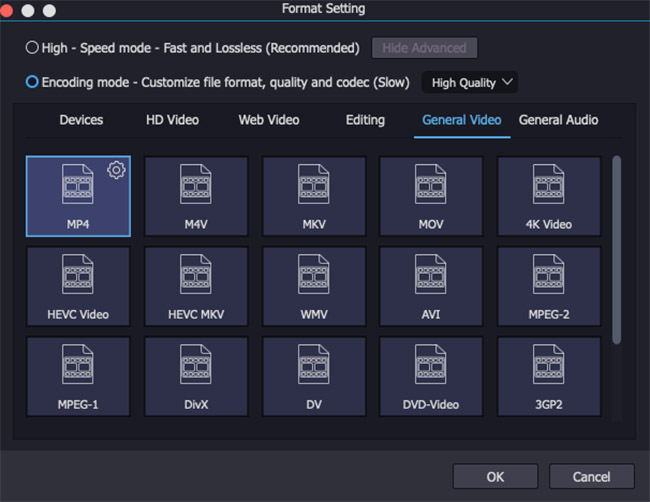
Step 3 Choose output format
Are you happy with the trimmed AVI segment? If so, now click "Format" to set output format. There are two cutting modes available. The "High-speed mode" is a lossless cutting mode, with which you are able to cut AVI video on Mac without any loss of the original quality. The "Encoding mode" allows you to trim, edit AVI file, specify any output format and custom file parameters. Consider your needs before you make your choice.
-
Step 4 Save trimmed AVI file
After selecting the desired export format, touch "OK" to exit the format window. You finally need to proceed to the "Start" button to let Joyoshare Video Cutter generate the trimmed AVI video.
Part 2. How to Trim AVI Files on Mac Using iMovie
iMovie, the pre-installed video editing on computer with macOS operating systems, can be served as a free Mac AVI trimmer to help the task of AVI video cutting and trimming. It is designed based on timeline technique, including a rich library of editing features, which makes its operation interface relatively complicated. Nevertheless, the operations of cutting AVI video with it are not hard to learn. Follow the quick guide and get tricks.
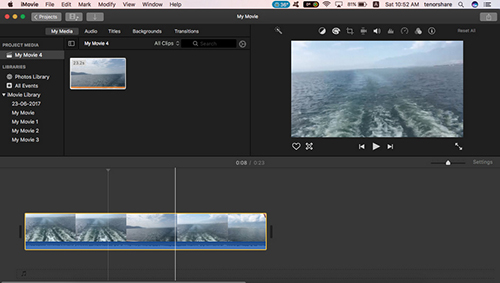
Step 1: Go to "Finder" to launch iMovie on your Mac. In your first use, you should create a new project and then click "Import Media" to add the AVI video to the project;
Step 2: Drag the AVI video to the timeline on the bottom of the main screen. Play to preview your AVI video to decide where to start cutting and end cutting;
Step 3: Next, highlight the AVI file on timeline and use the cursor to mark the determined unwanted segment. After that, right-click and a dialog box will pop up, on which you just click "Cut" to trim off undesired AVI parts;
Step 4: Lastly, head to "File" option, then to "share" > "File..." to export and savce the final AVI video.
Part 3. How to Trim AVI Video on Mac Using Final Cut Pro
There is one more available way to trim AVI on Mac - Final Cut Pro, a professional and non-linear video editing software developed by Apple Inc. It brings a series of powerful editing features, which include but are not limited to trim, flip, rotate, merge, color correct, subtitles, etc. To cut or trim AVI with it, do the following. Note that its latest version requires the Mac devices powered by macOS Mojave 10.14.6 or later and its registered version is costly. Thus, it is better for you to have a first try with its free trial version.
Step 1: Open Final Cut Pro on your Mac device after downloading and installing. Follow "File" > "Import" > "Media..." to upload AVI video. Or, directly drag your AVI video to the timeline window;
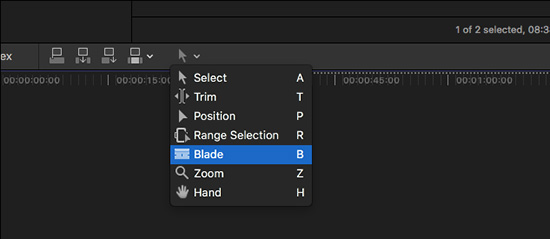
Step 2: Click "Tools" icon at the top left corner of timeline window to bring out a menu, from which you need to select "Blade";
Step 3: After the operation, your mouse cursor will be shaped by a razor blade. Preview to confirm the start point of the unwanted section in your AVI file and click; do the same to mark the end point of the segment to be trimmed off;
Step 4: Click to select the specified unwanted AVI video clip and press "Delete" key to trim it out of your AVI file.
