Prevalent as Vimeo is, it can well transcode the uploaded file into HD video, which makes it stand out from so many video platforms. Sometimes, you may only need a small segment for your use. How to trim video on Vimeo? It's not as simple as what we cut YouTube videos. You might as well try the following different solutions we collect. All of them do a good job in trimming Vimeo video here with stunning features, like lossless quality, professionality and high-efficiency.
- Method 1. Cut Vimeo Video with Joyoshare VidiKit
- Method 2. Cut Vimeo Video with Wondershare Filmora
- Method 3. Cut Vimeo Video with Online Video Cutter
1. How to Trim a Vimeo Video with Joyoshare VidiKit
To simplify the whole cutting process, especially for novices, why not try this super reliable Vimeo video editor, Joyoshare VidiKit - Video Cutter? Being good at trimming and cutting Vimeo video files, this tool has powerful compatibility with nearly all common and rare formats and devices, such as MP4, M4V, MKV, MOV, WMV, 3GP, ASF, FLV, SWF, YouTube, HD AVI, or iPhone, iPad, Android, game console, smart TVs, etc. Furthermore, its thoughtful designs for timeline and adjuster make splitting area setting easier.
To extremely give you concrete assistance, Joyoshare VidiKit also empowers users to customize quality, codec, size, bitrate, channel, etc. in flexible way. If you like, you can remove noise from audio, extract audio from video or adjust the volume and so forth. By means of it, any assignments will be done at up to 60X faster speed.

- Trim video without losing quality (Vimeo included)
- Cut in a fast way with three solutions
- Extract audio from video to save as MP3, AAC, etc.
- Offer high-accurate video cutting process for all users
- Crop, watermark, subtitle, rotate and apply effects to Vimeo videos
Step 1 Add Vimeo video into Joyoshare VidiKit

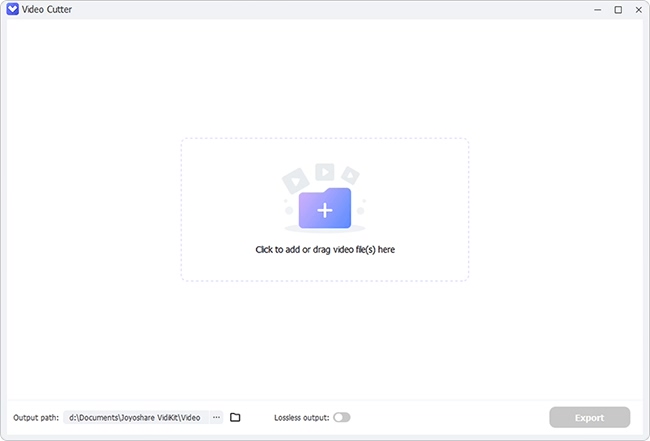
To import video from Vimeo smoothly, you'd better download and save it on your local folder in advance. Then you can go straight to launch Joyoshare VidiKit - Video Cutter and add the required video file at your own will. Aside from dragging video file from local hard drive, you can get access to click the "Open" button as well.
Step 2 Extract certain segments from original Vimeo video

Usually, you may cut off some needless sections, like the header or the tail. To enhance the accuracy, Joyoshare VidiKit comes with a well-designed timeline and controller. You can watch the playing Vimeo video, drag the handle to the desired position and decide a specific area to be cut. Or you can simply set both start time and end time by filling them into the temporal intervals.
Note: If you'd like to utilize the merge function, you can go forward to press the "+" button and tick "Merge Segments" option.
Step 3 Choose output mode and destination format

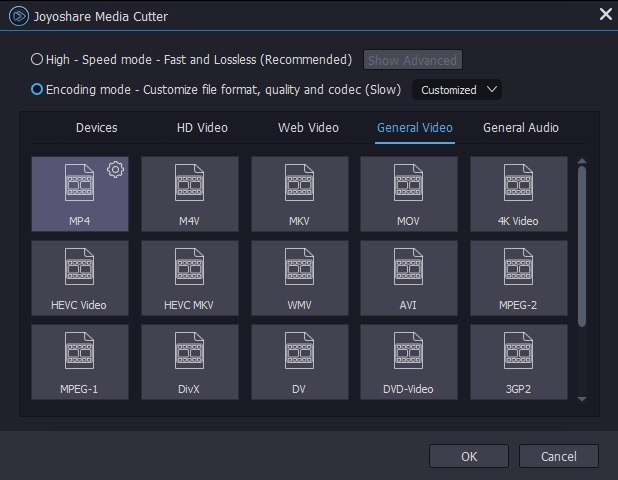
Press "Format" panel to bring up all necessary settings. According to your own preferences, select "High-Speed" mode to conduct a fast and lossless trimming process. In case you want to customize the format, codec, quality, bitrate, channel, etc., choose "Encoding" mode.
Step 4 Start to trim Vimeo video
Direct to hit the "Start" button and Joyoshare VidiKit will work for you right away. Supposing there is no further problem with the finished Vimeo video, then you can store them locally for later watching.
2. How to Trim a Vimeo Video with Wondershare Filmora
As one of the most professional video cutters, Wondershare Filmora is well-known by a large number of users. It comes with a powerful ability to edit Vimeo video files. Here's how.
Note: Though it can perform well in editing video, for newbies, it may a bit complicated. When it comes to video cutting, it's also hard to find a place for you to set precise cutting time by yourself. Essentially, its advanced features make it high-paid as well.
Step 1 Run Wondershare Filmora and add Vimeo video

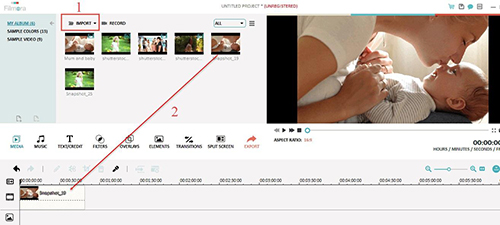
Having fit out your computer with Wondershare Filmora, you can straightly manipulate it. Hit the "Import" button to select one designated video file from your computer. Likewise, it's also practical to drag it to User's Albums.
Step 2 Trim video portions on timeline

Now, it's time for you to strip unwanted sections from the imported Vimeo video file. Only when you hang your mouse at the corner of the video clip can you see the pop-up trim icon. Move it to get a cutting area. Note that if you want to leave out the middle scenes, you have to press the "Scissor" icon to make it.
Step 3 Get a desired output format

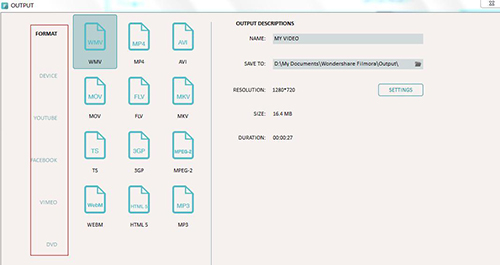
Depending on your own need, you can choose a favorable format or share the destination file to YouTube, Facebook, output as DVD, etc.
3. How to Trim and Cut Vimeo Video Online - Online Video Cutter
Online Video Cutter is a worthwhile tool for trimming your Vimeo videos. It provides you with cutting possibilities both before and after uploading files to Vimeo. Also, it can directly set quality to meet your requirement. During the whole trimming process, there are no complicated buttons to distract you.
Note: It obviously depends on the state of your network. If the network is weak or unstable, the video loading time will be relatively long.
Step 1 Upload Vimeo video file
Go to the home page of this online tool, simply click the center "Choose file" button, or expand the drop-down box to load your video via Dropbox, Google Drive or URL. You're besides allowed to directly drag and drop your file here.

Step 2 Trim Vimeo video online
After the loading and processing, Online Video Cutter will display your designated Vimeo video file and show all frames on the timeline. You can now just drag and drop the slider to select the video clip or precisely set "Start" and "End". It's doable to play the file, crop and rotate at the same time.

Step 3 Save trimmed Vimeo video online
Under the Quality section, choose "Same", "No re-encoding", "1080p", "720p", etc. based on your own needs. Then, press on the "Save" button and "Download" it to local folder, Dropbox or Google Drive.


