Q:"How do I trim a video using Handbrake? I can't seem to figure out the solution to a very simple problem. I want to trim a video in Handbrake and keep the video as is (resolution, encoding, etc), just chop off the first few seconds, but I can't find out how." - from Super User
As the above user have said, trimming video actually is relatively hidden in HandBrake. You can't find it at first glance and do it yourself, considering the interface isn't particularly intuitive. That's why so many users ask this seemingly simple question. Don't worry, if you're the new suitor for this free cross-platform tool and you're thinking about letting HandBrake trim video, check out the steps in this article.
Part 1. How to Trim Videos Using HandBrake
What we need: the newest version of HandBrake, a Windows computer with the up-to-date compatible Microsoft. NET Framework or a Mac computer, and the video you'd like to trim.
What to do: there is a downside that cannot be ignored when using HandBrake - you won't be able to see the video in real time while trimming, making it a must for you to know the timing before operating.
Step 1 Remember the start and end points to trim
Play the video in any available media player you have, such as iTunes, VLC, QuickTime, etc. and pause to take down both start and end points. Apply hour:minute:second as notation if you're a Windows user. For Mac, only seconds are required when trimming.
Step 2 Add video to HandBrake

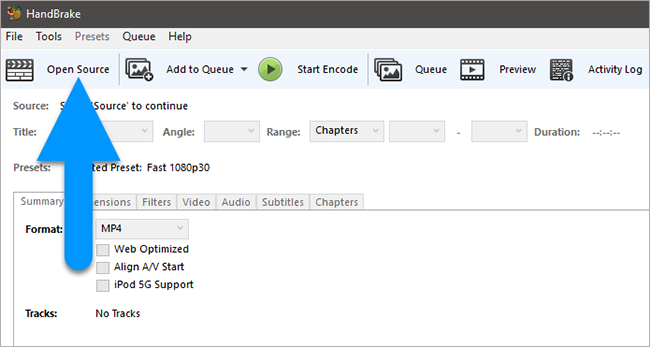
Launch HandBrake on your computer and go for "Open Source" > "File" to open a single video file. You can also click on "Folder (Batch Scan)" to open a folder with one or more files. Then set the Title, Destination and Format based on your requirements.
Step 3 Trim a video with HandBrake

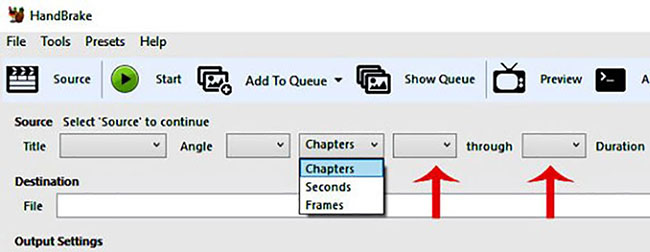
Unfold the drop-down menu that shows "Chapters" currently to choose "Seconds". Afterwards, input the start time and end time you previously write down in the duration section. Then tap on the "Start Encode" on the top of the toolbar to trim and output the video.
Part 2. How to Trim Videos Using HandBrake Alternative - Joyoshare VidiKit
You can surely see the limitations of HandBrake. By contrast, Joyoshare VidiKit is an unbeatable tool that is proficient in trimming with inbuilt media player to visualize the video, even removing the middle of a video. Most of all, it makes lossless quality an outstanding convenience for users.
Furthermore, this superior tool comes with full support for all major video and audio formats, such as MPEG, MOV, AVI, MKV, MP4, WMV, M4V, MP3, AAC, FLAC, etc. It also gives you two modes to switch between, high-speed mode and encoding mode.
Highlights of Joyoshare VidiKit:
Available to trim videos on Windows 10 and Mac 10.15
With built-in media player to display each video frame
Cut out the middle of a video and merge the left
Trim video and extract audio without re-encoding at 60X speed
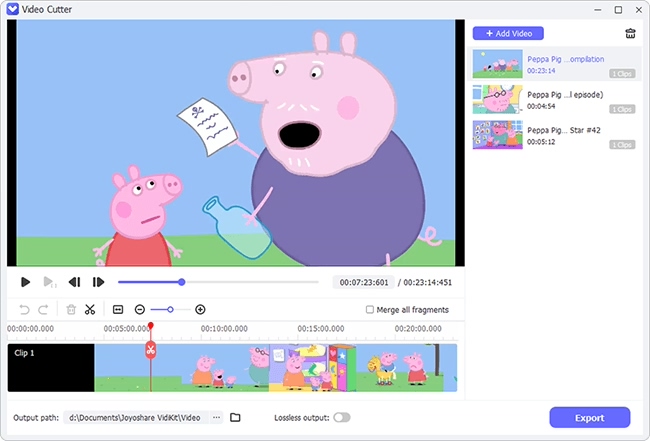
What we need: the latest version of Joyoshare VidiKit, a Windows or Mac computer, and the video to trim.
Step 1 Open program to import a video

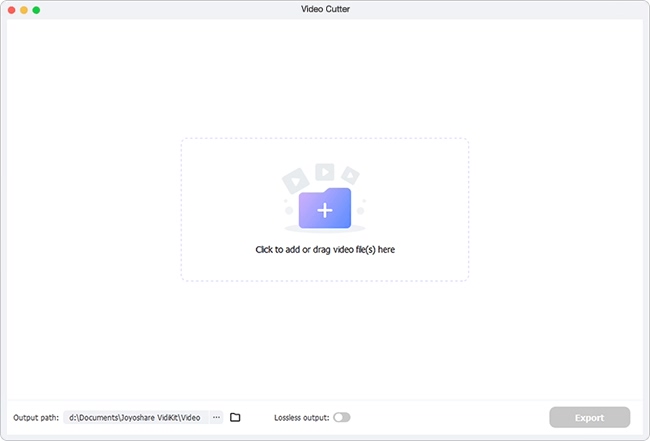
Run the program of Joyoshare VidiKit on the computer you have. Next, a instruction will be shown in the center of the main interface. Follow it to drag and drop the video or simply go to browse and add from the local folder with the "Open" button located in the bottom left corner.
Note: Only one video can be imported once as Joyoshare VidiKit is developed to handle single file.
Step 2 Determine trimming mode

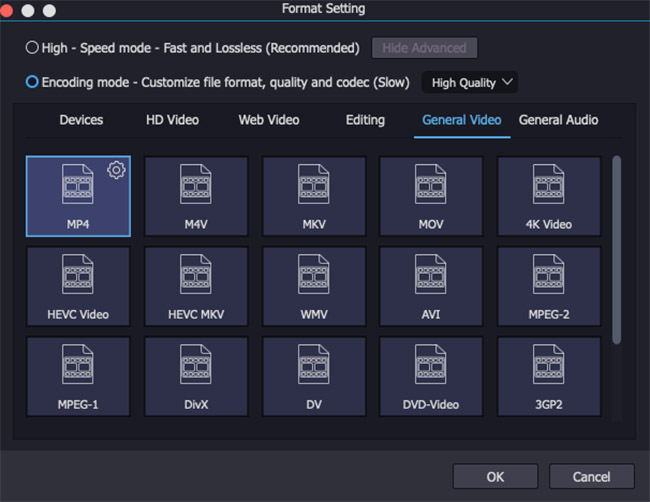
Now, go ahead to the "Format" tab to select a proper mode. As you can see, the High-Speed mode is used to cut and trim videos fast and losslessly while the Encoding mode is used to customize and edit videos professionally and neatly. Here you are advised to pick up the first 60X high-speed mode. Next, confirm an output format and finish with "OK".
Step 3 Take to trim video

To start trimming your video with this HandBrake alternative, you are able to move the sliders around the timeline. It's likewise simple to navigate either beginning handle or end handle to where the playhead positions with shortcut keys - "Set Segment Start Time" and "Set Segment End Time". Or you can directly enter "Start Time" and "End Time".
Note: Use both "+" and "Merge Segments" options to generate and combine one more parts together if you need.
Step 4 Export the trimmed video
Press on the "Start" option on the right to call out the progress bar. Once it goes to the end, you can check the trimmed video under the local storage path and begin to use it in the way you desire. The tutorial video below is going to show you how to trim video using both HandBrake and Joyoshare VidiKit. You can refer to it for more details about related steps.
