Q: I am a newbie and want to use Adobe After Effects to cut my video files. It seems that its operating interface is sophisticated with high-tech features, which is puzzling for me. Any guide will be appreciated. If possible, a more easy-to-use program is also accepted. - From VideoHelp Forum
It is understandable for novices to ask help on using After Effects on account of its confusing layout and top-notching functions. Relax yourself and follow this post to see how to cut video in After Effects now.
- Method 1. Trim Video Files in After Effects
- Method 2. Split Video Files in After Effects Alternative
Method 1. Simple Steps to Cut A Video in After Effects
Adobe After Effects admittedly enjoys high reputation from a large quantity of users, video professionals in particular. Here's how to apply it to cut video files in few clicks.
Step 1 Launch After Effects and import video file
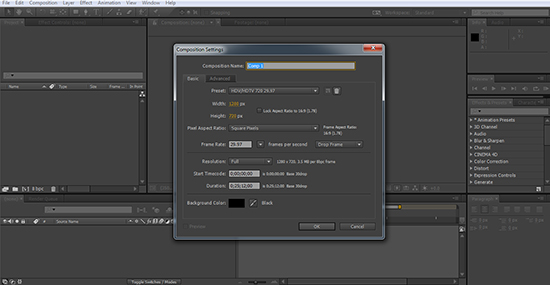
Get After Effects started, after which you will see a main menu that includes distinct projects. Choose "New Composition" and you will be leaded to relevant composition settings. Customize frame rate, resolution, duration, background color and more parameters in your own way so that you can create a personalized composition.

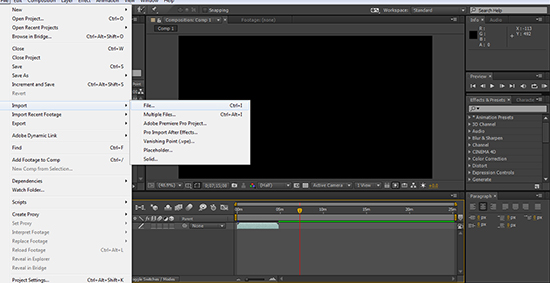
Hereafter, you should import designated video file. Just go to click "File" > "Import" > "File". Then it's your time to drag a video file to the timeline.

Step 2 Cut a video in After Effects
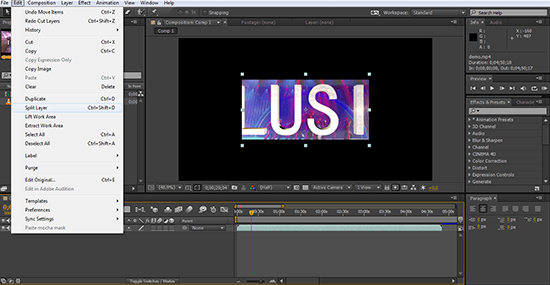
To let yourself control each fragment of your video track explicitly, you can zoom in on the timeline. Afterwards, move both start and end handles to accurate points so that you can isolate the portion of your video file you want to leave. If it is done, hit the "Edit" > "Split Layer". Do the same steps to get more video cuts if you need. You can edit each clip according to your actual situation.

Note that you can take full advantage of additional tools to make your video cuts flawless. You can adjust the order, add transition effect, delete useless parts, etc.
Step 3 Save destination video file
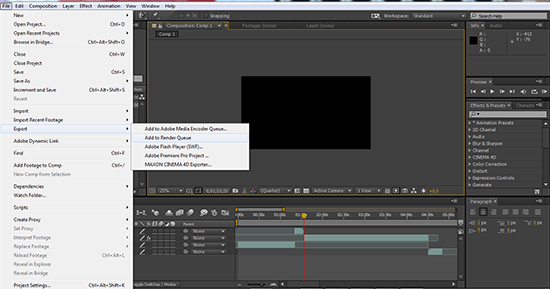
As long as you are satisfied with your edited video file, you can output it. It can be realized by clicking "File" > "Export" > "Add to Render Queue". Next, you have right to choose "Render Settings", "Output Module" and "Output Format" from the "Render Queue" interface. Without further operations, you can get what you want and enjoy it at a later time.

Method 2. Easy Operation to Cut A Video in Joyoshare Media Cutter
For some users, Adobe After Effects comes with unfriendly pricing strategy. Alternatively, forthright and accurate operation might be more appreciated. Fortunately, Joyoshare Media Cutter is exactly such a versatile program, which has powerful ability to cut large video files into small pieces with no quality loss at up to 60X faster speed.
Most essentially, this After Effects alternative can be your intelligent assistant to accomplish any cutting tasks in perfect performance. Briefly, any common and rare video and audio files can be loaded and edited without compatibility problem. You can also export the destination video file to a new video format, like MP4, M4V, MKV, AVI, MPEG, DV, DivX, ASF, OGV, FLV, SWF, HD MOV, TS, etc. You can also get audio track from it by saving it as MP3, M4A, AAC, M4R, M4B, AU, AIFF, etc. Or simply transfer it to mobile device, such as PSP, Xbox 360, iPad, iPhone, Android, smart TV, etc.
Comprehensive as Joyoshare Media Cutter is, it can as well make ringtone for iPhone and Android phones, remove noise from recording, extract audio from video, shorten video size and combine different clips together and so forth.
Key Features of Joyoshare Media Cutter
Cut any video files in fast way
Merge MP4 files or more others losslessly
Allow you to make customized video file flexibly
Support transferring videos to any portable devices
Step 1 Run Joyoshare Media Cutter and add required video file

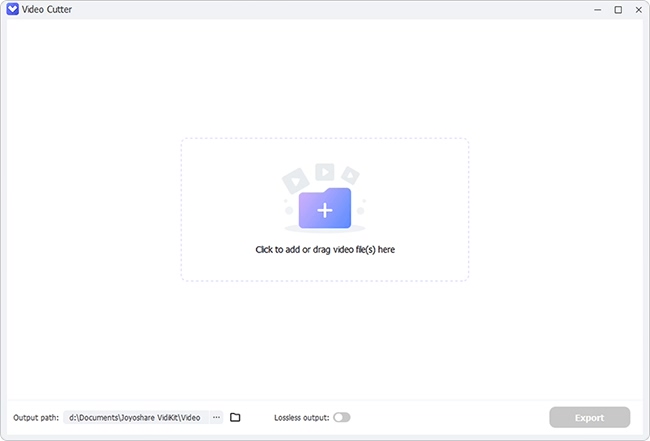
Certainly, you have to get Joyoshare Media Cutter installed on your own PC firstly. Then it is high time you should import specific video file to this program. Directly drag the determinate video to the main cutting interface or handily click the "Open" button to browser your local folder.
Step 2 Eliminate unnecessary portions from imported source

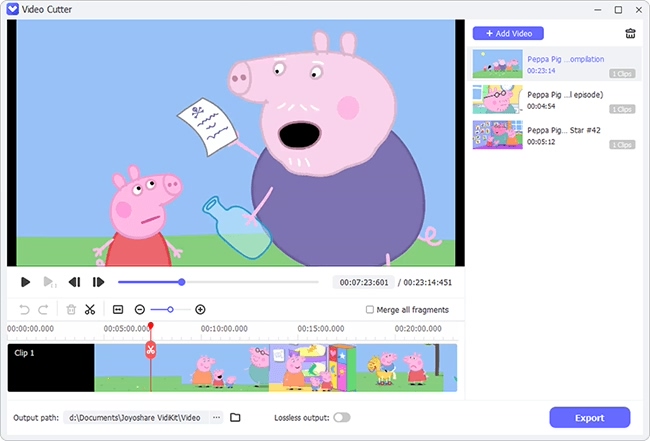
Joyoshare Media Cutter will auto-play the loaded video file for you, with which you can clearly know which part to be cut. Leave out the sections of the video file that are outside of both beginning and end handles. Or you can put precise time points to set up the temporal intervals.
In case you want to merge all desired video cuts together, you can go to hit the "+" icon to produce more pieces, which can be edited as well, and then tick the "Merge Segments" option.
Step 3 Select favorite output mode at your own will

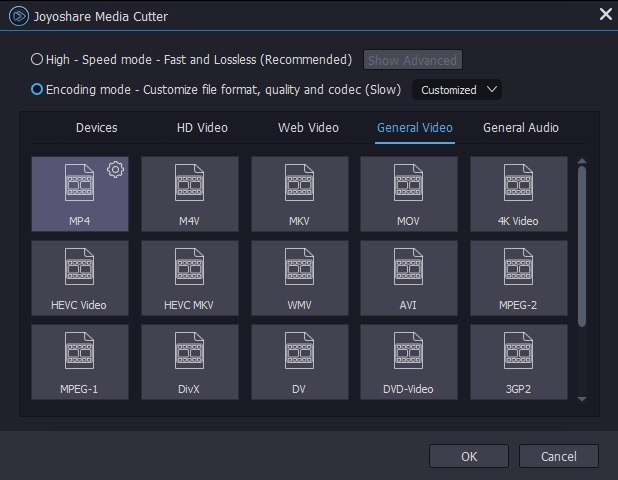
Press the "Format" panel to see more hidden options. The recommended "High-Speed" mode stands for a fast and lossless cutting process. Nevertheless, if you want to make some changes for corresponding parameters, just click the "Encoding" mode and opt for "Customized". Any format can be chosen as you can generate your video to new video format, extract audio track only or transfer to popular device. Hit the gear icon on the right top corner of selected format, from which you can stylize codec, resolution, channel, bit rate, sample rate, etc.
Step 4 Start to cut a video with Joyoshare
Having finished all preparations, you can click the "Start" button straightly. Unlike cut videos in After Effects, Joyoshare Media Cutter will work at 60X faster speed and bring completed video for you quickly.
