Camtasia, one of the best integrated multimedia software available on Windows and Mac, is not only used as a screen recorder to capture anything on computer desktop but also marketed as a powerful video editor to embellish video by cutting, splitting, adding video effects and transitions, using annotations and animations, and more. Coming with the timeline-based interface, it might not seem easy to operate. But that's not the case. Still is the cutting video in Camtasia proven simple at least. Below lists a full guide on how to cut/split video in Camtasia at every step. Considering its fancy price, we share an affordable video cutter software for alternative.

Part 1. Full Steps on How to Split Video in Camtasia
Step 1 Launch Camtasia and add video
In the first place, double-click to launch Camtasia on your computer after installation. Choose "New Project" > "Import Media..." to import the target video from system. Then, drag the video from "Media Bin" to the track. Or, directly drag your video file to the track.

Step 2Split and cut video in Camtasia
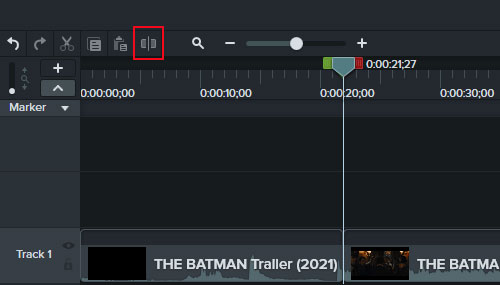
Click the "Play" button to preview the added video. To split video into parts in Camtasia, please highlight the video track and position the timeline to the point where you want to split. Then, touch "Split" icon.

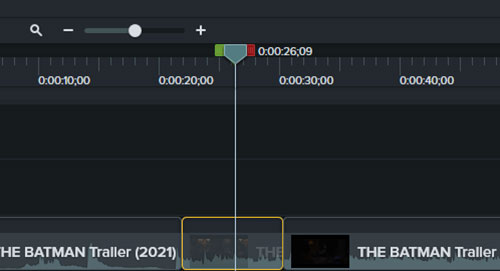
To cut off unwanted segments from your video, locate the start point of the video part to be cut and click "Split" to mark as well as decide the end point of that and similarly use the "Split" button to mark. After that, pitch on the abandoned video clip and press "Delete" key.

Alternatively, locate the timeline to the start time point of the cutting video segment, and then slide the red button on the right side of the time handle to cover the whole video clip that you need to cut. Next, touch the "Cut" icon.

Step 3 Save the final video
In the last step, navigate to "Share" on the top menu bar and choose an output desitination. After completing output settings as you like, hit on "Finish" button to start the export process. Wait patiently. It will take some time.

Part 2. Guide on How Alternative to Camtasia Cuts Video
Camtasia is indeed as powerful as the world knows it. However, few people can afford its prohibitive price - $249.99 for a single license. Thus, here, we suggest a cost-effective alternative - Joyoshare Video Cutter to cut and split video on Windows and Mac. The software is proficient in both quick and precise cutting techniques. With the timeline cutting option, you are able to cut any video file in a much more direct and effortless manner. Developed with the function of adjusting keyframes and the precise time setter, it allows you to do a cutting task with millisecond precision. Above all, in either case, no original quality will suffer. It works with different types of media files, such as MP4, MP3, YouTube, Facebook, HD, 4K, WAV, MTS, MPEG, TS, AVI, MOV, MKV, WMV, and much more.
- Cut and split video into parts without the expense of quality
- Present the clean interface and easy to operate
- 2 cutting modes: high-speed mode and encoding mode
- Support a huge number of audio and video formats
- Built-in editor for editing effects and customizing option
-
Step 1 Upload a video
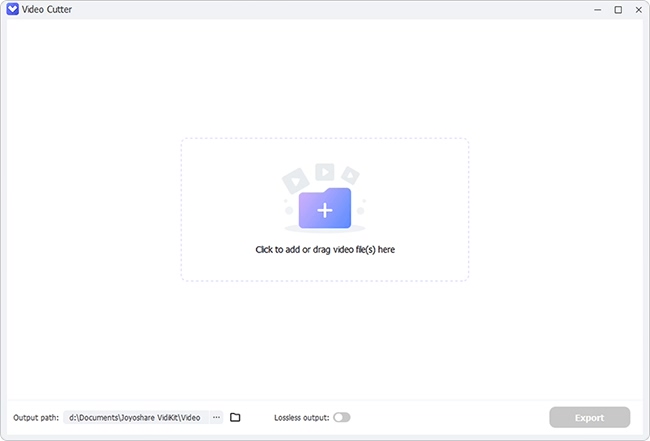
Get the latest version of Joyoshare Video Cutter from its official website downloaded and installed on computer. Run it and find "Open" button on its first screen to upload your video. The program supports the ability to drag and drop file as well.
-
Step 2 Cut undesired video clips
Determine the video section to be kept. Whereafter, you should slide the yellow time handles respectively to the start time and end time of the video segment that you want. The video segments that are not included in the timeline will be removed. In order to cut video with more precision, it is suggested that you apply the "Key Frame" buttons to identify the cutting parts and use the "Set Segment Start/End Time" icons to locate the time points, or manually enter specific start time and end time to cut.

The above is to cut off unpleasant sections from video. To split a video into multiple parts, please click "+" icon to generate more source videos, and then do the cutting operations.
-
Step 3 Select cutting mode
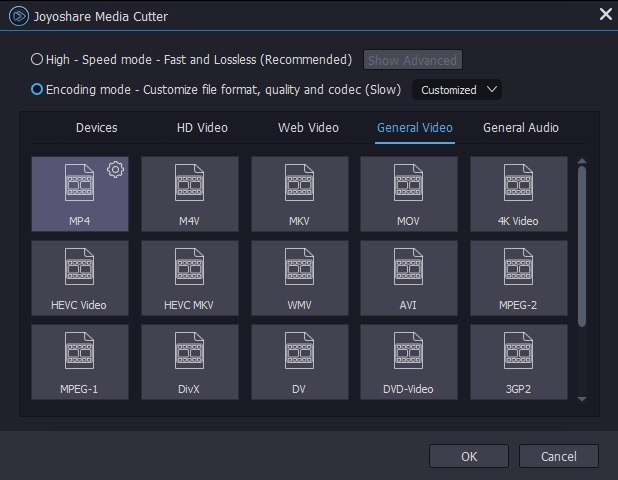
Click on "Format" to continue. On the format settings window, you need to select a cutting mode before specifying an output format. The "high-speed mode" promises that there won't be quality loss during the cutting process. The "Encoding mode" allows customizing output format and quality as well as editing video file besides cutting. Choose what you want and click "OK" to save.
-
Step 4 Output and save
Return to the main interface. Tap on "Start" button to let Joyoshare Video Cutter export the resulting video. Once finished, you can use the shortcut button of "Open The Output Folder" to preview the output video file.

