Q:"I want to unlock the iPhone without deleting the data." - safaa81 from Apple Support Community
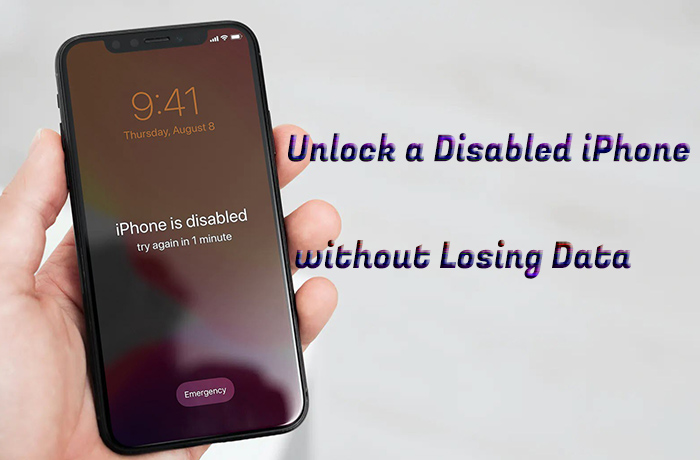
Like above-mentioned iPhone user, you may encounter similar situations where your device is disabled due to the accumulation of multiple incorrect passwocode inputs. The only thing you care about more than whether you can unlock it is your data. Not surprisingly, nearly all users wonder how to unlock disabled iPhone without losing data. Is this possible? If so, what solutions you can try? Here, follow us and learn some ways to remove screen lock from your disabled iPhone and avoid data loss.
- Part 1. Can You Unlock a Disabled iPhone without Losing Data?
- Part 2. 3 Ways to Unlock Disabled iPhone
- Part 3. How to Restore Backup for iPhone
- Method 1. Restore from iTunes Backup
- Method 2. Restore from iCloud Backup
- Method 3. Use Joyoshare iPhone Data Recovery
- Part 4. Conclusion
Part 1. Can You Unlock a Disabled iPhone without Losing Data?
Yes. You can get your disabled iPhone unlocked without causing any data loss as long as you have backup files that you created before the device is locked. However, what you should keep in mind is that the process to unlocking a disabled iPhone inevitably leads to data loss. You have to reinstall the firmware package for restoring your device to factory settings, which as a result, erasing all content and data from your iPhone. To avoid data loss, you can only set up device and restore a previous backup.
Also, if you are lucky enough to know the correct passcode before your iPhone gets completely disabled, you can unlock it using valid passcode when the onscreen timer ends.
Another solution to unlock an iPhone that's disabled with no data loss is to use Apple loophole - Siri. This method comes with extremely low success rate since it requires your device is running iOS 8 to iOS 10. If it is luckily suitable for you, then check how to bypass iPhone lock screen using Siri here.
Part 2. How to Unlock a Disabled iPhone
Here you can use different solutions to unlock your disabled iPhone. Keep reading to learn how to get each one done until you can find the most appropriate one.
Method 1. Use Professional Joyoshare iPasscode Unlocker
Joyoshare iPasscode Unlocker is the first suggestion for unlocking a disabled iPhone. It promises a high success rate and possesses the ability to deal with types of iOS screen lockes including 4-digit/6-digit passcodes, Touch ID, and even Face ID with no difficulty. You can remove locks from your device in a variety of cases like screen is unavailable, cannot remember passcode, Apple ID locked for security reasons, etc. What's more, it supports the recent iOS device model like iPhone 15 series and the newest iOS 17. The easy interface it provides make beginners operate it smoothly.
- Enable a disabled iPhone without passcode
- Solve all passcode-locked related problems
- Capable of unlocking all types of screen locks
- Unlock iPhone Apple ID, MDM and Screen Time passcode
- Support nearly all iOS device models and even iOS 17
Step 1 Launch Joyoshare iPasscode Unlocker
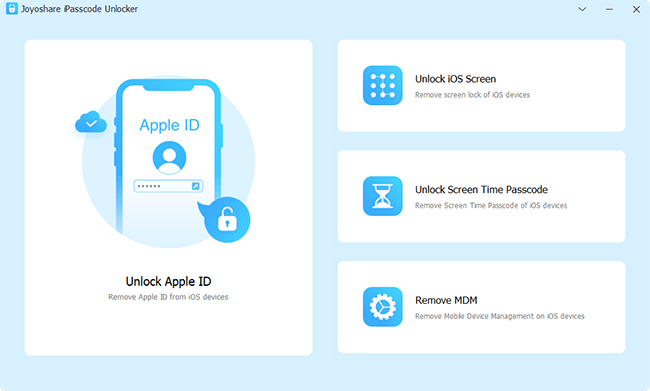
First of all, please download and install the proper version of Joyoshare iPasscode Unlocker on your computer. Next, launch it and plug your disabled iPhone to the computer. Click on "Unlock iOS Screen" in the main interface and then continue with "Start".

Step 2 Set Your iPhone into Recovery Mode
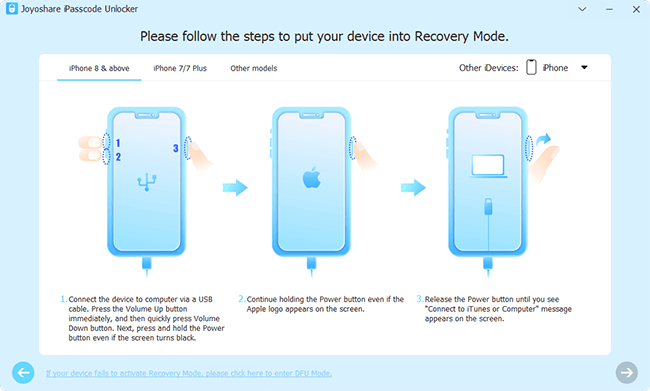
You will get into an interface where you need to manually put your iPhone into recovery or DFU mode. Just follow the steps on the screen and when the right arrow turns bule, click it to proceed.

Step 3 Download and Verify the Firmware Package
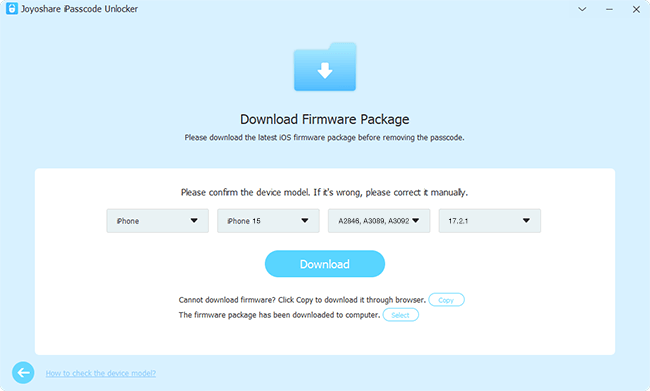
Now, the program will display all info of your iPhone on the window. What you have to do is checking it and making sure there is nothing wrong. Subsequently, click on "Download" to download and verify the latest firmware package.

Step 4 Unlock a Disabled iPhone
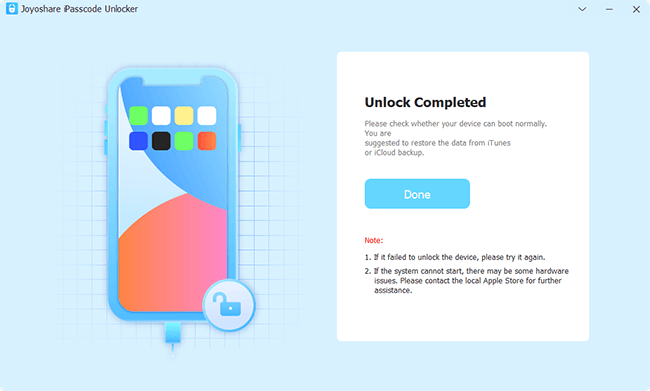
Hit on "Unlock" to unzip the verified firmware package. Once completed, Joyoshare iPasscode Unlocker is going to unlock your disabled iPhone. After unlocking, your device will be reset with no screen lock and you can now recover data from iTunes/iCloud backups.

Method 2. Use iTunes in Recovery Mode
Restoring iPhone using iTunes in recovery mode is another method that you can adopt to unlock a disabled iPhone. This solution is applicable to the case where your iPhone hasn't synced to iTunes. Now you can see how it works.
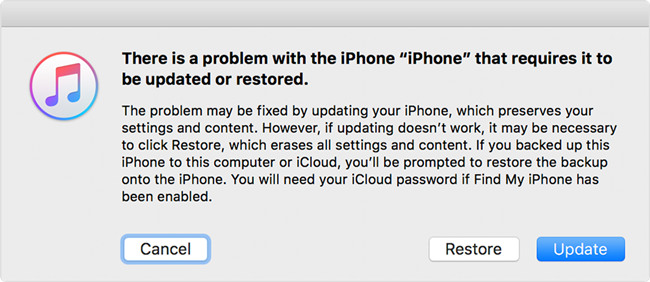
- Step 1: Launch iTunes or Finder on your computer and connect the disabled iPhone.
- Step 2: Put the disabled iPhone into recovery mode:
- iPhone 8 or later, including iPhone SE (2nd generation and later): quickly press and release "Volume Up" button, then same operation for "Volume Down" button. After that, hold the Side button until you see the recovery mode screen.
- iPhone 7/7 Plus: press and hold the "Volume Down" and "Top/Side" butttons until the recovery mode screen shows.
- iPhone 6s or earlier, including iPhone SE (1st generation): hold down both the "Home" and "Top/Side" buttons at the same time. Keep holding them until the recovery mode screen appears.
- Step 3: After iTunes detects that your connected device, it will pop up a window, in which you have to choose "Restore" to make your disabled iPhone unlocked.
Method 3. Use iCloud.com
Another available approach to unlock a disabled iPhone is by means of iCloud service. Such a way works fine for hacking a disabled iPhone, but it has limitations. Make sure that Find My iPhone is turned on before your device is locked and it is connected with a Wi-Fi network. If your iPhone meets the requirements, do the following.
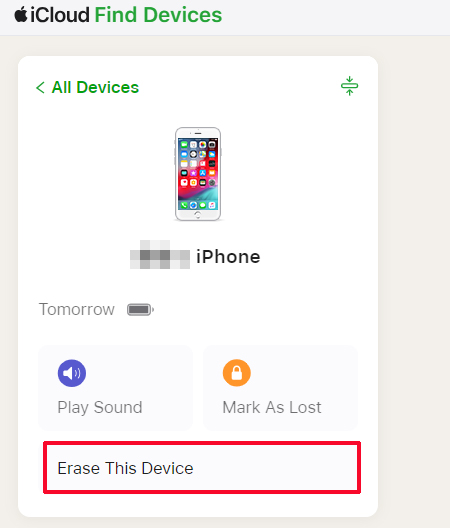
- Step 1: Access iCloud official website and sign in your iCloud account using Apple ID and password linked with the disabled iPhone.
- Step 2: Afterward, head to Apple ID section, locate "Find Devices" link.
- Step 3: Under "All Devices", select the disabled iPhone from a list of iDevices associated with this Apple ID.
- Step 4: Click on "Erase This Device" to unlock your disabled iPhone. After the whole process, do not forget to recover iPhone backup.
Part 3. Restore iPhone Backup after Unlocking
With the above methods, your disabled iPhone must have been unlocked now. What you have to do next is to recover data from a previous available backup to your iPhone so that you are able to unlock disabled iPhone without losing data. Here iTunes, iCloud and professional iPhone data recovery can be put to good use.
Method 1. Restore iPhone from iTunes Backup
Please make sure your iPhone has synced to iTunes before it's locked so that the device detection process can be smooth.
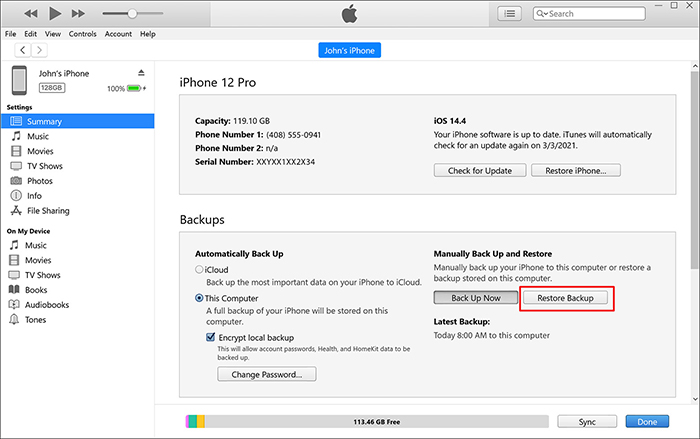
- Step 1: Double-click iTunes icon to run it on your Windows computer or open "Finder" on your Mac running macOS Catalina and later.
- Step 2: Afterwards, use an original USB to connect your iPhone with a computer.
- Step 3: Once your iPhone is detected successfully, click its icon to continue.
- Step 4: Choose "Summary" and click on "Restore Backup..." to get the backup back to your iPhone.
Method 2. Restore iPhone from iCloud Backup
All content and settings on your iPhone will be erased after unlocking. It will turn on automatically and show a Hello screen. To get your important data back from iCloud backup, you can follow the steps below.

- Step 1: Set up your iPhone after unlocking by following on-screen prompts.
- Step 2: When you reach "Transfer Your Apps & Data" screen, tap on "From iCloud Backup".
- Step 3: Sign in your iCloud account and select a recent backup file.
- Step 4: Wait for the completion of restoration process and data will come back to iPhone.
Method 3. Restore Data from Joyoshare iPhone Data Recovery
iTunes or iCloud failed to recognize your iPhone during the backup restroration process? You can try a professional tool called Joyoshare iPhone Data Recovery. It offers 3 recovery modes (Recover from iDevice/iTunes/iCloud) to restore any lost data perfectly. More powerfully, such a iPhone data reocvery software allows you to preview the recoverable files before recovery. In this way, you can selectively get important and useful data back to your iPhone.

- Step 1: Connect your iPhone to computer and run Joyoshare iPhone Data Recovery.
- Step 2: Select a suitable recovery mode at the top of the program.
- Step 3: Check desired data types and start scanning selected backup.
- Step 4: Preview all items in the results interface and tick whatever you want. Simply click on the "Recover" button to restore data.
Part 4. Conclusion
After checking this article, you must have learned how to unlock disabled iPhone without losing data. The most important thing for you to do is make a backup in advance. If not, there's almost no chance you won't lose data. So, just follow what we introduced here one by one and bypass screen lock of your disabled iPhone now.
