After upgrading to a new iOS version, your iPhone always encounters some problems that never happened before, for example, high power consumption, stuck screen, applications forced termination, and videos can't be watched in landscape mode. Or some of you just don't like the new functions and interface of the new iOS version. Whatever the reason is, you will eager to find a way to downgrade your iOS to the previous version that you like.
Then how to downgrade your iOS version? This article will show you several available methods to downgrade iOS with & without iTunes. If you have already downloaded iTunes on your computer, Apple shows their official way to do it. But if you don't possess iTunes, the easiest way to make your iOS downgrading is by asking a third-party program for help.
Part 1. How to Downgrade iOS with iTunes
Apple permits you to downgrade the older iOS version for up to two weeks after a new version is released. Therefore, you can not only upgrade iOS but also downgrade iOS with iTunes. But before the downgrading, you should prepare something:
- Stable USB cable, stable Internet, enough power
- Install the latest iTunes in your computer
- Turn off Find My feature in Settings
- Step 1: Download iOS Firmware Package to Computer
- Step 2: Connect to Computer and Back Up Data
- Step 3: Start to Downgrade
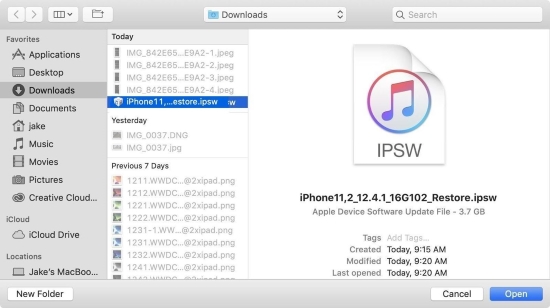
Since Apple doesn't provide iOS firmware package (IPSW file) downloading services, you can find firmware compatible with your device model and download it from third-party websites, such as https://ipsw.me.
Plug your device to your computer using the USB cable. If you have backed up your data before using the new iOS version, you can choose Restore iPhone. It will erase all your data, but you can restore your backup later. So, an important thing you should know is that restoring data backed up from a higher version to a lower version can cause some problems in your device.
Hold the Shift key, and at the same time, click "Restore iPhone". There will be a pop-up and you could select the IPSW file you've downloaded. Click "Open" and wait for a while until your downgrade is complete.
Part 2. How to Downgrade iOS without iTunes
2.1 Downgrade iOS Using TinyUmbrella
However, if you miss the valid period that Apple allows you to downgrade, can't download iTunes on your computer, or fail to downgrade iOS using iTunes by following the above steps, you could find a third-party tool to solve your problem. TinyUmbrella is another way to help you.
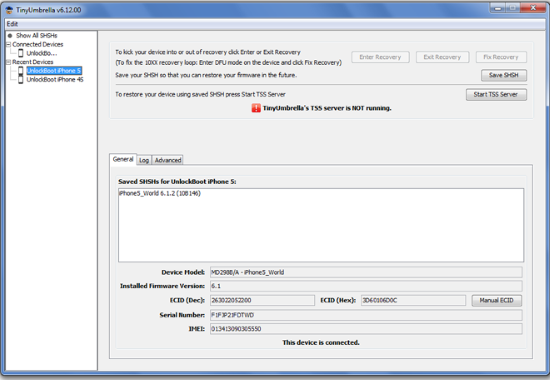
It is an iOS downgrade tool that provides free service for Windows users. But it's more likely to see people who majored in IT as its audience. Therefore, if you are an expert in IT, you can operate it easily. If you are a layperson, go on with the following steps, and your downgrading process will succeed as well.
- Step 1: Download, install and run TinyUmbrella.
- Step 2: Plug your device into your computer via a USB cable.
- Step 3: Locate your device and click "Save SHSH" to store SHSH blobs.
- Step 4: Press "Start TSS Server" and Error 1015 will pop up as soon as the progress ends.
- Step 5: Exit recovery mode and press "Advanced".
- Step 6: Don't put the tick on the "Set Hosts to Cydia on Exit ( If you need a clean restore from Apple uncheck this box )".
- Step 7: Click "Save SHSH" and start the iOS downgrade.
2.2 Downgrade iOS Using Joyoshare UltFix
If you meet the problem I mentioned at the beginning, Joyoshare UltFix will provide you with the easiest way to downgrade iOS without iTunes. Although you have no developer account or your device is not jailbroken, it's still possible to downgrade your iOS firmware. Meanwhile, Joyoshare UltFix supports all models of iOS devices including but not limited to iPhone 14, iPhone 14 Plus, iPad Pro, iPad Air, and iPod Touch 7. This software is also a great iOS upgrade tool that can solve your iOS upgrade failure. In addition to the downgrade and upgrade iOS features, another three features are offered as well - iOS system repair, reset device, free to enter/exit recovery mode.
- Downgrade iOS without iTunes
- Upgrade iOS without iTunes
- Repair more than 150 iOS system problems, like boot loop, white Apple logo
- Factory reset iOS device if your device is unable to be restored or you forget passcode
- Enter/Exit recovery mode for free
Step 1Back Up Data and Connect Device
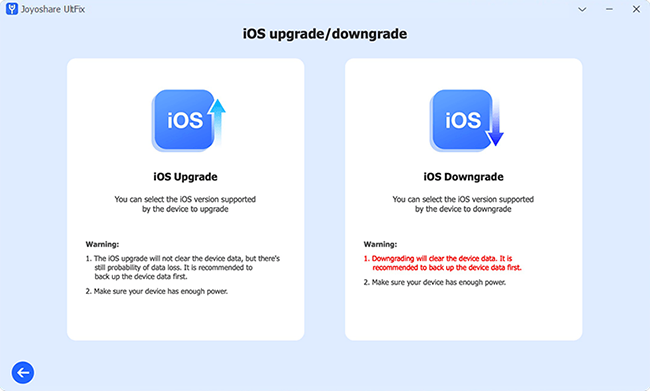
Search the official Joyoshare website and download Joyoshare UltFix on your computer. Install and launch the program. Then click "Upgrade/Downgrade iOS" section. After that, connect your device to your computer via USB cable.
Note:
- If you didn't back up before, you'd better back up your data in iTunes or iCloud.
- Keep in mind that restoring data backed up from a higher version to a lower version can cause some problems in your device. So, you should be psychologically prepared that your data will be deleted.
Step 2Download the Firmware Package
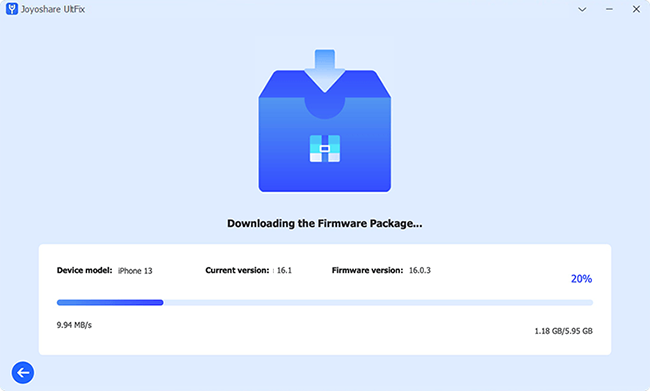
Click "iOS Downgrade". Joyoshare UltFix will scan your device and show you the available iOS version. You can choose any version you want, and download the corresponding firmware package. It will verify automatically.
Step 3Start to Downgrade
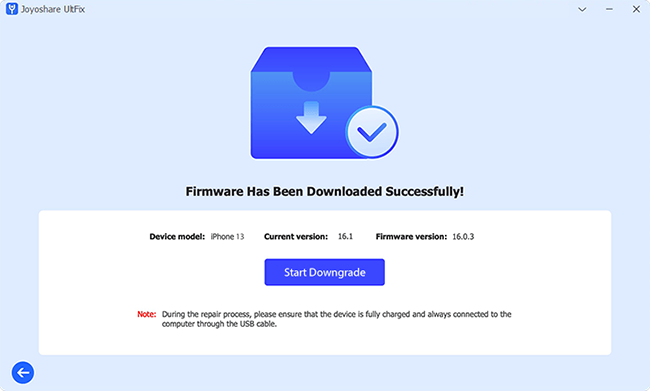
Click "Start Downgrade" button. The one thing you need to do is wait and make sure that your device keeps connecting to your computer. When you see "Firmware Has Been Downloaded Successfully", it means your device comes back to the previous version.
Conclusion
No matter what motivation promote you to downgrade your iOS version to the previous one, this article provides effective ways for you to downgrade iOS with & without iTunes. Using iTunes to downgrade requires you to download iTunes in advance and find a matched firmware package on a third-party website. However, if you want to know how to downgrade iOS without iTunes, there are another two methods – TinyUmbrella and Joyoshare UltFix. The former is more professional but complex than the latter. If you are a layman, the easy operation might be more necessary. Which method you choose depends on your situation.
