Screen recording programs have become popular in the last two years, and the demand for quality products has surged. A screen recorder software is a tool that allows you to capture the computer screen while you perform different activities. For example, you can use it to record a game, a video, or a meeting. The selected area screen recorder allows you to choose the area you want to capture rather than the entire computer screen. Today, you will learn about the best six tools that come in handy to record a specific area of the screen for different needs.
- #1 Joyoshare VidiKit
- #2 Wondershare DemoCreator
- #3 Icecream Screen Recorder
- #4 EaseUS RecExperts
- #5 My Screen Recorder
- #6 Bandicam
1. Joyoshare VidiKit
Joyoshare VidiKit - Screen Recorder is the ultimate solution for all screen capturing requirements. This screen recorder that records selected area of your computer gives enormous flexibility to users. With its help, users can record an entire screen or partial screen of the computer based on the requirement. Alternatively, you can choose the preset ratio for quick screen capture before starting a recording session. With no time limit to record a session, you can use it for lectures, live chat, webinars, podcasts, and more.

- Edit watermark and change its transparency, scale, position
- Create schedule recording task based on your need
- Three solutions to change recording area
- Allow users to record part of screen and full screen
- Built-in video editor to enhance your well-recorded video
Step 1Run Joyoshare VidiKit
Choose right version of Joyoshare VidiKit and dowanload it from its official website. Activate this program on your screen and choose Record - Screen Recorder in the pop-up window.

Step 2Check Settings
Click the "+" sign in the capture area to specify the recording area. You can customize capture area by dropping blue frame, inputting width and height and selecting standard ratio. Make changes to the settings of the recording output like format, storage location, resolution, codec, quality, watermark, etc. by clicking the "Options" button.

Step 3Record and Save Videos
Open the window that you want to record and start recording by pressing the blue REC button. Preview, manage and edit the final videos in the History window.

2. Wondershare DemoCreator
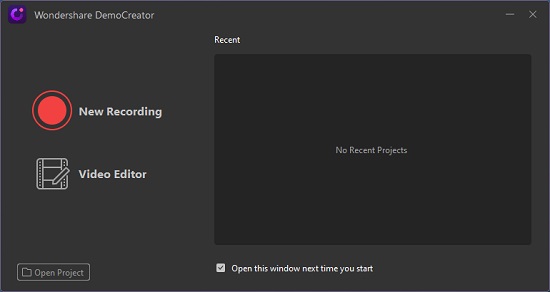
Wondershare DemoCreator is suitable for recording tutorials, YouTube videos, gaming videos, and meetings. This selected area free screen recorder with webcam recording allows you to choose from frame rate, full screen or partial screen, record screen and webcam simultaneously, audio, and other settings. Its built-in video editor allows you to edit and save files in a wide range of formats. You can further share videos directly to YouTube, Facebook, and Twitter.
Pros:
Share videos directly to video hosting sites
A custom selection of capture area
Advanced editing features
Capture 4K at 120FPS
Cons:
120FPS available only for Windows
- Step 1: Start the software.
- Step 2: Click the recording button or press F10 on the keyboard.
- Step 3: You can customize the recording settings.
- Step 4: Choose the input device. Click the stop or pause button to complete the recording.
3. Icecream Screen Recorder
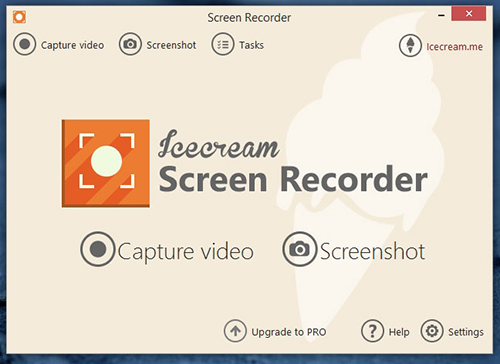
Icecream Screen Recorder gives the users five different modes to capture the screen - custom, fullscreen, last area, auto-detection, and around the mouse. This free selected area screen recorder is a lightweight software and is available in freemium. Its free trial version has the basic capturing facilities, while the pro version has unlimited record time, video codec options, scheduled recordings, and more. Unfortunately, you can record only 5 minutes with the free version.
Pros:
Audio recording from computer and external microphone
Annotations
Add webcam overlays
Video converter and editor
Cons:
Limited editing features
- Step 1: Download and install the software.
- Step 2: Prepare the settings to capture the screen with the audio or without audio. Choose the recording settings and hide the cursor.
- Step 3: Click the capture video button and choose full screen or custom screen.
- Step 4: Tap the recording button or press F7 on the keyboard. Edit and share the captured video.
4. EaseUS RecExperts
EaseUS RecExperts is a decent tool to capture the screen and webcam in a few simple steps. This screen recorder that records selected area has a simple design and easy access to the features. Users can save the format in different video outputs and make the necessary changes before capturing the area. The customized screen capture, frame rate, output format, audio bit rate, and webcam capture are a few options to play with the recorder.

Pros:
Game recording mode
Advanced editing tools
ID3 tag support
Clutter-free interface
Simple RAM management
Cons:
The free version captures only two minutes
- Step 1: Install the software.
- Step 2: Click the first icon from the menu bar and choose the recording area.
- Step 3: Choose the audio device for recording. You can choose the screen or the webcam for recording the video.
- Step 4: Press the recording button to start the recording.
5. My Screen Recorder
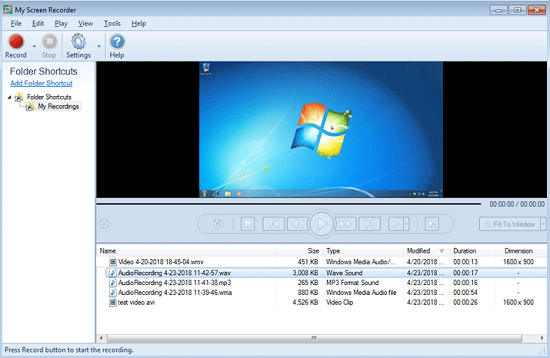
My Screen Recorder software captures screens and is useful for both personal and professional needs. With this selected area free screen recorder with webcam option present, it is easy for a business to create video and audio of webinars, gaming videos, and other presentations. This tool further allows customization for the output video, and a user can play with the settings with ease.
Pros:
Record webcam and mobile screen in HD
Save files in popular formats and WebM for easy distribution
Scheduled recording
Auto-upload recording to an FTP account
Cons:
Limited editing options
No transitions and animations
- Step 1: Install the recording software.
- Step 2: Click the record option to select the capturing dimension of the screen. Press the record button and crosshair will show on the screen.
- Step 3: The software will start recording anything that is below the crosshair.
- Step 4: You can also choose the custom region for capturing a video.
6. Bandicam
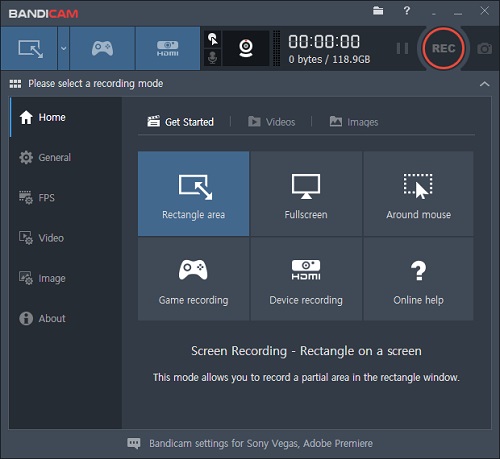
Bandicam free selected area screen recorder offers three different modes to capture screens. Each is applicable according to the activity that you like to capture, such as meetings, gameplays, podcasts, screencasting, and more. Bandicam offers the ability to record at 144FPS, which is suitable for gameplays. Alternatively, one can record the computer's audio or the external microphone for easy addition to video in later stages.
Pros:
High-compression ratio
Highest frame rate capture at 144FPS
Device recording capability using a capture card
Capture screenshots in JPEG, BMP, and PNG
Cons:
Audio sync is poor
Not flexible with live streaming
- Step 1: Install the recording tool and launch the software.
- Step 2: Choose the area that you want to record by clicking the first icon in the menu bar.
- Step 3: Click the recording button or press F12 from the keyboard to start and stop recording.
- Step 4: Hit the Video option from the home page to edit the recorded video and share it with others.
Conclusion
A selected area screen recorder serves different purposes for different people, and the best tool does not need to come up with a hefty price tag. Based on your requirements and the system you use, choosing a freemium or paid screen recorder is a good move. The only difference is that you will have editing features and a few more options than freemium. Hopefully, one of the different tools discussed today will meet your expectations and fulfill the need to screen recording software. Use the best tool for creating the best video that you can share online or impress your peers.


