Blurry and shaky footage is a strict no-no when it comes to creating professional videos and social media content. The frustration is real when you shot cinematic footage to create a fantastic home movie, only to realize later that they are all blurry, and you don't seem to know how to fix it. There can be numerous reasons why your video footage can appear blurry. Lack of focus is one of the main reasons. But don't worry because we will teach you how to fix a blurry video with a variety of methods to tackle any situation. So, let's begin!

- Why are My Videos Blurry?
- Tips 1. Use Video Repair - Joyoshare VidiKit
- Tips 2. Increase Contrast - iMovie
- Tips 3. Add Sharpening Effect - Movavi
- Tips 4. Alter Video Effect - AVS Video Editor
- Tips 5. Adjust Codec - VideoProc
Why are My Videos Blurry?
You may set the camera right and take sharp angles, but still, the footage can come out blurry. It is so annoying when you cannot pinpoint a reason why it is happening every time. Here are a few common reasons:
- If your camera does not have autofocus, the slight movement can make the footage blur.
- Capturing fast motion or moving the camera around faster can cause the video to blur.
- The lack of a good Internet connection can blur the footage until a proper Internet signal is received.
- If you use a low-quality camera to capture videos, they become blurry when you upload them on social media.
1. Use Video Repair Tool to Fix Blurry Video - Joyoshare VidiKit
Joyoshare VidiKit is the best software to fix blurry and choppy videos. It supports various camera brands and works excellently to enhance DJI, GoPro, and Canon footage quality. Furthermore, it sharpens the video and ensures the quality is not lost when the video is uploaded on your social media platforms. You can repair multiple videos and audio in different formats using this video repair tool, as it supports ample mainstream video formats.

- Support multiple video formats and camera brands
- Offer a built-in media player to preview your repaired video
- Fix corrupt WAV, MP4, FLV, MOV and more
- Repair videos and audio that are not playing, choppy, and blurry
- Fix videos and audio in batch or single as you want
Step 1 Open Video Repair Software
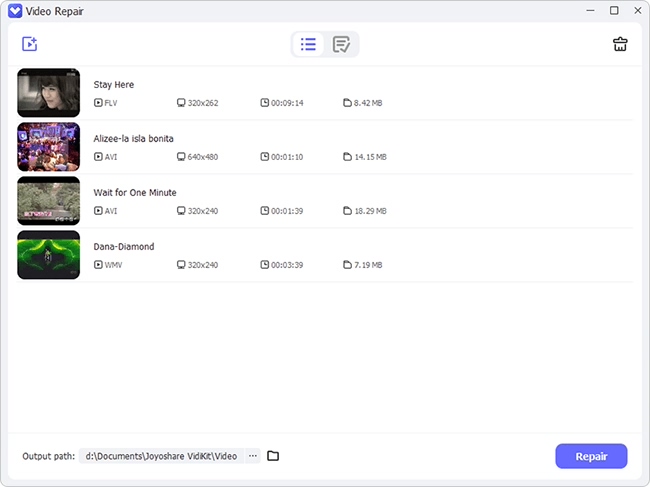
Joyoshare VidiKit is easy to download and run on your PC. Once you have it, click on the Repair - Video Repair to activate it. Click on the + icon, select the video, or tap on the Add button to add videos on the software.

Step 2 Start the Blurry Video Repair Process
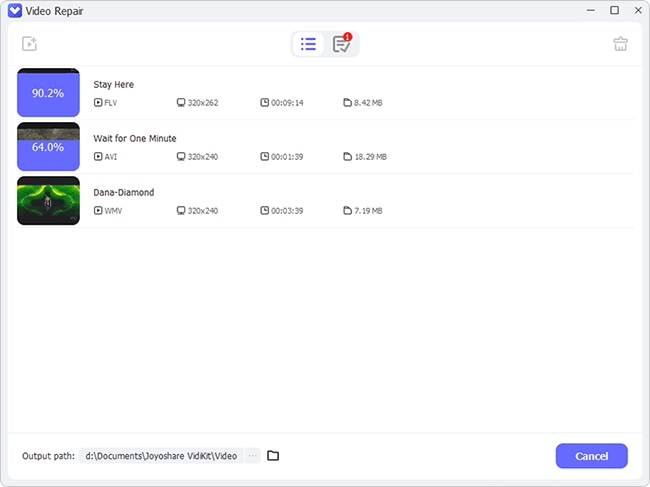
You can repair more than one video at the same time. Click on the menu button, select Preferences, then Advanced, and finally, the Number of parallel tasks. Click on the Repair button and then wait to see if the video is repaired or not.

Step 3 Preview and Save Repaired Video
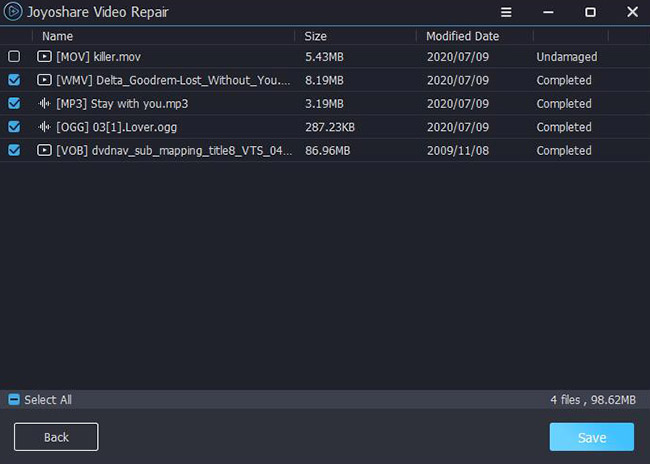
Select all the videos you have repaired and click the save button to download them on your PC. You can preview your repaired videos in the History window with its built-in media player before saving them.

2. Increase Contrast to Fix Blurry Video - iMovie
If you are an iOS or MacBook user, then iMovie is a great option. You can add music, titles and effects using iMovie. We will simplify the steps for you and make you use this app's user-friendly interface to the fullest.
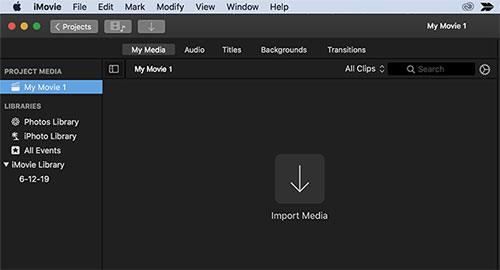
Step 1: Select the video you want to repair, drag it on your timeline, click the Colour Correction button. Here a multi-slider option will let you adjust the contrast from the half-moon button.
Step 2: When the contrast is fixed, a checkmark will appear beside it. Tap on the view large image option to preview the video and save.
3. Add Sharpening Effec to Fix a Blurry Video - Movavi
Movavi is an excellent program to repair it. The sharpening effect is the best in adding depth and definition to the video. Also, you can enhance pixel contrast to maintain video quality.
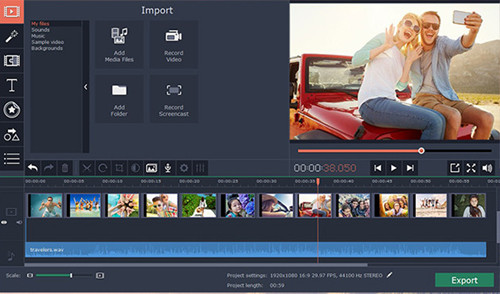
Step 1: Once you have the software downloaded and the target video on the timeline, select the sharpening tool and place it on the blurry part of the footage.
Step 2: Now, you can edit the sharpening filter to ensure the effect is not too much and save it.
4. Alter Video Effect to Fix Blurry Video - AVS Video Editor
Many people search how to fix blurry video in Premiere Pro; however, you can do so using AVS Video Editor, which is much easier to use. Its user-friendly interface makes it a hit amongst beginners who do not know much about editing.
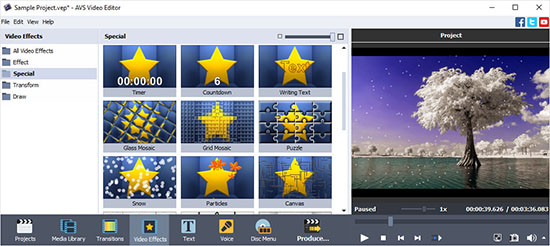
Step 1: After uploading the blurry footage, click Video Effects - Effect - Sharpening Tool.
Step 2: You can also choose the add and replace effect option to eliminate the blurry part or to stabilize the footage. Once done, save the video on your computer.
5. Adjust Codec to Fix Blurry Video - VideoProc
VideoProc is a phenomenal video editor that allows users to edit 8K and 4K videos easily. With this software, you can crop, edit and cut your videos as you want. Its Codec option is excellent for eliminating blur in videos. Here is how:
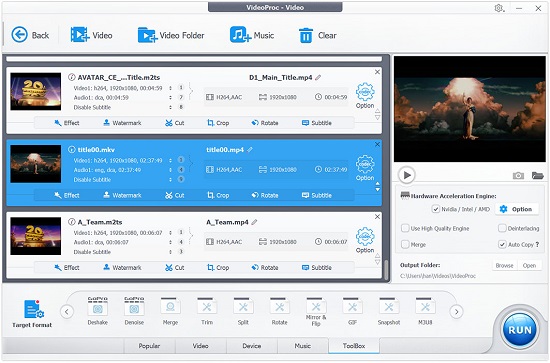
Step 1: Select the Codec option and then Resolution; you can also customize the resolution before clicking done.
Step 2: Finally, select an output format before saving it in the desired folder.
Conclusion
Now that you know there is no need to scrap the entire video if some part of it is blurred, you must be relieved. We have explained how to fix a blurry video above using five different software. You can easily enhance video quality while editing using a few simple steps. So, wait no more. If you have any blurry footage, fix it with the powerful Joyoshare VidiKit and upload it on your social media to stand out in the crowd.
