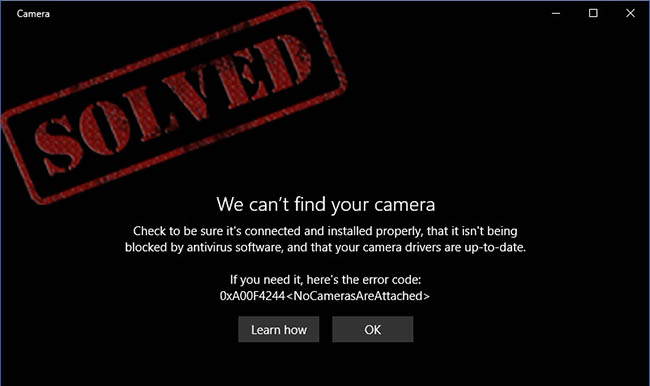
Have you tried to use your computer's camera only to be greeted by Windows Camera app error code 0xa00f4244? Well, this is a common error that most people want to repair. Usually, the error signifies that your Windows 10 or 11 could not identify your device's in-built camera. The good news is that it is easy to solve this problem. The key is knowing what to do. Fortunately, in this article, we introduce reasons for this issue and 7 useful and meaningful solutions for your reference, along with detailed steps. All you need to do is scroll down and choose the best one that suits you.
- Reasons for Error Code 0xa00f4244
- Tip 1. Make Sure the Camera Is Enabled
- Tip 2. Check and Update Drivers
- Tip 3. Uninstall and Install the Webcam Driver
- Tip 4. Disable Antivirus and Firewall
- Tip 5. Run Windows Store Apps Troubleshooter
- Tip 6. Configure Windows Registry
- Tip 7. Use Video Repair
Reasons for Error Code 0xa00f4244
1Not Properly Installed Camera App.
If Camera application on your laptop is not installed or is not properly installed, Windows will not find the camera on your device. This will result in an error every time you try to use the camera.
2Antivirus Problem
Sometimes the antivirus we use on our computers malfunction and detect genuine applications such as Camera application as malware. In this case, your antivirus will block your Camera app and your Windows operating system won't find the camera on your device.
3Outdate Camera Drivers
If no camera driver is installed on your device or the driver is outdated, then you will also experience this error. This is because drivers are the ones that make sure the applications work on your machine.
4Webcam Not Enabled
If your Webcam is not enabled, then you are also likely to experience the "no cameras are attached Windows 10" error. This is a common problem if you have been using your camera, then suddenly it is not found. Chances are you disabled Webcam without knowing.
5Malware on Your System
Sometimes malware installed on your system may take over your Webcam and make it unavailable to you. If you have been using your computer on the Internet or you have used an external hard disk, chances are it got infected with the problematic viruses.
Solution 1. Make Sure Camera Is Enabled
If you just bought a laptop or you carried out a major system repair work, you need to check and make sure that Camera is enabled. This is because, in most cases, Camera is not enabled on your device. This makes it impossible to use the camera. To enable Camera and solve "we can't find your camera 0xa00f4244" error on your computer, simply follow these steps:
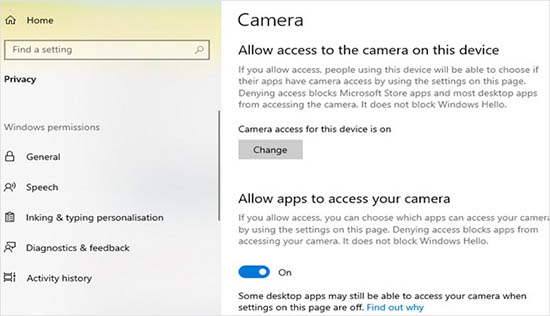
- Step 1: Press the "I" and "Windows" keys together on your keyboard. This should open the "Settings". In the Settings window, select "Privacy" to open the Privacy window.
- Step 2: On the Privacy menu, select "Camera" and check to make sure that it is on. If it is off, turn it on. In case it is on try turning it off and then on again. This should solve your problem. Now you can go back and try using the camera to see if this solves the problem. If the Camera was off, turning it on will likely solve your problem.
Solution 2. Check and Update Drivers
If the problem persists even after, making sure Camera is on. Then, chances are the camera error code 0xa00f4244 is caused by the drivers' problems. In this case, you will want to update the camera driver. To update your camera driver, simply follow these steps:
- Step 1: Connect your device to the Internet and check to ensure that your device is indeed connected and you have decent Internet download speed.
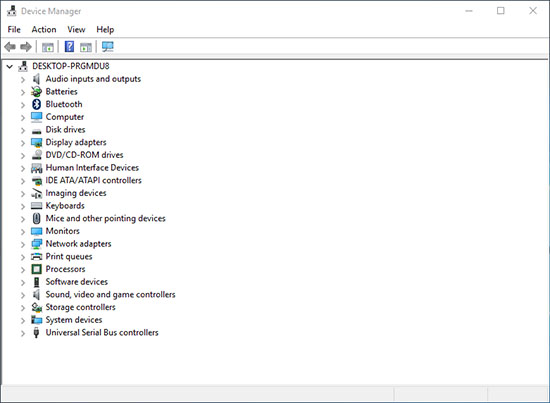
- Step 2: Start by right-clicking on your device's "Start" menu. On the pop-up menu, select "Device Manager" and then choose "Imaging Devices". On the expanded menu, find and choose your camera.
- Step 3: Once you have found your camera, right click on the "Camera Device" and then in the pop-up menu, select "Update Driver". This should start the process of updating your camera driver. Wait until the update is done, use your camera to see if it works.
Solution 3. Uninstall and Install the Webcam Driver
Sometimes updating the Camera Driver may not solve your camera error code 0xa00f4244 problem. In this case, you need to uninstall and reinstall the webcam driver. To do this simply, follow these steps:
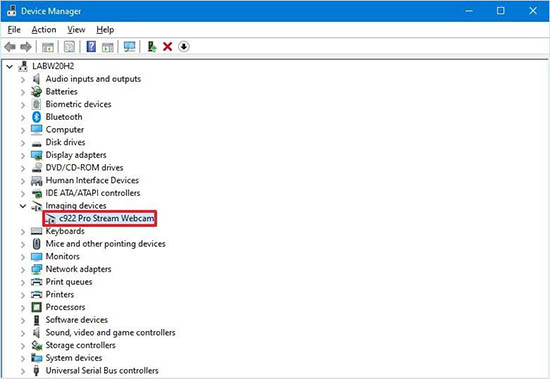
- Step 1: Simply click the "R" and "Windows" keys together and then type in "devmgmt.msc" and press Enter. This will open the device manager, from where you will select your camera device and right-click to uninstall the device.
- Step 2: To make sure that your webcam driver is uninstalled, wait until the uninstallation process is completed, and restart your device.
- Step 3: Open the "Device Manager". Select your camera device and then click "Scan for hardware changes" to start the process of reinstalling the webcam driver.
Solution 4. Disable Antivirus and Firewall
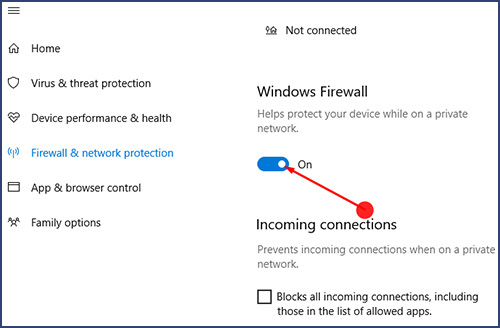
Sometimes it is your antivirus or firewall that is the problem. If you suspect your antivirus is the one causing your camera not to work, simply find the antivirus program on your device and disable it. The same case should be if you suspect it's your firewall. Once you disable the programs, try using your camera. This should solve your problem.
Solution 5. Run Windows Store Apps Troubleshooter
Sometimes runing the Windows Store Apps troubleshooter may be the solution you need to get rid of the error code 0xa00f4244. To run the Windows Store Apps troubleshooter, simply follow these steps:
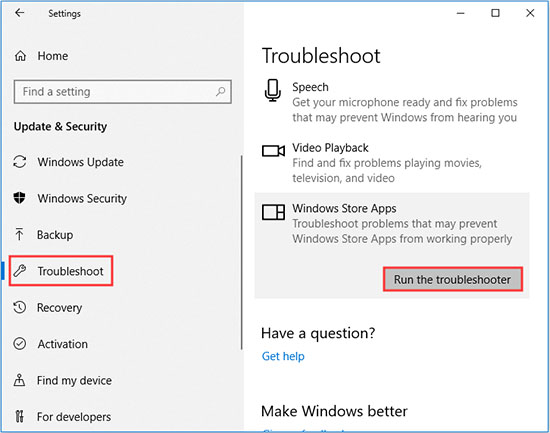
- Step 1: Click the "I" and "Windows" keys together to open your device. Click the "Update and Security" icon and then select "Troubleshoot". Scroll the pop-up menu to select "Windows Store Apps".
- Step 2: Under this window, click the "Run the troubleshooter" button to start the process. Once the troubleshooting is done and the problem is resolved, use your camera to see if it has been solved.
Solution 6. Configure Windows Registry
Sometimes the encoding standards used by your computer's registry be the main cause of camera error code 0xa00f4244. If this is the cause, you need to check your Windows Registry. To do so, follow these steps:
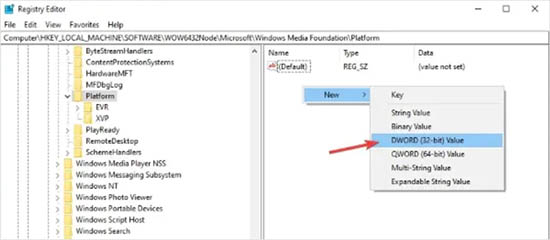
- Step 1: Search "Regedit" in your Windows search bar and then right-click on "Registry Editor". Finally, run Registry Editor as the administrator of your computer.
- Step 2: Click the "File" icon and select Export. Then, in the window that opens, create a restore point for your Windows Registry.
- Step 3: Select HKEY_LOCAL_MACHINE - SOFTWARE - Microsoft - Windows Media Foundation - Platform if you are using a 32-bit system. Select HKEY_LOCAL_MACHINE - SOFTWARE - WOW6432Node - Microsoft - Windows Media Foundation - Platform if you are using a 64-bit system. Next right click on the right window and then select "New". Here select either DWORD (32-bit) Value or QWORD (64-bit) Value depending on your system. Right-click on your option and then select "Modify". Then set your registry value as zero (0). You can then save your changes and restart your PC.
Solution 7. Repair Corrupt Videos with Joyoshare VidiKit (Video Repair)
If you recorded yourself using your computer camera and now your video is corrupted, you don't have to worry about it. This is because, with Joyoshare VidiKit, you can repair any video regardless of the kind of damage or the format of the video. This is an easy-to-use tool and supports more than 25 different file formats. Before exporting your video, it allows you to preview repaired file with its inbuilt media player. Also, you have the power to process corrupted videos one by one or in batch.

- Support batch repair for multiple corrupted files concurrently
- Allow you to preview repaired files before saving
- Repair videos recorded from cameras like Canon, DJI, Nikon, etc.
- Support 100% safe repair to fix 224003, 0xa00f4244, 0xc1010103 and more
- Have the highest success rate and user-friendly interface
Step 1 Open Video Repair in Joyoshare VidiKit
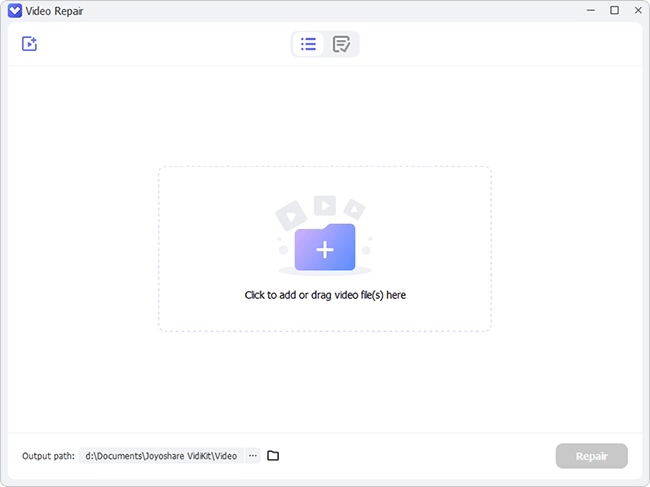
Download, install and launch this program. Then simply drag and drop your broken video to the tool's main interface after activating video repair in Joyoshare VidiKit by clicking Repair - Video Repair options.

Step 2 Change Settings
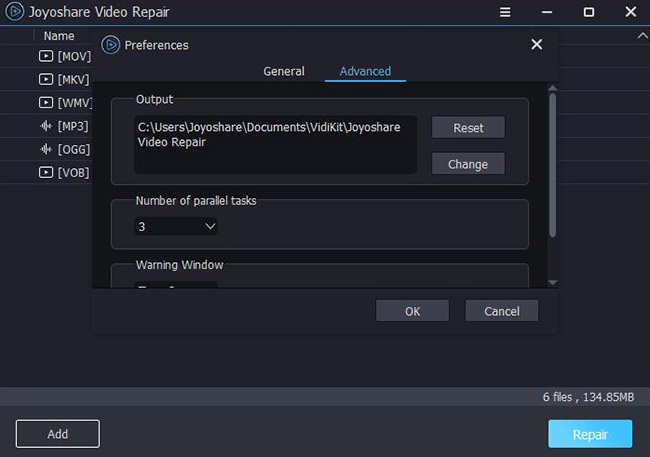
If you only have one video file that you want to repair, ignore this step. However, if you have several files that you would want to repair concurrently, you have to set up a parallel task for repair. To do so, simply click the "Menu" button on the tool and then click "Preferences" - "Advanced". Now set the Number of parallel tasks that you have. For three videos, simply select 3 and then click "OK".

Step 3 Fix and Save Corrupted Files
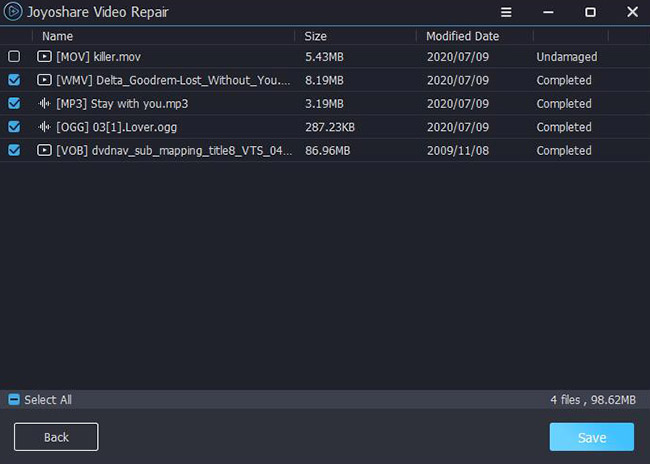
Simply click "Start" and the repairing process will begin. Wait until all the videos are repaired. Once the repair is done, preview every repaired video to make sure that they meet your standard. Once satisfied, click "Save" to save your repaired videos.

Conclusion
Camera error code 0xa00f4244 on Windows 10/11 is quite common. It is caused by several issues such as uninstalled Camera applications, missing drivers, or other system problems. However, this should not worry you a lot as these problems can easily be solved by following the steps described above. In case you end up with a corrupted video from your camera, use Joyoshare VidiKit to repair the video 100% safely.
