Many users have definitely experienced a situation where you cannot enter your iPhone to get the data you need because it is disabled. In spite of the exact cause, what you most want to know right now is likely how to recover photos from disabled iPhone. Therefore, in this post, we share a complete guide to do disabled iPhone photo recovery with iTunes and iCloud backups. Better yet, you have a chance to learn 3 best methods to unlock your disabled iPhone. Let's keep going.
- Part 1: Recover Deleted Photos from Disabled iPhone - iTunes Backup
- Part 2: Recover Deleted Photos from Disabled iPhone - iCloud Backup
- Part 3: 3 Best Solutions: How to Fix and Unlock a Disabled iPhone
The Tool to Recover Deleted Photos from Disabled iPhone
Wonder how to recover photos from disabled iPhone without backup? You should firstly guarantee that the disabled iPhone can work to be recognized without problem. Otherwise, you can only restore the deleted photos from backup files. How to achieve it? Just go direct to apply Joyoshare iPhone Data Recovery.
It is an excellent tool that has ability to scan, search, preview and retrieve as many as 20 kinds of iOS data from iPhone, iPad and iPod touch. Sure, you can also let it extract data from encrypted iTunes and iCloud backups. Don't worry. It functions to support nearly all iOS devices and even the latest iOS 13.
Key Features of Joyoshare iPhone Photo Recovery:
Recover data from locked and disabled iPhone securely
Restore photos, videos, messages, contacts, etc.
Provide three recovery modes to recover in various scenarios
Preview data before recovery and selectively save on computer
Part 1. How to Recover Photos from Disabled iPhone with iTunes Backup
Step 1 Run program to choose "Recover from iTunes"

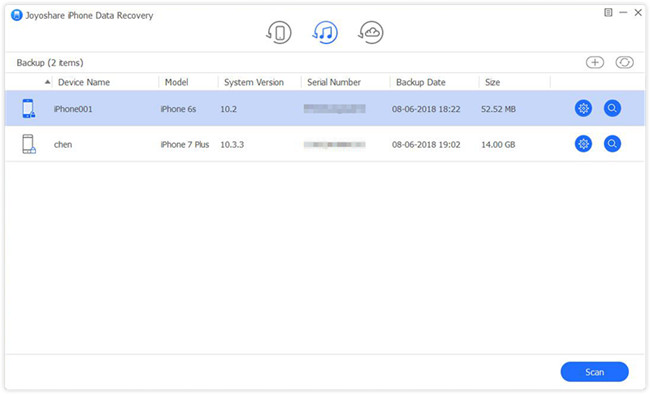
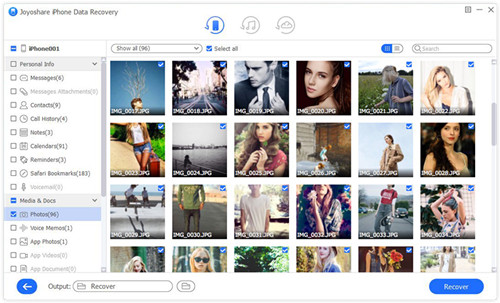
Straightly get Joyoshare iPhone Data Recovery full version started on your computer and there is no need to connect your disabled iPhone. Choose "Recover from iTunes" mode in the top navigation bar and this program will soon display all local detected iTunes backups.
Step 2 Scan iTunes backup files

Compare with all backup files and select the related one that contains your desired photos. Locate at the iTunes backup, click the "gear" icon
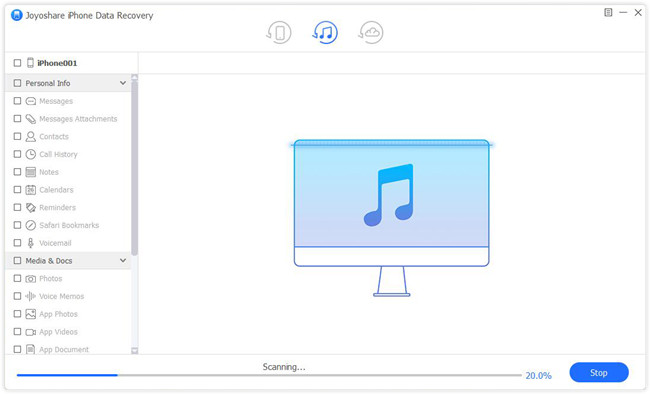
 button to check data types, like "Photos", and tap on the "Scan" option to continue.
Step 3 Get photos back from iTunes backup

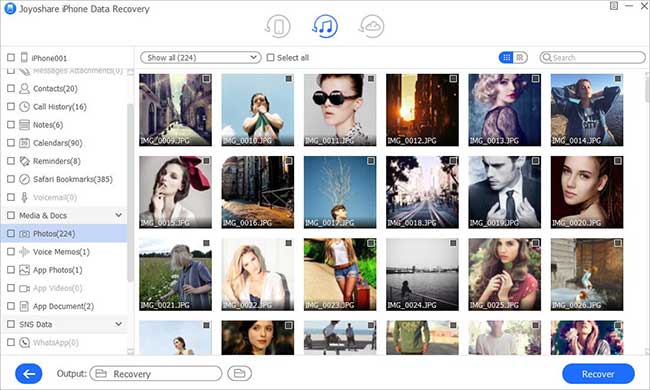
Once the scan completes, all recoverable photos will be shown in the results page. Take a moment to preview and mark what you really want. Then you can click on the "Recover" option to extract photos from iTunes backup.
Part 2. How to Recover Photos from Disabled iPhone with iCloud Backup
Beyond that, you can also take advantage of Joyoshare iPhone Data Recovery to restore lost photos from a disabled iPhone by using your iCloud backups. It's indeed a handy iCloud backup extractor.
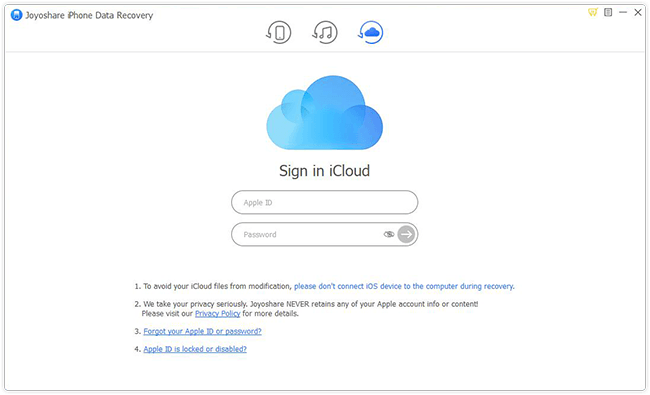
Step 1: Go to log in iCloud account under "Recover from iCloud" mode after launch the program;
Step 2: Elect an iCloud backup, confirm "Photos" type and start "Scan";
Step 3: Filter needless data, choose designated pictures and press on "Recover" button to save on computer.
Note: You can check here to learn more ways to recover photos from iCloud.
Part 3. 3 Tips to Unlock a Disabled iPhone
The most common factor that can cause an iPhone to be disabled is that screen lock passcode is entered incorrectly for many times or you forget the passcode. To help you get an access to the device, we are here to introduce three easy solutions. Notably, each method you use to unlock disabled iPhone will factory reset it.
3.1 Restore Disabled iPhone with iTunes in Recovery Mode
iTunes can be utilized directly to restore your iPhone, which will at the same time put your iPhone to factory settings. Thus, the content and screen lock can be removed.

i. Set your iPhone to recovery mode and run iTunes on computer;
ii. Connect iPhone to iTunes to let it detect;
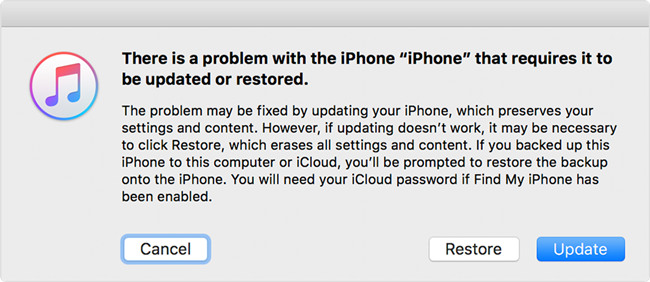
iii. iTunes will recognize your disabled iPhone in Recovery mode and show a prompt. Click "Restore" option to factory reset iPhone.
3.2 Bypass Disabled iPhone Passcode with iCloud
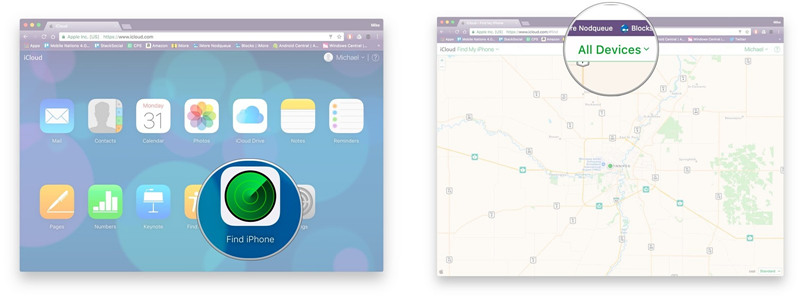
Think about whether you have turned "Find My iPhone" option on before it's disabled. If the answer is Yes, you can also try to use your iCloud to fix disabled iPhone.

i. Visit icloud.com on a browser and sign in with Apple ID;
ii. Head to "Find iPhone" > "All Devices";
iii. Find your disabled iPhone and simply tap on "Erase iPhone" option.
3.3 Remove Disabled iPhone Lock with Passcode Unlocker
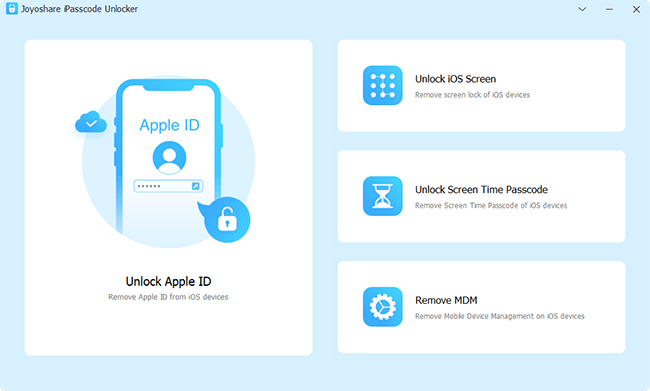
Readily, at present, there are lots of iPhone passcode removal tools developed to help you get out of disabled status. Here we will take Joyoshare iPasscode Unlocker as an example to guide you stepwise.

i. Open Joyoshare iPasscode Unlocker on computer, connect disabled iPhone and click on "Start";
ii. Refer to the steps to boot iPhone to recovery or DFU mode and press "Next";
iii. Check device info for your disabled iPhone, download and verify firmware package;
iv. After go through all above steps, click "Unlock" option to make this program work and get rid of passcode from your disabled iPhone screen.
Conclusion
After learning from this post, you can know how to recover photos from disabled iPhone under the help of iTunes and iCloud backups. Besides, it's convenient to use three different ways to unlock your disabled iPhone. To avoid this situation, you'd better back up your iPhone data regularly or switch to use other smart lock, like Face ID and Touch ID. Hope this article is of great help for you.
