Q:"Can you recover deleted files from iCloud? I don't know how to do it." - Bomer
Data loss frequently happens on iOS users. But often in this case, iCloud will be your savior. It's well designed to store iOS data synced between multiple devices and assist to restore deleted files in important moments. In order to solve problem come from Bomer and other similar users, we are here to introduce an efficient way to recover deleted files from iCloud by using iCloud Drive. Beyond that, you can also learn tips on how to restore deleted files from iCloud by using backup extractor.
- Part 1. Recover Deleted Files from iCloud Drive
- Part 2. Tips: Recover Deleted Files from iCloud Backup
Part 1. How to Recover Deleted Files from iCloud Drive Directly
iCloud Drive (icloud.com) offers a thoughtful option, "Restore Files", to recover files that have been deleted over the past 30 days. It will bring up a list of files, which are available for you to choose and restore. To do it, you can just follow the steps below to get started.
Step 1 Sign in iCloud

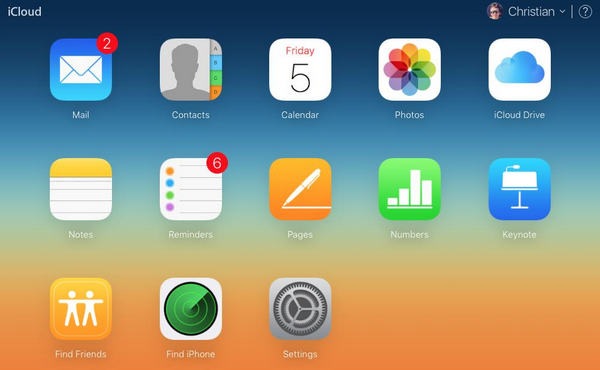
Visit icloud.com on Safari or other browser to sign in your iCloud account with Apple ID and password.
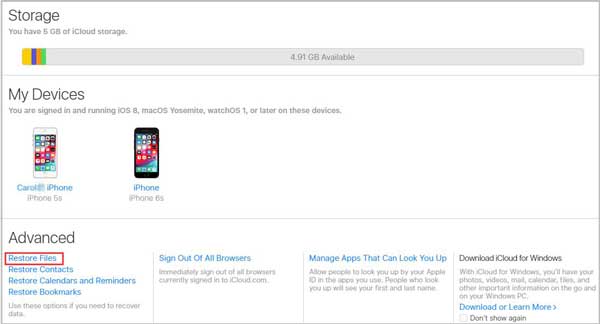
Step 2 Select "Restore Files" under "Advanced" section

Go to "Settings" and scroll down to find "Advanced" section on the bottom left-hand corner. You can "Restore Files", "Restore Contacts", "Restore Calendars and Reminders" and "Restore Bookmarks" out there. Just select and press the first "Restore Files".
Step 3 Locate and tick deleted files to restore

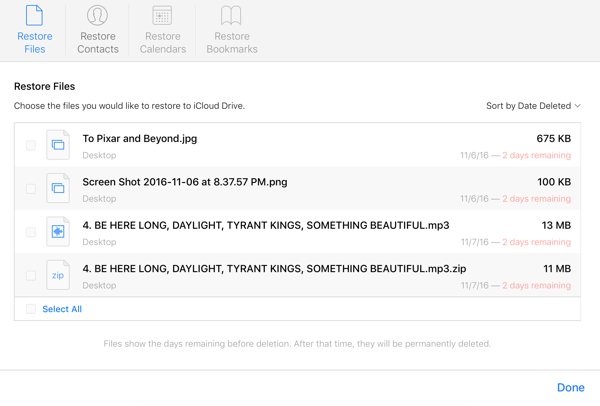
A file restoration window will pop up if you have deleted files in the last 30 days and stored them in iCloud. Be patiently. It will take you some time to load all files. After that, you are allowed to locate designated individual file or multiple files by marking the checkbox(s). Then click on "Restore" button at the right bottom to recover. iCloud will show a message in your sight to confirm it.
Part 2. Tips: How to Recover Deleted Files from iCloud Backup Extractor
It's also advisable to extract deleted data from iCloud backups in a selective manner. To perform it professionally, here we highly recommend Joyoshare iPhone Data Recovery, a tool used to recover data from iDevice, iTunes and iCloud securely and effortlessly.
Thankfully, it works fast to scan, search and retrieve iOS data with high success rate. Other than that, it fully supports over 20 kinds of iOS types, including photos, videos, notes, contacts, call logs, Safari history, calendars, reminders, Kik/Viber/WhatsApp attachments, etc. By using it, all your existing data can be protected well without being damaged and overwritten. You are even enabled to preview recoverable content in real time and only choose desired data.
Key Features of Joyoshare iPhone Data Recovery:
Restore files from iCloud backup fast with high success rate
Available for all iPhone/iPad/iPod models and iOS versions (iOS 12)
Rescue 20+ data from various possible data loss scenarios
Selectively preview results in real time before recovery
Let's take a close look on the full guide to recover deleted files from iCloud backups with Joyoshare iPhone Data Recovery.
Step 1 Install Joyoshare iCloud backup extractor and log in iCloud

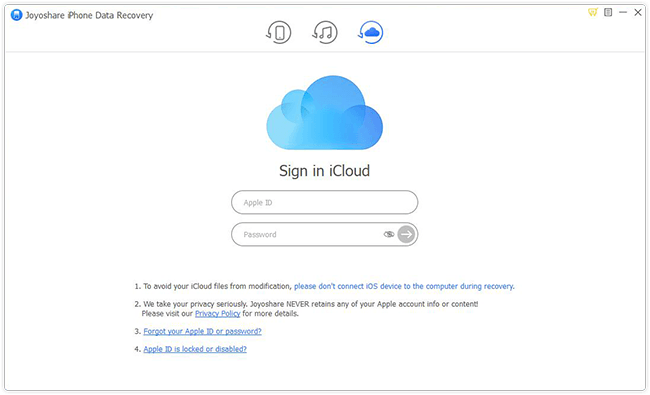
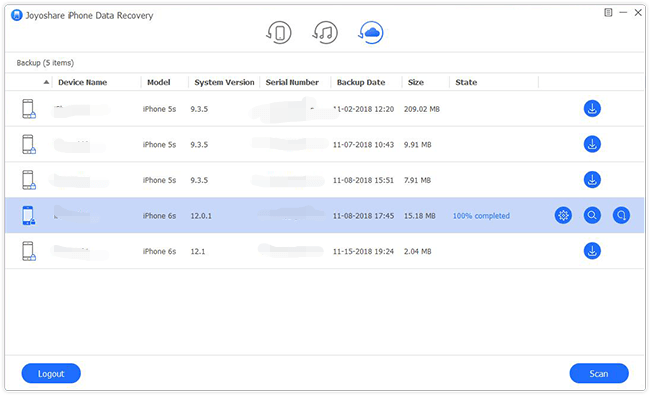
To recover data from iCloud, you should firstly download and install Joyoshare iPhone Data Recovery on your computer. Then head to the top navigation bar to choose "Recover from iCloud" as recovery mode and sign in iCloud as prompted.
Step 2 Scan files from downloaded iCloud backup

Soon after, both common and encrypted iCloud backups can be detected and displayed orderly in a list. "Download" the most relevant one as per your need and click its gear "Setting" icon to select data type. It's practical to only pick up what you want or select all without change. Next go to tap on the "Scan" button to begin data search.
Step 3 Restore deleted files from iCloud backup to computer

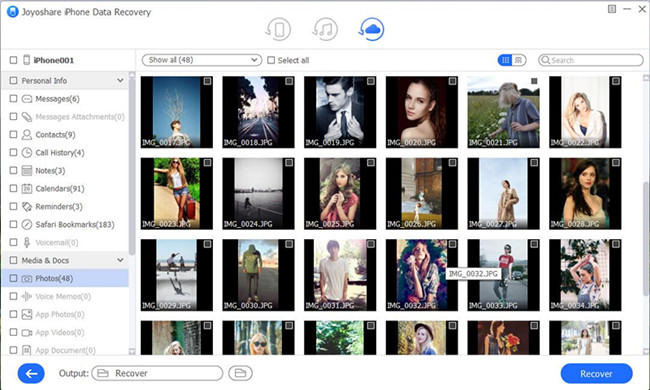
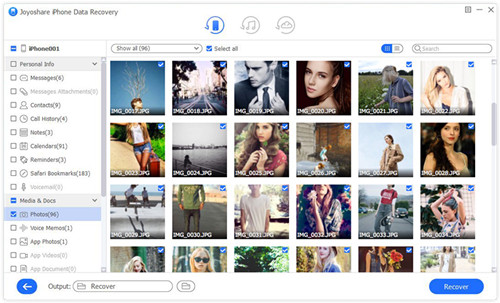
When the scan completes, all found data will be classified to different categories in the left column. Give yourself a try to have a quick search, filter out data and preview wanted files. Check the one you would like to restore and click the "Recover" button to save them on computer.
