Q: "How can I recover data from a locked iPhone without backup on iTunes and iCloud?" – From Quora
Everyone might encounter a locked iPad while forgetting the screen passcode. Under normal circumstances, you will be prompted to unlock your iPad by restoring your device. However, as is known, it will delete all data and settings. Understandably, there are endless precious memories stored on your iPad so you have trouble giving up them. It's normal you will feel frustrated and unpleasant. If you have wrestled with the same issue over how to recover data from locked iPad, some reliable and trustworthy methods discussed in this article may do you a favor.
- Part 1. Restore Data from Locked iPad Without Backup [Recommended]
- Part 2. Retrieve Data from Locked iPad with iTunes Backup
- Part 3. Extract Data from Locked iPad with iCloud Backup
- Part 4. Final Words
Part 1. How to Restore Data from Locked iPad Without Backup
While unlocking your iPad requires deleting all the original data, finding an effective way to recover your data is of primary importance at this time. If you have a backup, there's nothing to it much. The worst thing is that you don't back up data in advance because it suddenly happens.
Joyoshare iPhone Data Recovery, a powerful and effective iOS data recovery utility, focuses on data recovery since its inception. Nowadays, it is capable of recovering 20+ types of data from iPhone, iPad, and iPod touch. The data categories involve contacts, photos, videos, messages, notes, voice memos, WhatsApp/Kik/Viber messages and attachments, etc. With its expert features, this tool allows you to retrieve the existing and even deleted files whether you have backups or not. Moreover, the real-time preview feature makes it possible to decide on what you recover.

- Recover photos from locked iPad within 3 steps
- Support all iOS devices, including the newest iPhone 13 and iOS 15
- Three recovery modes are available, namely recover from iDevice, iTunes, and iCloud backup
- Freely preview your data and retrieve items in a selective way
- Guarantee nearly 100% success rate without factory setting your iPad
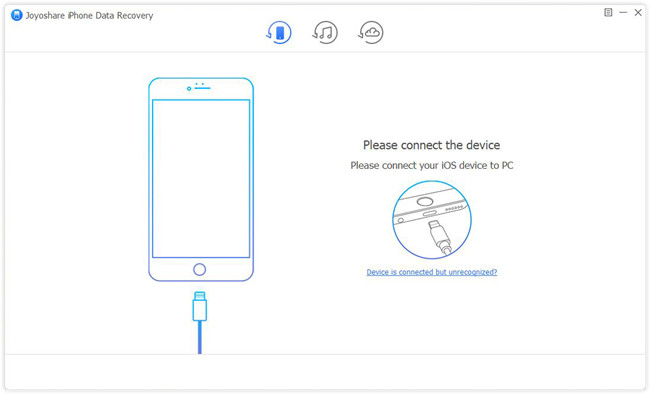
Step 1 Connect iPad to Computer
Firstly, download and then launch Joyoshare iPhone Data Recovery on your computer. Then connect your locked iPad to your computer under the first recovery mode i.e., "Recover from iDevice". It must be stressed that you should use a trusted computer that has been connected to your iPad before.

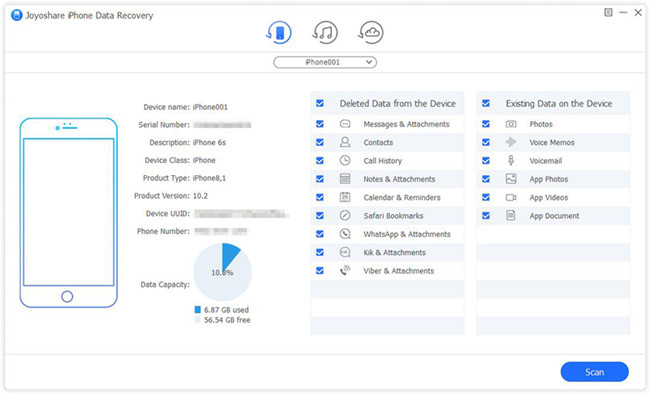
Step 2 Scan Data from the Locked iPad
Once successfully detected, the device information and all data types will be displayed in order. Keep all data chosen and hit "Scan" button.

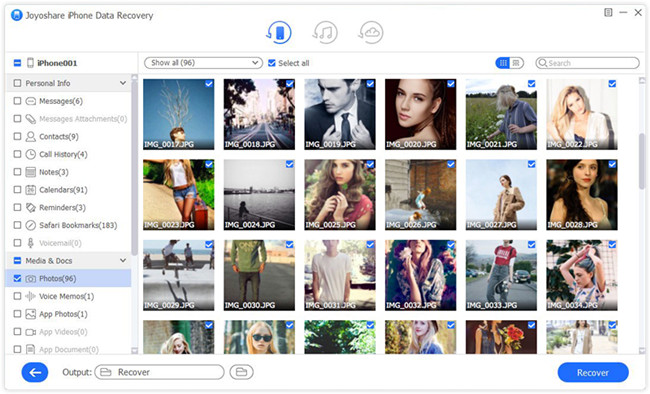
Step 3 Extract Data from Locked iPad
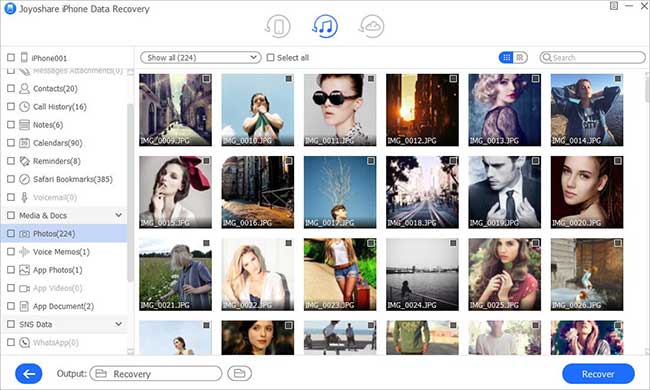
You can freely and carefully view all data categories in real-time. Tick desired data or just select all files to save them on your computer with the "Recover" button.

Part 2. Retrieve Data from Locked iPad with iTunes Backup
Fortunately, you have a good habit of syncing data with iTunes at intervals. In such a case, you might as well attempt to apply iTunes backup to extract your data. Both Joyoshare iPhone Data Recovery and Apple provide this helpful feature.
Way 1. Recover Data from iTunes Backup without Resetting Your iPad
Step 1 Choose "Recover from iTunes"
Run Joyoshare iPhone Data Recovery and connect the locked iPad to your computer. Get started with the second recovery mode – "Recover from iTunes".

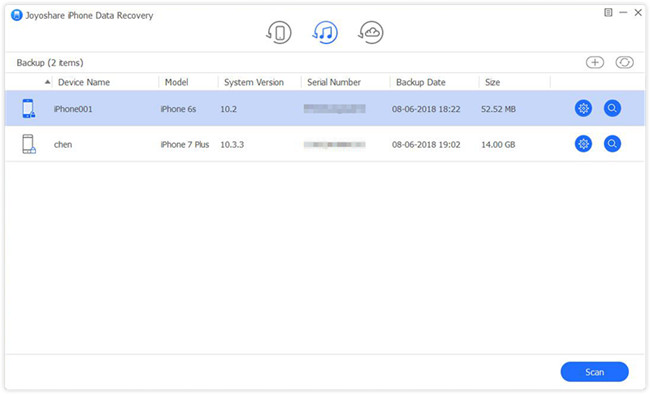
Step 2 Scan iTunes Backup Files
Confirm the iTunes backup you need and then locate the "gear" icon to verify data types. You are suggested to select all data and click the "Scan" button.

Step 3 Get Data Back with iTunes Backup
With all data shown in order, you can only choose files that you are interested in. Alternatively, you can go straight to click the "Recover" button. All files will be exported to your computer.

Way 2. Recover Data via iTunes by Restoring iPad
As a free method provided by Apple, iTunes is widely used by all iOS users. However, the obvious and fatal weakness is that it needs to restore the entire backup which results in overwriting the current data on your iPad.
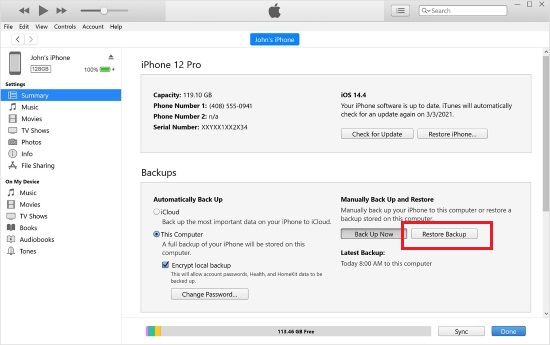
- Make sure iTunes is up to date. Launch iTunes, and connect your iPad to the computer.
- Click the iPad icon. In Summary tab, find "Restore Backup" option.
- Hit "Restore" button to make confirmation.
Part 3. Extract Data from Locked iPad with iCloud Backup
As iCloud integrates the storing feature, it makes all of your data, like photos, files, and notes, safe and available wherever you are. The automatically syncing feature maximizes the functionality so that it helps a lot when iOS users run into data loss situations.
Way 1. Recover from iCloud Selectively with Joyoshare iPhone Data Recovery
Step 1 Log in to iCloud
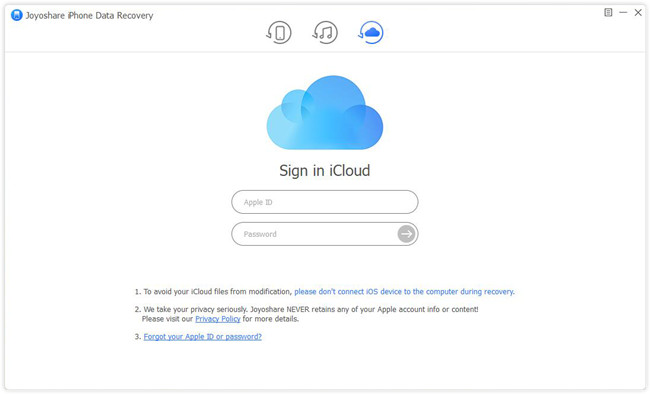
Keep it under the third recovery mode – "Recover from iCloud". Enter your Apple ID and password to access the iCloud backup files.

Step 2 Download and Extract iCloud Backup
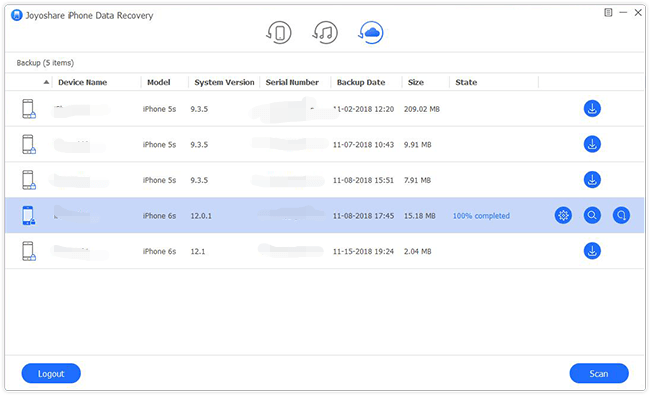
Likewise, all iCloud backup files are presented for you to choose from. Download the one that contains the fullest contents. Hereafter, hit the "Scan" button to scan files.

Step 3 Get Data off from Locked iPad
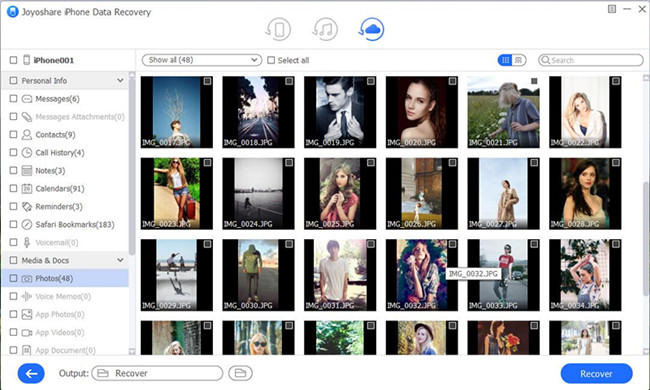
After the scanning bar comes to an end, you are allowed to look through all items. After checking these files, click the "Recover" button to output them on the computer.

Way 2. Recover from iCloud Website via Erasing iPad
Even if you don't have screen passcode on iPad, you can easily restore your iPad using the iCloud service. Here are some steps you need to take. It can't be understated that this method will eradicate all data and settings, including the screen lock.
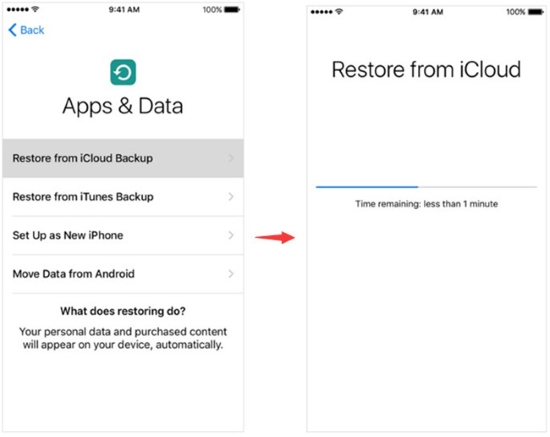
- Navigate to "icloud.com" on your computer, and sign in to iCloud with your Apple ID.
- Choose "All Devices" and locate the locked iPad you wish to reset from the list.
- Click "Erase iPad". When the Apps & Data screen shows up on your iPad, choose the option to "Restore from iCloud Backup".
Part 4. Final Words
If you don't know how to recover data from locked iPad, don't feel frustrated and helpless. Joyoshare iPhone Data Recovery is the most excellent tool presented to help you retrieve various files. If you have any other questions, never hesitate to get in touch with us by leaving your comments below.
