Q:"I have upgraded my iPhone to the latest iOS version, iOS 12. As expected, the data stored on my iPhone has been lost. Now, I just would like to extract my photos. Do you know how do I retrieve photos from iTunes backup? Fact is that I have synced all iPhone data with iTunes in advance. So everything can go easier, right?" – Cash
Alright, it is indeed incredibly simple to get photos out of iPhone's iTunes backup in that your iTunes has already backed up all your iPhone data. The only thing you should pay much attention to during extracting and recovery process is that which method you adopt. Here we will show you how to extract photos from iTunes backup in 2 ways, one straightly uses iTunes while the other aids iPhone data recovery. Let's move to more details.
- Part 1. Extract iOS Photos Directly from iTunes Backup
- Part 2. Extract iOS Photos from iTunes Backup with Joyoshare
Part 1. How to Restore Photos from iTunes Backup
In terms of iTunes recovery, an iOS device, like your iPhone, is required to keep connection with iTunes. It will facilitate you to restore all data, including photos, from your recent synced iTunes backup and bring them back to your iPhone directly. Check out the comprehensive steps as below.
Step 1: Use a USB data cable to connect your iPhone with computer. Keep iTunes run at same time.
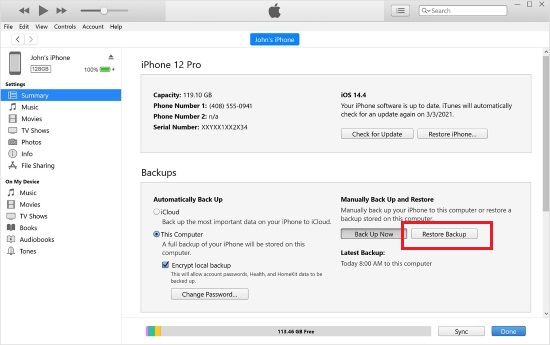
Step 2: You iPhone will be detected and recognized by iTunes. Once it is shown successfully, you can go for "Summary" > "Backups" > "Restore Backup".
Step 3: Select one recent iTunes backup file you create before data loss and tap on "Restore" button to initiate a recovery process.
Note: Though this method can work and recover photos from iTunes backup, it comes with shortcomings as well. Explicitly, it will erase your previous data from your iPhone and gives no option to preview data before retrieval.
Trustworthy iTunes Backup Extractor - Joyoshare iPhone Data Recovery
The safest workaround recommended here is applying a reliable and dedicated iTunes backup extractor, named Joyoshare iPhone Data Recovery. It enables you to extract photos and more iOS files from iTunes as well as iCloud backup without wiping and overwriting current data.
Distinctively, this outstanding program authorizes you to preview all scanned items in real time and selectively choose needed files at your disposal. The iOS users who save photos as HEIC format can get pretty nice chance to convert HEIC to JPG. Moreover, it is capable of being compatible with all series of iDevices, even iPhone XS/XS Max/XR. That is to say, you are also empowered to recover data from your iPhone/iPad/iPod touch directly with high success rate.
Key Features of Joyoshare iPhone Data Recovery:
Extract photos and more 20+ data types from iTunes and iCloud backup
Fetch files from any iOS device without damaging original data
Fully compatible with the latest iOS version and iDevice models
Support get data back from various possible data loss situations
Part 2. How to Get Photos from iTunes Backup using Joyoshare iPhone Data Recovery
By means of this solution to extract your iTunes backup files, all of your iPhone data can be protected well. The reason is that Joyoshare iPhone Data Recovery will perform as a medium, avoiding further data loss disaster.
Step 1 Run iTunes backup extractor and choose mode

Navigate to Joyoshare official download page to finish installing Joyoshare iPhone Data Recovery. Simply launch it and switch the recovery mode to "Recover from iTunes" on the top menu bar.
Step 2 Scan selected iTunes backup file

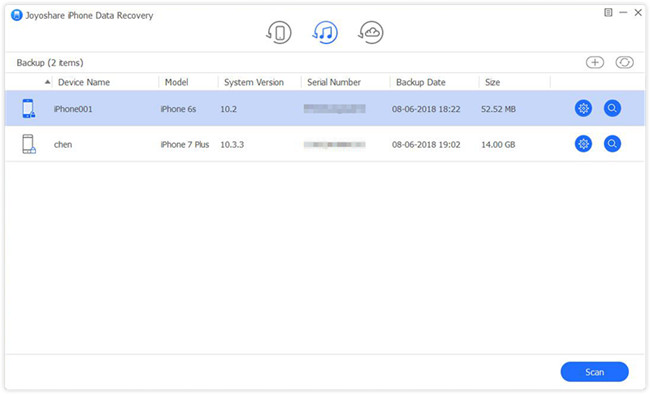
This program will detect and present all your iTunes backup files in a list. You can also refresh the found files by using the "Refresh" icon or import one from local folder by clicking "+" button. Next pick up the most relevant one and press its "gear" icon to confirm data types, follow which you can hit the "Scan" button to start to extract iTunes backup data.
Step 3 Retrieve photos from iTunes backup

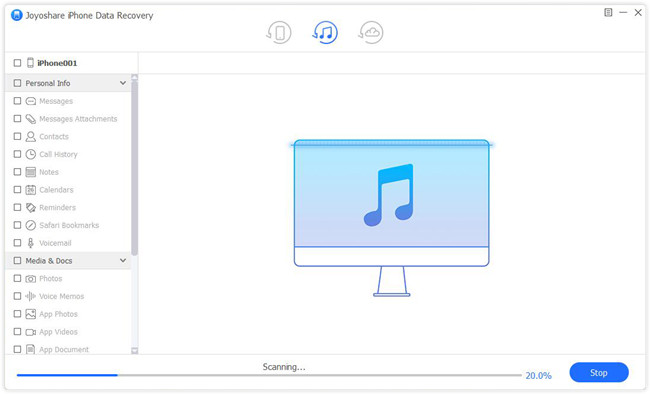
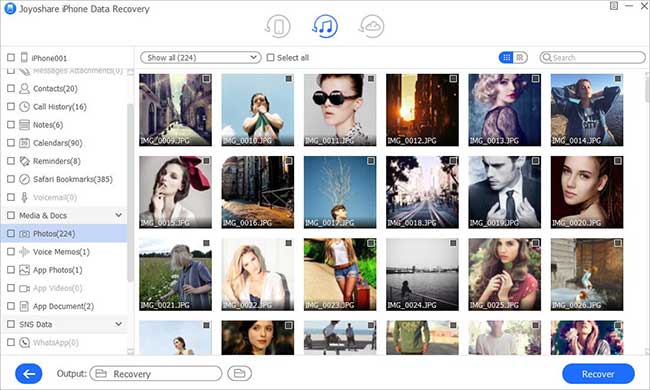
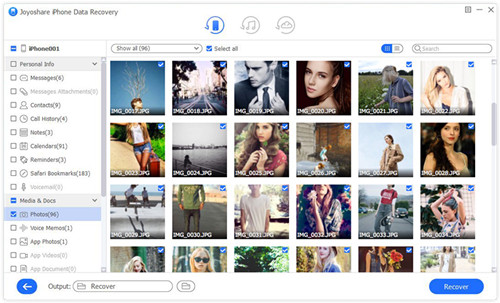
The time cost to scan data depends on the actual file size. Once it is completed, go forward to check categories, such as "Photos", "App Photos" or something else. You can preview all photos one by one and consider whether to recover them. To save time, you can also filter out unnecessary files in the way you like, for example, "Only show the deleted". Then simply click "Recover" button to export marked items on your computer.
Video Tutorial - How to Extract Photos from iTunes Backup
