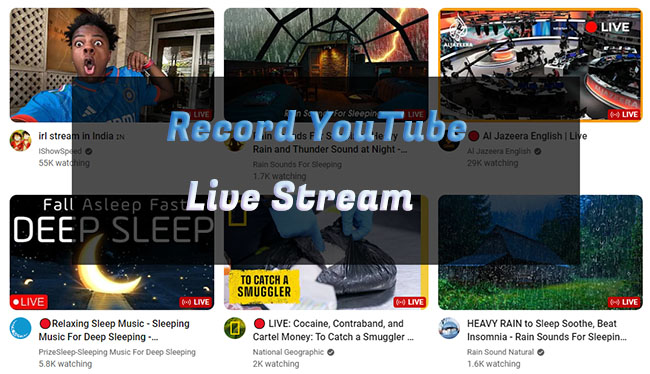
Live stream apparently becomes more and more popular, especially for video creators in various fields, such as education, gaming, sport, news, business, etc. You can make a real-time broadcast of any activity or event you'd like to spread it over the Internet, or simply view and interact with your fans. There are many platforms with access to live stream. YouTube Live is a typical one. If you want to have all your favourite contents for watching later when you have time, then record YouTube live stream. Here comes with 5 best ways and you can take a close look at them.
- Part 1. How to Record YouTube Live Stream on Computer
- Part 2. How to Record Live YouTube Stream on iPhone/iPad
- Part 3. How to Record YoutTube Live Videos on Android
- Part 4. How to Record a YouTube Live Stream Online
- Part 5. FAQs on Capturing YouTube Live Stream
- Part 6. Conclusion
Part 1. How to Record YouTube Live Stream on Computer
#1 Joyoshare VidiKit (Windows & Mac)
Joyoshare VidiKit is a formidable program designed to produce high-quality professional videos. As a powerful YouTube live stream recorder, it can work well to record screen, audio, webcam, and game from YouTube. You can capture video while make a live and at the same time grab sound from microphone to keep whatever you and your views do. The output file can be saved in any format to highly compatible with any device for playback and the resolution can reach 4K, giving you a good viewing experience.
- Record live stream from Instagram Live, YouTube Live, Facebook Live, etc.
- Allow to customize quality, codec, resolution, hotkeys, effects and more
- Record video without time limit and frame latency in 1080p/4K
- Help schedule and stop recording live stream automatically
- Capture live stream screen, webcam video, microphone voice, system audio together
Step 1 Launch Screen Recorder on Computer
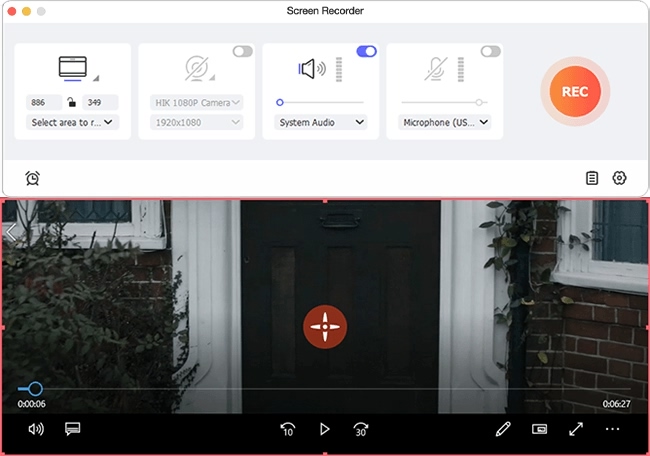
Launch the program of Joyoshare VidiKit and register as required. Then navigate to "Recorder" and click "Screen Recorder" icon to activate the recording tool.

Step 2 Set What to Record
Open the drop-down menu in the main interface and you can "Select area to record" as you desire. Adjust the recording area to make it matchable with your YouTube live stream window. You can also enable "Camera" and choose your available webcam. To capture what you say and what computer system outputs, you can turn on both "System Audio" and "Microphone".

Step 3Customize Recording Preferences
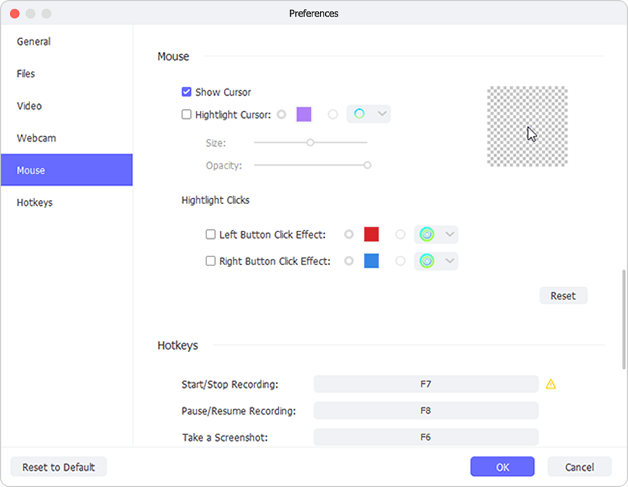
Hit the "Preferences" at the right bottom and in the pop-up window, choose a video location, personalize your cursor effect, set recording hotkeys, pick up an output format, and adjust the parameters such as resolution, quality, codes, sample rate, etc.

Step 4Record YouTube Live Stream with Audio
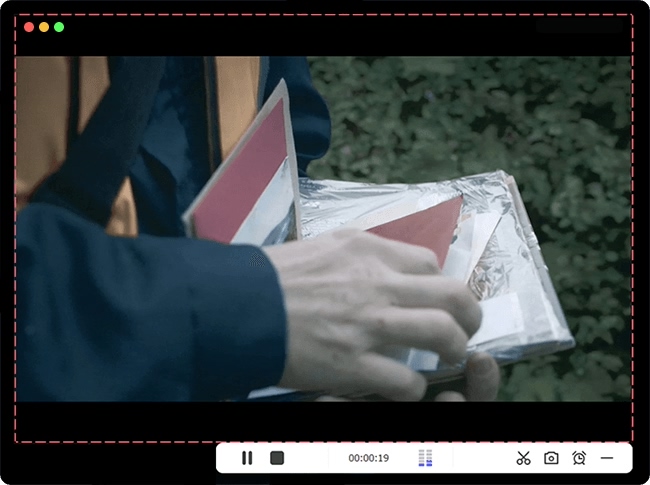
Now on your YouTube, go to click Create → Go live to start a live stream. You can soon hit the REC button in Joyoshare VidiKit to begin the recording. Take snapshots or cut the video if you need.

Step 5Manage Recorded YouTube Video(s)
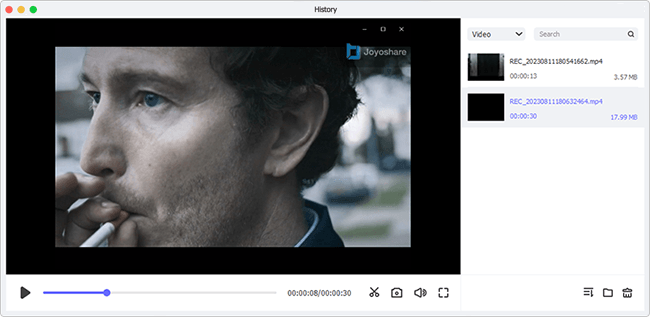
A simple click on the Stop button can help save your recorded YouTube live stream and take you to the History window. Preview the video to see if it meets your expectations. You can rename and trim it here for better file management.

Open your YouTube and prepare to make a live stream. Then download and install Joyoshare VidiKit on your computer. Simply follow the instructions below to record video.
#2 QuickTime Player (Mac)
For the one who has a Mac computer to watch live stream from YouTube, QuickTime Player is a good helper in screen recording. This is a decent multimedia player designed by Apple Inc. The player can record, edit and share both video and audio files. To create a recorded video from YouTube by using QuickTime, you can check out steps below.
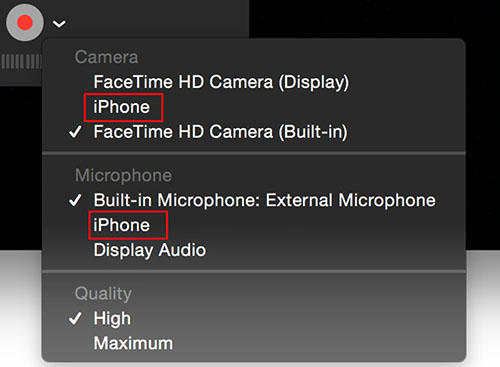
- Step 1: Launch QuickTime on your computer, then click the "File" icon and then select "New Screen Recording".
- Step 2: Open the YouTube live stream you want to record and access it for watching. On the toolbar, choose an area to record. You can record the entire screen or just a specific region. Then click on "Record" to begin recording.
- Step 3: When what you want has been recorded from YouTube live stream, hit the "Stop Recording" icon. Then go for "File" and select "Save" to save the recording to your Mac.
Part 2. How to Record Live YouTube Stream on iPhone/iPad
If you use YouTube to create a mobile live stream on your phone or tablet, then the inbuilt iOS screen recorder is the first choice. This captures the YouTube screen and creates a great video for you without the need to download a recording tool on your device. The operation is easy-to-follow.
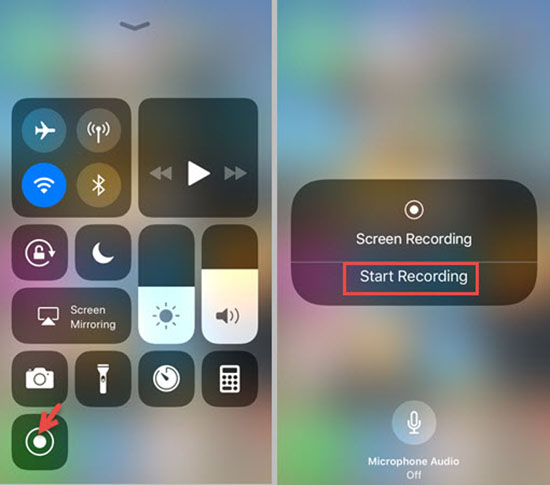
- Step 1: On your device, open "Settings" and then click "Control Center". Followed by that, you can hit the "Customize Controls" button and afterwards, make "Screen Recording" listed in the "INCLUDE" section by tapping on "+" sign.
- Step 2: Go to YouTube and open the YouTube live stream that you want to record.
- Step 3: To start recording the live stream, simply enter Control Center on your device and click the recording tool, which looks like a concentric circle. A 3-second countdown will appear by default and then recording begins.
- Step 4: Wait until the live stream is done and click on the same icon in your Control Center again to stop recording. Your livestream will be saved. Simply go to the Photos folder on your device and find the file to play when you need it.
Part 3. How to Capture YouTube Live Stream on Android
Similar to iOS devices, your Android mobile phone comes with its own screen recording tool. It's usually activated in Control Panel and you don't need to set it. If not, open Control Panel, click pencil-shaped Edit button to drag and add Screen Recorder widget. However, for different Android models, the screen recording operation may be slightly different.
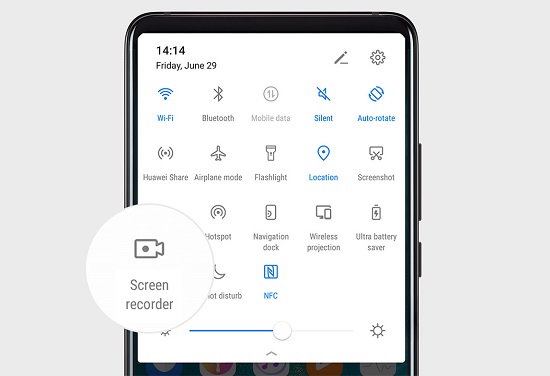
- Step 1: Go to YouTube app on your Android phone. Start your own live stream or find the one from others to get ready.
- Step 2: Swipe down your Android device screen to open Control Panel → Screen Recorder button and start recording your live stream.
- Step 3: To end the recording and save your file, simply click the stop button at the top red recording bar on your screen.
Part 4. How to Record a YouTube Live Stream Online
ScreenApp is an online tool for you to free use in recording, storing and sharing videos. You can apply it to record live stream, music video, movies and more from YouTube. Also, other things like interviews, gameplay, virtual meetings, and more, can be captured. You're allowed to get microphone audio, browser audio, and system audio. Besides screen, content from your webcam can be kept for you to save. Here you can see how it works for you.
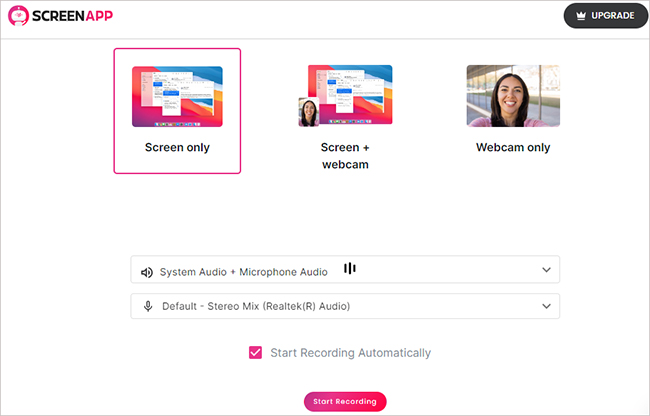
- Step 1: Visit ScreenApp and click on "START FREE" to sign in with an account.
- Step 2: Click on New Recording and choose "Screen + webcam" mode for YouTube. You should give related permissions first. Then set camera and audio.
- Step 3: Hit "Start Recording" option in the screen and you can now choose "YouTube" from "Chrome Tab" to capture live stream from. Enable "Also share tab audio" and click on "Share" to begin recording.
- Step 4: Once your desired live stream has been captured, click on "Stop sharing" at the top. You can then check, share, download, trim, and transcribe your YouTube video.
Part 5. FAQs on Capturing YouTube Live Stream
Q1. Can I record a live stream while watching?
A: Yes. You can watch a live stream on YouTube and meanwhile record it using either built-in screen recorder or third-party software.
Q2. How to download a live stream from YouTube?
A: YouTube only lets you download a live stream from a personal YouTube channel. You can do this by going to YouTube Studio → Content in the left column → Live at the top menu → Options → Download. If you want to download a live stream from another person's YouTube channel, then the best option for you is to screen record it.
Q3. How long can YouTube archive my live stream?
A: YouTube will automatically archive live stream for up to 12 hours in 1440p and 2160 (4K) resolution. If your stream reaches 12-hour duration limit, it will not be captured by YouTube.
Part 6. Conclusion
It's a fairly simple task to record YouTube live stream if you get an appropriate solution. This makes using YouTube fun, interesting and quite exciting. Also, it is perfect for everyone, even when you are busy in something but unwilling to miss an important live stream. In this article, we have looked at 5 methods to help capture content from YouTube. These methods vary but provide the perfect path for you.

