As the winner of the Best Esports Game at The Game Awards 2022, the popularity of Valorant is beyond doubt. Game lovers who enjoy first person shooter games could not refuse the thrill of this team-based competitive shooting game. If you are a Valorant whiz who wants to share killing moments on social moments, or you’re full of passion to set up a game channel on your own, recording is a nice start. This post is an easy tutorial on how to record Valorant gameplay for beginners. Keep reading to find the best way of recording Valorant with no lag.

Part 1. How to Screen Record Valorant
1. Joyoshare VidiKit
To get an authentic presentation of wonderful gaming clips, you need to record Valorant without FPS drop. Otherwise, you would experience game stuttering issues while recording. Joyoshare VidiKit is a full-featured recording software, standing out in recording gameplay and supporting recording at 60FPS with no delay. In addition, it is almost compatible with all common video formats, such as ASF, MP4, MOV, etc. And you can freely designate the screen recording area without interrupting operation. Besides, Joyoshare VidiKit is equipped with a separate audio recorder to catch sound effects in Valorant. After recording, you could edit on your own to create a more attractive video and save your files in a desired format.
- Record Valorant gameplay without lag in any format
- No screen and time limit to record any activities
- Customize recordings by adjusting settings, adding watermark, and trimming videos
- Schedule recording feature without wasting time and energy
Step 1 Install Joyoshare VidiKit and Locate Record
You could download this screen recording software from the official website and install it on your computer. It has a user-friendly interface, which is easy for you to locate Record first. Click on it and then choose Screen Recorder on the right side.

Step 2 Select Capturing Area
With Joyoshare VidiKit, you could design your recording area by clicking the + icon in Capture Area section. Then you can adjust the volume of System Audio and Microphone if you want to keep them running. If you want to add another audio track later, you could turn them off with a simple click.

Step 3 Configure Advanced Settings
Next, click the Options icon at the right corner, you’re allowed to make advanced recording settings, such as settings formats, adding watermark, highlighting cursor, and much more. Click the Format and select the one you want. You can click at the top right icon to adjust the Frame Rate. 60 fps is recommended for recording latency-free Valorant clips.

Step 4 Start Recording Valorant Gameplay
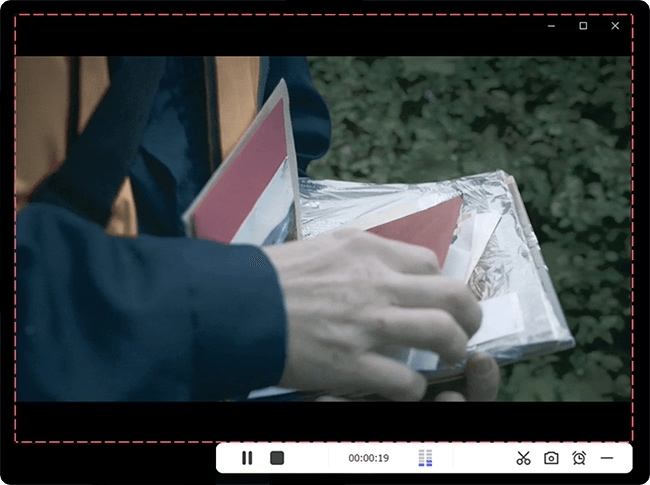
Then you could open Valorant and prepare to experience an exciting game with your friends. Just click the Record button, and all your gaming moments would be recorded in high quality. You can record any length as you want to accumulate abundant materials as long as you have adequate storage.

Step 5 Edit Gameplay Recordings
When the game is over, you could click the Stop button to end recording. The videos will be saved in History, and you can preview, trim, or rename them as you like.

2. OBS Studio
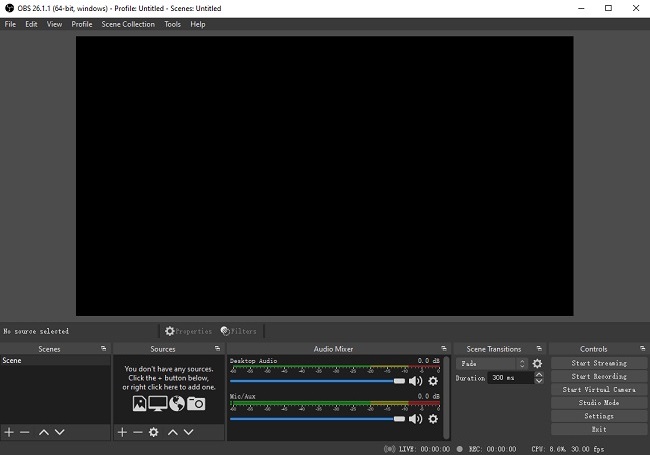
OBS Studios is a reliable Valorant screen recorder as well. With this open-source software for video recording, you’ll have no trouble capturing a high-resolution Valorant game in 60fps. And it supports live streaming to other platforms while recording. However, this software’s interface is not that friendly for novices. Here are the steps about how to capture valorant in OBS.

- Step 1: Get OBS Studio on your PC first and open it up. Then you could set the recording settings by clicking the Settings on the lower right.
- Step 2: Next, head to the Sources section on the main interface and hit the + button, and select Game Capture. A window would show up after hitting OK.
- Step 3: You could open Valorant now and go back to OBS to prepare for recording. Click the Mode and select Capture Specific Window, followed by Valorant.exe. When the Valorant loads on the OBS, you can click the Start Recording to capture games. Once the game finishes, hit the Stop button.
3. Xbox Game Bar
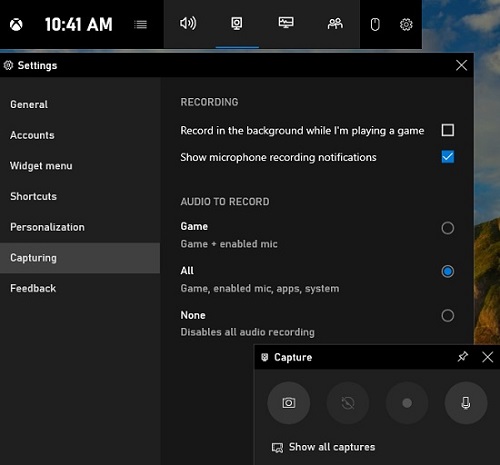
The last recommended way to record Valorant clips is Xbox Game Bar. It is a built-in gaming overlay for Windows 10 and Windows 11. And it is excellent in offering access to other features without leaving your game, which includes capturing screen videos and screenshots. Hence, it is a useful tool to help you record Valorant time.

- Step 1: Initiate the tool by pressing the Windows and G keys simultaneously. Then a small window will appear.
- Step 2: In the Game Bar widget menu, click the Capture. And you could make further adjustments by clicking the Settings icon.
- Step 3: Then you are required to tap Windows + Alt + R or the third circle icon to start recording Valorant.
Part 2. FAQs of Recording Valorant
Q1. Can I use Valorant to record each game?
A: No, you couldn’t use Valorant to record the game directly since it has no built-in recording feature. But the methods above can easily record the game for you.
Q2. How to choose a Valorant video recorder with no lag?
A: In order to record the gameplay with no lag, you need to choose a screen recorder with at least 60 frame rate to avoid dropping FPS.
Q3. Can I rewatch gameplay in Valorant?
A: Unfortunately, Valorant doesn’t support watch replays of games. If you want to rewatch gameplay, you can opt to use the methods above to record the game and watch them whenever you want.
Q4. What is the longest time a Valorant game can last?
A: Generally, a Valorant game would last around 30 to 40 minutes. However, the longest time on record is 80 minutes, which only occurs when both teams are content with playing OverTime.
Part 3. Conclusion
Now you have known about how to record Valorant gameplay in different ways. Joyoshare VidiKit, OBS Studio, and Xbox Game Bar could all be used to grab gaming moments for you. After recording, your highlights in gameplay can be saved for further sharing with gamers or on the platform you want. Hope these methods could add more fun to your game tour.


