Assuming you are having a Skype video call with your close friend or loved family, the topic talked about is very touching and the atmosphere is warm-hearted. In order to keep this unforgettable moment forever for future recall, you might want to find the best way to capture it with high quality. There is no doubt that you can see numerous solutions on the Internet, but how to make a wise decision to pick up an easy and quick one from the wide scope? To make it easier for you, here we will briefly lead you to know how to record Skype video calls with 5 different solutions.

- Part 1. Inbuilt Recorder - All Platforms
- Part 2. Joyoshare VidiKit - Mac
- Part 3. Evaer - Windows
- Part 4. AZ Screen Recorder - Android
- Part 5. TechSmith Capture - iPhone
Part 1. How to Record Video Calls on Skype - Built-in Recorder
There is a basic recording function in Skype, allowing you to record video and audio calls within 24 hours. Also, it can only save your recorded files for 30 days with its cloud storage, which means that you should download your recording locally during the 30 days. With basic recording features, this tool is only suitable for people who don't need advanced editing functions to escalate recorded videos.
- Step 1: Open a Skype call with your friends, family, colleagues as normal on computer.
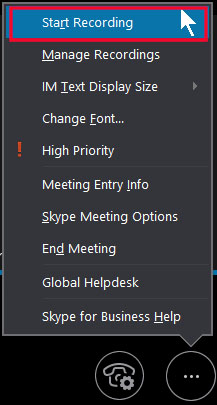
- Step 2: You can find the three-dots icon at the bottom right corner. Click it and select the Start Recording button to initiate a recording. After that, this program will let everyone in the call know that they're being recorded.
- Step 3: To make sure that you have started recording, a banner will show at the top left corner.
- Step 4: If you want to finish the recording process, just click the Stop recording button at the top left corner. Also, the recording will be finished automatically if you leave or end the call. Then, you can save your recording in the Skype chat in which the call took place by clicking More options > Downloads buttons. For mobile users, just press and hold the call recording and select Save.
Part 2. How to Record Skype Video Calls on Mac - Joyoshare VidiKit
Being good at capturing Skype video calls as well as any other screen video with high quality, Joyoshare VidiKit - Screen Recorder is proved one of the most professional video captures that adopted the most excellent screen recording technology. With this effective video capturing tool, any videos and audio played on your computer can be recorded with the finest quality. What it can provide are capturing Skype video calls, recording any area on your desktop screen, making a vivid video tutorial, capturing games, taking screencasts, doing a music recording, etc.
Joyoshare VidiKit consists of video/audio recorder which enables you to record Skype video chats with audio simultaneously. Essentially, it is equipped with accessible recording settings to bring you the best experience. You are able to make special Skype video calls flexibly with colorful options. What you can enjoy is to set up the screen capturing according to the way you like, take screenshots anytime, preset a scheduled task, close system video, select output format, etc. Of course, if you are fond of sharing your recording with others, you can upload it to YouTube.

- Record Skype video calls to many formats like HD MP4, AVI, FLV, SWF, WMV, MKV
- Audio track can be captured individually to MP3, AAC, WAV, FLAC, M4A and M4B
- Set up Skype video calls with options like resolution, frame rate, bit rate, etc.
- Support capturing any screen activity flexibly on Mac and Windows
- Best Skype recorder to record Skype videos and meetings
Step 1Install and launch Joyoshare VidiKit on Mac
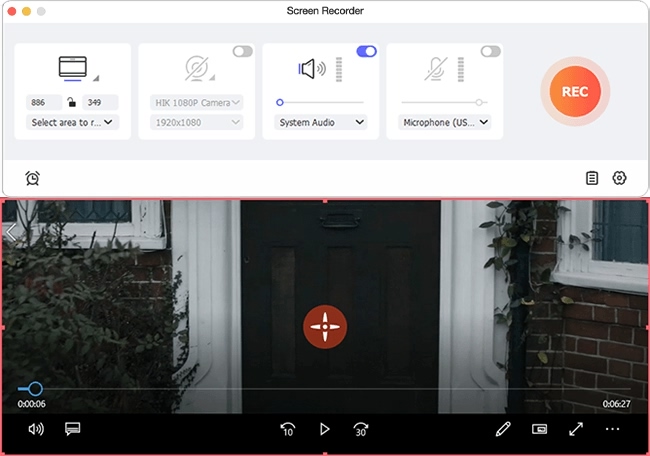
Straightly run Joyoshare VidiKit by simply clicking the icon on your desktop as long as you have finished the installation already. Open it and select Record - Screen Recorder in the pop-up window. Joyoshare VidiKit enables you to decide whether to capture Skype video calls without system audio or microphone sound in case you would like to close unwanted sounds. Besides, it also allows you to choose different microphone speakers especially when you record Skype video calls
Note: Acting as an independent audio recorder, Joyoshare VidiKit can capture your computer sounds with the audio track icon next to the blue "REC".

Step 2Select capturing area
Clicking the "+" button in Capture Area section, a pop-up window will be shown in sight, which is capable of adjusting the capturing area by yourself. You have the right to enter a definite number to customize screen size or preset standard ratio by choosing 320x240, 640x480, 1280x720, full screen, etc.

Step 3Customize recording files based on your own needs
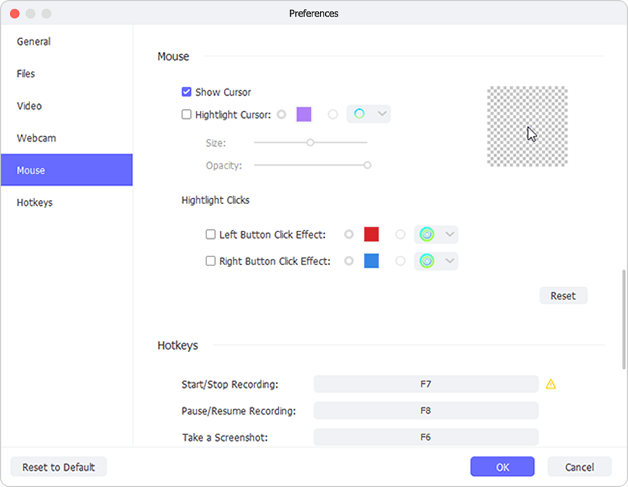
You can open up the recording options by clicking the "Options" icon, which is made up of "Basic record options", "Record time options" and "Cursor options" so that you can choose an output format, have screenshots, create a scheduled task, highlight cursors, etc.

Step 4Start to record Skype video calls
Open your Skype app and have a video call with one of your contacts from the friend list. Then it is time to capture Skype video call with just a click of "REC" button. Any unwanted content can be cut at any time during your recording process by using a cut tool.

Step 5Manage captured video/audio
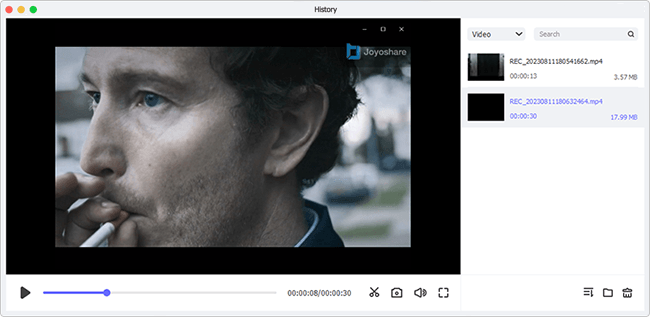
All captured Skype files will be stored at "History" list, locating any one so that you can preview and edit it. It is supportable of revising file names and editing recordings using cropping and trimming functions

Part 3. How to Record Skype Video on PC - Evaer
Designed to capture Skype and Teams video and audio calls, Evaer is another powerful Skype recording tool to help you save your video interviews, conferences, podcasts or family calls as MP4 and AVI formats. It can export your recorded files without any data loss directly to your hard disk. Plus, it is featured with changeable recording parameters like resolution, aspect ratio, and frame rate. Also, you can save separate MP3 audio files with video calls.
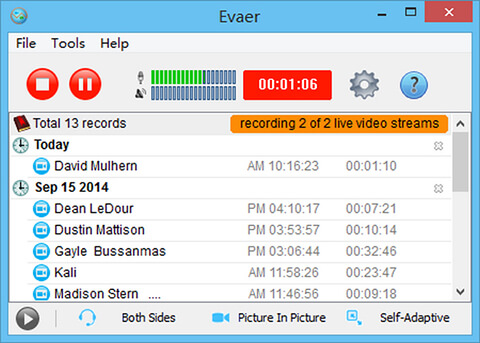
- Step 1: Download the operate Evaer on your Windows OS, and get your video call in Skype ready at the same time. This program will connect to your Skype and change the status to Ready automatically.
- Step 2: To begin the recording process, click the Start Recording button. Also, you can open the automatic recording function in the settings window to help you start the recording automatically.
- Step 3: The square button at the top left corner is provided for you to stop recording process.
Part 4. How to Record Skype Video Calls on Android - AZ Screen Recorder
Record Skype video call on Android is also available if you choose the third-party screen recording tools like AZ Screen Recorder to help you. As a stable and high-quality video call recorder for Android, it has various functions like screen capture, live steam screen, capture internal sound, and save game recordings in HD. Besides, this recording app can help you capture multiple videos, including video tutorials, game videos, live shows and video calls.
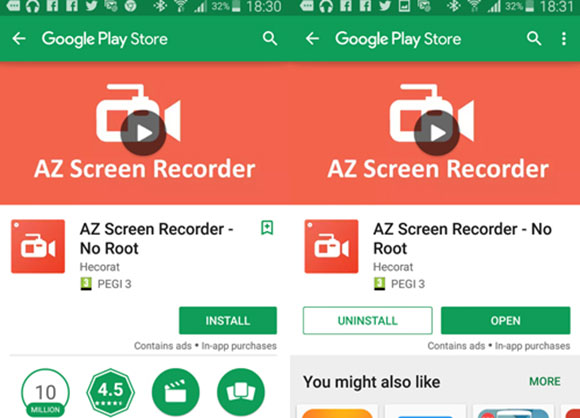
- Step 1: Download and install this tool from Google Play or its official website. Then, run it on your Android.
- Step 2: To access more customizable settings, you can tap the gear icon. It allows you to configure settings like video resolution, FPS, video quality and more as you prefer.
- Step 3: Open a Skype video call that you want to record and find the red button in the AZ Screen Recorder overlay. Tap the red record button to start the recording process. To stop recording, it enables you to open the notification section and choose the stop recording button.
Part 5. How to Record Skype Video Calls on iPhone - TechSmith Capture
Developed by TechSmith, TechSmith Capture gives you the power to start recording with one tap. You can also record conferences, meetings, lectures, music, gameplays, and many more on all iOS devices without any lag as you want. With the user-friendly interface, it is easy to operate for beginners and professionals. After the recording process, this powerful recording tool will save your recorded Skype video call recordings automatically.
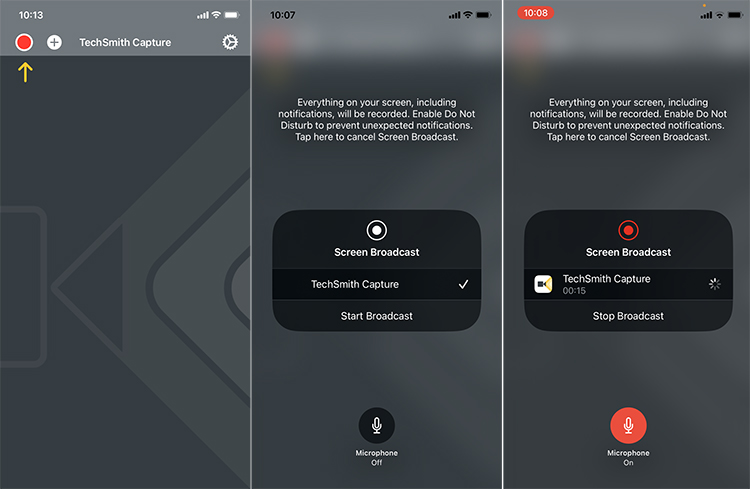
- Step 1: Install and operate this screen recorder from App Store on iOS device. Get your Skype video call ready.
- Step 2: Swipe down from your screen, tap and hold screen recording feature. Select TechSmith Capture in the pop-up window.
- Step 3: Once you have done the recording process, find and tap the red status at the top of your screen.
Conclusion:
It seems that you are clear about how to record Skype video calls on all platforms after getting help from this post. In addition to Skype online chats, these recording tools also records other videos and audio in the highest quality, including desktop activities, webinars, games, streaming music, online movies, video conferences, and more. According to my practice, Joyoshare VidiKit is the best screen recorder to help you escalating recordings by changing parameters like resolution, codec, quality, and more. For any problem or request regarding this recording tool, please don't hesitate to share your thoughts in the comments.
