In the past, Remote desktop session was mainly used by businessmen to hold a meeting. Owing to its advantage, it is well-known and adopted in different aspects, like family communication, educational course, etc. Popular as it is, there is a tendency to record remote on-screen activities for future playback. The easiest way is to get help from an easy-to-use recording tool so that you will not miss some important points and have chance to recall pleasing moments. If you still have trouble in making a decision, you can follow our step to see how to record remote desktop activity with the best remote desktop session recording solutions.

- Part 1. First Choice for Remote Desktop Session Recording
- Part 2. Best Alternatives to Record Remote Desktop Activities
Part 1. How to Record Remote Desktop Session on Windows and Mac
Joyoshare VidiKit - Screen Recorder is a fairly dedicated video capturing tool. It provides optimal solutions to record not only remote desktop session, but also any other screen video activity, such as Google Earth tour, HBO Go program, Omegle chat, Facebook call, etc. It is workable to grab video as well as audio at the same time. Thus, you can determine whether preserve system audio or microphone sound. Similar to other screen recording software, it is available to take screenshot, select formats and highlight clicks at discretion. Flexibly, it has access to make a recording in full screen or with customized size. Any captured videos can be uploaded and shared to YouTube.

- Record TeamViewer session and more remote desktop activities in high quality
- Grab screen video and audios from sound sources at the same time
- With flexible methods to choose capture area
- pre-set recording, trim video, apply effects to cursor and clicks, etc.
- 100% secure and protect user privacy without leakage
Step 1Navigate to Joyoshare VidiKit
Go straightly to your desktop screen to launch Joyoshare VidiKit. The precondition is that you have installed it already in advance. Then, select Record - Screen Recorder in the pop-up window to access its recording function.

Step 2Select a Capturing Area
It is easy for you to see the "Capture Area" section in the intuitive interface. Click the "+" button and a pop-up window will appear in your sight. Drag the edge of capturing frame to a proper position. No matter how large you want, you can make it. Certainly, there is standard fixed ratio for you to choose from, including 320x240, 640x480, 1280x720, full screen, etc.

Step 3Preset Relative Recording Options
Hit the gear icon and you will see following interface, which is made up of all capturing settings. It empowers you to remove unwanted noise from a remote desktop session. It also includes full supports for recording both video and audio in synchronous, choosing desirable output format, presetting shortcut to be used later, adding effects to cursors, etc. To make Joyoshare VidiKit work for you as an independent audio capture, you have the right to grab any audio tracks, for instance, game music, online radio, system voice, microphone sound, etc.

Step 4Record Remote Desktop Activity and Save Recordings
Hold a remote desktop session with others. Joyoshare VidiKit has ability to support any program, like TeamViewer. Press "REC" button to initiate a recording process, during which you can split video into different segments to cut unsatisfying clips. Joyoshare VidiKit has the options of managing recordings according to your actual needs. You are permitted to preview final video, delete imperfect clip, revise its file name, correct ID3 tags information, etc.

Part 2. 5 Alternatives to Screen Record Remote Desktop
#1NoMachine
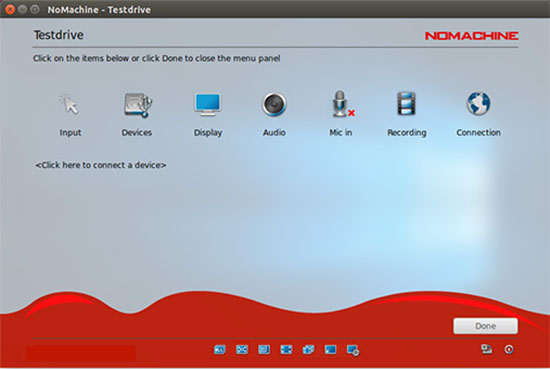
You can term NoMachine as the best remote computer access program, allowing you to record your desktop activities. It is free to use and available for most devices. If you are a beginner, you may be confused to use it. Whether you are a personal user or staff from large businesses, you can share screen and access remote using this software.

- Step 1: Download and activate NoMachine on your computer. Connect local computer to another remote desktop.
- Step 2: Click Recording to record local desktop and remote desktop separately or simultaneously.
- Step 3: Click stop button in the recording bar to finish your recording process.
- Step 4: Then, NoMachine will ask you whether to save, discard or resume your recording. You can choose any icon based on your need.
#2Ekran System
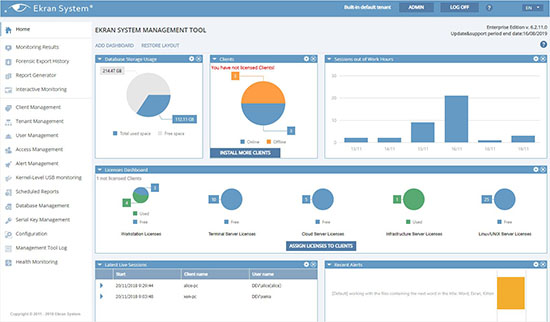
It is a powerful insider risk management and employee monitoring program, allowing you to verify user identities and manage user access. You can use it online and offline. It also provides features like screen recording, time tracking and threat intelligence.

- Step 1: Connect your computer with another PC. You will get an email notification after you connected. Click View Sessions in the email to access recording webpage.
- Step 2: Now, you can play your video via Session Player feature. You are able to record your screen by clicking start recording button using your recording program.
- Step 3: To stop recording, you can click the stop sign.
#3RecordTS
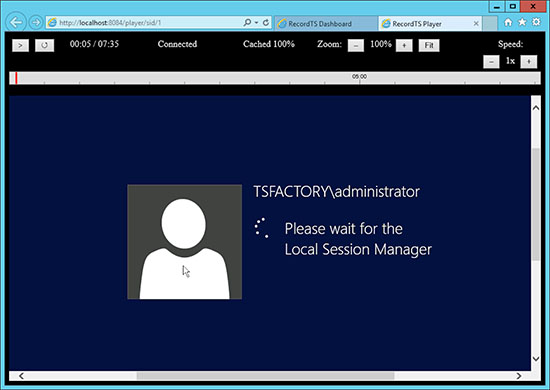
If you want to access remote desktop and record screen recordings, it is software you can consider. It can record user activity on-premise or in the cloud. This program is featured with many functions, including employee email monitoring, alerts, browsing history, keystroke recording, etc.

- Step 1: Operate TeamSpeaker software and input the IP of the remote PC in the pop-up window. Then input the interface address of your computer in the UDP Address.
- Step 2: Click the Record - Record MUX on the taskbar after establishing the stream.
- Step 3: To check the recording, you can go to the RecordTS program and fetch the DLL source.
#4AnyDesk
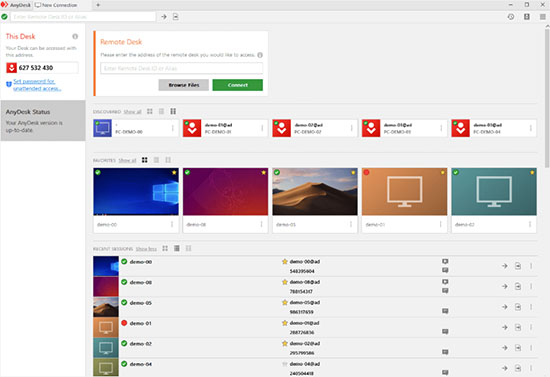
It is a popular alternative to TeamViewer. AnyDesk and TeamViewer have multiple similar functions. Run this tool on your computer, and enter the ID and password of the remote computer. By doing so, you can access the remote computer easily.

- Step 1: Download AnyDesk and run it on your screen.
- Step 2: Click menu sign in the upper-right of the screen and select Settings in the drop-down list. Press Recording section and choose Start session recording when a session starts. You can customize other parameters according to your need.
- Step 3: To begin the recording process, connect your computer with another remote computer.
- Step 4: It can save your recorded files automatically on your computer. You can check recordings by heading to the right storage location.
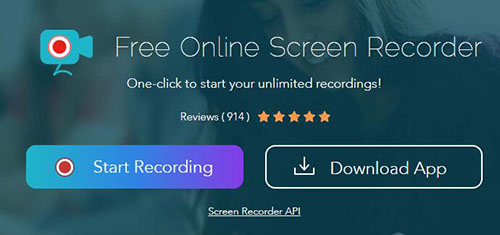
#5Apowersoft Free Online Screen Recorder
Another straightforward way is to draw support from one simple online screen recorder. Some online screen captures also come with essential recording features, like quality-adjusting and task-creating. However, the shortcoming is that it might not as safe as offline apps considering it works relying on internet. Besides, the required launcher is java-based, easily causing data leakage.

- Step 1: Install and launch to activate Apowersoft Free Online Screen Recorder. Then you can simply press the "Start Recording" button.
- Step 2: You are allowed to set capturing hotkeys and audio input. Surely, you can also decide whether to show mouse spots or not.
- Step 3: Now open any program with remote desktop screen. To let all minor details be evolved in recorded video, you can enlarge the presentation window. After choosing a recording area, you can click "OK" and begin the capturing instantly.
- Step 4: Click the red stop button to end the recording process. You can find it in its media library.
Conclusion
To sum up, this article provides 6 methods to record remote desktop activity, along with detailed step-by-step guide for each solution. You can opt for any above-mentioned solution to help you. If you want to choose a powerful screen recorder that can record remote computer sessions, online videos, meetings, music and more, I highly recommend Joyoshare VidiKit. You just need to download and install it on your computer.


