As a wonderful platform, Microsoft Lync provides users with a comprehensive communication solution. It facilitates both individuals and professionals to send instant message (IM), share availability information, have audio and video calling, make PowerPoint presentation, hold online meeting, etc. Given that you are a business operator, you may have a moment to look for a decent video capture and apply it to record Lync online meeting for later reviewing. Do not be anxious. This post will show you two feasible methods with quick guide about how to record Lync online meeting in high quality. Now, it's your time to have a look.
- Part 1. Record Lync Online Meeting via Third-party Software
- Part 2. Record Lync Online Meeting via Local Capture
Best Lync Online Meeting Capturing Program - Joyoshare Screen Recorder
Equipped with the most advanced screen capturing technology, Joyoshare Screen Recorder is commonly considered as a dedicated recording tool. It can be utilized to not only record Lync online meeting in high quality, but also grab any onscreen activity sparing no efforts. Essentially, it is available to take advantage of Joyoshare Screen Recorder for other usages, such as, capturing Amazon instant video, GoToMeeting webcam conference, Omegle chat, class lecture, Adobe Connect, etc.
Alternatively, both Lync video and audio can be grabbed well in perfect synchronization, meaning that any microphone sound and system voice can be recorded as well when a Lync online meeting recording is in progress. Joyoshare Screen Recorder also supports any common formats and popular devices, like WMV, MKV, MOV, HD MP4, AVI, FLV, SWF, iPhone, Andriod, Xbox, smart TV, etc. Furthermore, it enables you to select capturing area, change storage location, create recording task, add effects to cursor, manage captured files, etc.
Key Features of Joyoshare Screen Recorder:
Record Lync online meeting with few clicks
Customize capturing area as you like
Export Lync online meeting recording to MP4, AVI, FLV, SWF, MPEG, etc.
Support video-cutting and screenshot-taking
Have access to make a designated recording assignment
Can be shared to YouTube according to actual need

Step 1Install Joyoshare Screen Recorder on your PC
The first indispensable step is to finish the installation for Joyoshare Screen Recorder. Thus, you can directly double click the icon on your desktop screen to launch it.

Step 2Customize capturing area
To cater to different users' recording habits, Joyoshare Screen Recorder offers ability to determine capturing screen size in flexible ways. Press "+" button on "Capture Area" and adjust screen area by dragging the edge of the pop-up window. Of course, you can straightly click the drop-down menu and select a systematic fixed ratio, for example, 320x240, 640x480, 1280x720, full screen, etc. Furthermore, both specific height and width number can be entered to choose a screen size.

Step 3Head to recording options
Hit the gear icon on the right corner so that all recording parameters will be presented in main interface. It mainly consists of three parts, "Basic record options", "Record time options" and "Cursor options", which empowers you to choose output format, take screenshots, utilize shortcuts, preset recording task, highlight cursor, etc. Aside from what mentioned, Joyoshare Screen Recorder also allows you to decide whether to keep "System Audio" or "Microphone Sound" left. To disable it, you can remove unwanted intervention from your captured files. However, you will get a recorded Lync online meeting with audio as long as you open the system sound.

Note: If you are looking for an independent audio capture, Joyoshare Screen Recorder can come in handy as well. You have chance to draw support from it to record streaming music, online radio, music games and any other audio activity, which can be exported to MP3, AAC, WAV, FLAC, M4A and M4B.
Step 4Initiate a recording task for Lync online meeting
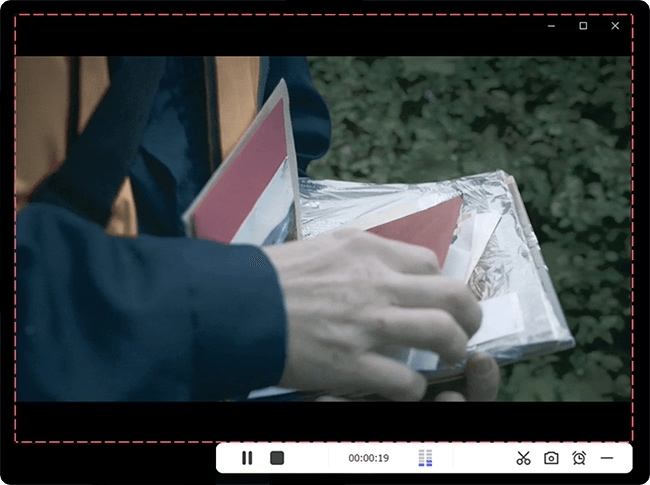
Run Lync and start an online meeting with others. Simply press "REC" button to let recording assignment begin. During the intervals of 3 seconds countdown, you are permitted to make adjustment for capturing area again. Upon the Lync online meeting is captured, it has access to take screenshot anytime and split video freely.

Step 5Edit Lync online meeting recordings
To verify whether the captured Lync recording is satisfying, you can preview it first. If it is imperfect, delete it and preserve delighting one. Joyoshare Screen Recorder also has the option of revising Lync recording's name and editing ID3 tags information.

Part 2. Built-in Handy Recording Tool - Lync Local Recorder
Frankly, the most convenient way to record Lync online meeting is to make use of the built-in Lync capturing tool. It's no wonder that this local recorder requires no third-party software installation and is straightforward enough to use. However, it also comes with some shortcomings. You cannot regard it as a professional recording tool with colorful capturing options owing to it is only developed for basic recording. Moreover, the recording feature of Lync is not designed by default, which may cost some time to change the setting and activate the recorder.
Step 1Make changes to recording settings
Go directly to "Lync Online Control Panel" > "Users" > "Display name" > "Edit user". Then "Bulk edit user settings" will be shown in your sight. Under the "IM, Audio/Video, and Conferencing", you have right to turn on or turn off features for user. Tick "Changes requested" and choose "Record calls and conferencing". After finished all these measures, you can verify the settings and hit "Finish". Hence, you don't have to repeat the operations again next time.
Step 2Start to record Lync online meeting
There are two methods available for you to initiate a Lync recording. Simply press "More Options" or "Actions" and then click "Start Recording" from the menu. Once you complete a Lync online meeting recording, you can click the red stop button located at the bottom of the meeting interface. The captured Lync files will be saved automatically as MP4 video on your computer.


