As a browser-based online web conferencing software, Livestorm is frequently used in business field for HD webinar and video streaming. It's convenient sufficiently so that you can adopt it flexibly to show product demos, hold live meetings, have online sessions, make presentations, and more. Sometimes, it is often not enough to take minutes during a webinar. Only saving the original video can the meeting be better reviewed and checked when needed. To make it, we are here and clearly show you how to record a Livestorm webinar.

- Part 1. Learn More about Livestorm
- Part 2. Save Replays in Livestorm
- Part 3. Record Webinars from Livestorm Using Livestorm Recorder
- Part 4. FAQs about Livestorm Recording
Part 1. Learn More about Livestorm
Livestorm is a webinar hosting and end-to-end video engagement platform that offers possibility for organizations to build real connections and have webinars anytime anywhere at scale. It sets a free plan for users to get started, allowing up to 4 people in instant meeting, 10 live attendees, maximum 20 minutes and 10 registrants per event. All features can be experienced and you can have unlimited events handily. It additionally gives a basic plan, €99 per month, to make each event up to 4 hours with 100 live attendees. Aside from webinars, Livestorm can help create interactive events, such as Polls, Chats and Questions, like a cork.
Part 2. How to Record Webinars in Livestorm
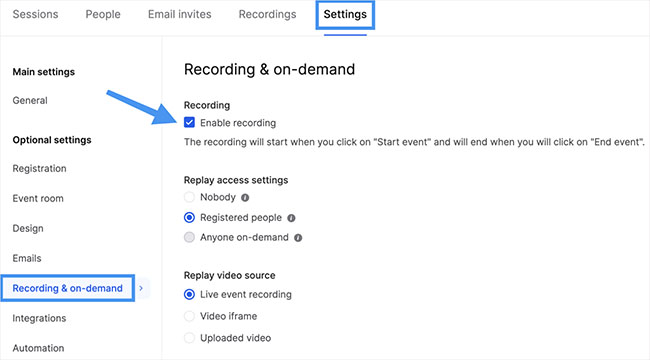
Livestorm develops a default option to save webinars and video conferences as recording files. It's simple to access, download and save the replay no matter you are attendee or host. Usually, "Enable recording" is checked in Livestorm by default in Settings > Recording & on-demand tab. If not, you should firstly finish setting it correctly. Then, when you "Start webinar", Livestorm Webinar Replay will automatically help begin the recording, which can be up to 4 hours and can be stopped when you "End webinar". You can later find and check it in "Recordings" tab. If you need it, you can "Download" it in MP4 format.

Part 3. Optimal Livestorm Recorder to Record Livestorm Webinars
The video replay of your events in Livestorm can reach a maximum of 1080p resolution, which however, can be easily impacted if you're disabled to upload an HD stream. This makes it a must to locally record webinars with professional 3rd-party software, such as Joyoshare VidiKit - Screen Recorder here. It lets your saved meetings in up to 4K resolution and 60fps. Also, there is an option to adjust output format and quality as you wish. Meanwhile, the sound generated from your Livestorm webinar, including the system itself and your own microphone, can be grabbed without delay.
- Record webinars from Livestorm, GoToMeeting, BlueJeans, Zoom, etc.
- Save videos in high quality with customized resolution
- Record Livestorm events in full screen or partial area
- Capture audio synchronously from microphone and speaker
- Output webinar videos in MP4, MOV, FLV, MPEG, MKV and more
- Adjust format parameters, trim, make a schedule, watermark and display clicks
Step 1 Open screen recorder in VidiKit
Download Joyoshare VidiKit from official website and you'll get the complete video toolkit. Install and quickly launch it on your computer. Then find "Screen Recorder" in this toolbox. It starts with "Record video and audio"
 mode when you open the program.
Step 2 Choose format and set audio recording options
Don't want to miss the point of the meeting in Livestorm? You can turn both system audio and microphone sound on with preset volume as you like. Then, move to the lower right corner and click on "Options" to finish more recording configuration, such as shortcuts, cursor, click, watermark, location, format, etc.

Step 3 Specify an area to capture Livestorm
How can you ideally fit for the webinar window in Livestorm during recording? Now open this meeting software in advance and hit "+" in VidiKit to get an area that you draw. You can set certain values for both width and height to lock. Or select one from the provided list.

Step 4 Start to record a Livestorm webinar
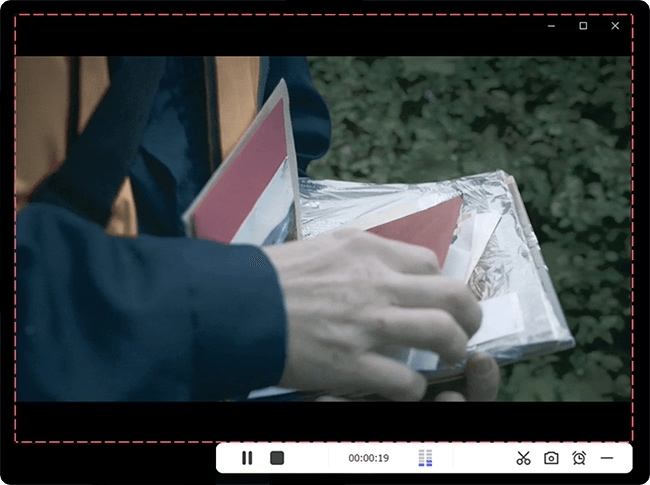
Get your Livestorm window ready on your desktop and hit "REC" in Joyoshare VidiKit to begin recording. During the given 3 seconds' countdown, it's doable to move the capture area again. Afterwards, you are able to start a webinar in Livestorm. The video and audio can be recorded in high quality. Also, there's no problem to cut and snapshot in the recording.

Step 5 Save and check recorded Livestorm video(s)
When you end webinar in Livestorm and press "Stop" in VidiKit, your recorded video will be saved to History window. It pops up and shows a list. You can edit, trim, rename, delete and play files to better check them.

Part 4. FAQs about Livestorm Recording:
1 What is the maximum number of people to attend Livestorm webinar?
It depends on your plan. If you are registered with a free plan, there are 10 live attendees in a webinar. However, for a paid plan, like €298 per month for one host, the maximum live attendee is 1000, while an Enterprise plan starting at 5+ hosts can support 3000 live attendee's access.
2 It is possible to host a pre-recorded webinar in Livestorm?
Yes. Livestorm offers a media upload feature to assist you in uploading your pre-recorded MP4 video. You can select "Go To Webinar" and schedule a webinar to upload it. Therefore, you can manually start a webinar and play this uploaded video during the meeting.
3 What is recorded?
Livestorm records whatever you share in the event, including both video and audio during the meeting, the uploaded media (MP4 and PDF files) and screenshares. However, the pop-up activities cannot be recorded and are only visible in the live event, such as live answers, sidebar (polls, questions, people, chat), and CTA's.
4 Who can watch Livestorm replay?
Replays are saved under "Recordings" in Livestorm and can be watched by registered participants. If you are a registrant and didn't join the live event, you can still get a link to watch the replay. Note that it depends on your "Replay access settings".


