As a classic presentation program, Microsoft PowerPoint has become an essential part of many people's daily work. To help you leave a lasting impression and make your presentation truly stand out, PowerPoint offers features like screen recording to create customizable slides. However, sometimes this practical feature might not work as expected. You may run into PowerPoint screen recording not working issue and see a message like "An error has occurred, please try again". What to do if this bad situation occurs? Don't look around. In this post, we'll walk you through some proven solutions to fix the recording error effortlessly.
- Part 1. Why Is My PowerPoint Screen Recording Not Working?
- Part 2. 9 Solutions to PowerPoint Screen Recording Not Working
- Solution 1: Restart PowerPoint
- Solution 2: Restart Computer
- Solution 3: Run PowerPoint as An Administrator
- Solution 4: Run PowerPoint in Safe Mode
- Solution 5: Initiate Quick Repair
- Solution 6: Update PowerPoint
- Solution 7: Uninstall and Reinstall PowerPoint
- Solution 8: Update Windows
- Solution 9: Record with PowerPoint Alternative – Joyoshare VidiKit
- Part 3. FAQs about Screen Recording Not Working in PowerPoint
Part 1. Why Is My PowerPoint Screen Recording Not Working?
It's undoubtedly frustrating when you encounter screen recording in PowerPoint not working. Actually, there are several reasons behind this issue. If you're having trouble figuring it out, you might as well check the possible causes first.
- 1. Outdated PowerPoint Version
- An old version of PowerPoint can carry out hidden bugs, cause compatibility problems, and result in recording errors.
- 2. Old Operating System
- An outdated or buggy Windows OS may also contribute to unexpected recording issues.
- 3. Permissions Not Granted
- Lack of administrative rights can restrict PowerPoint's ability to access certain functions such as screen recording.
- 4. Conflict with Other Applications
- Applications running in the background on your computer may interfere with screen recording.
- 5. Corrupt Installation Files
- If PowerPoint is not installed properly, some features like screen recording may fail to work.
- 6. Software Glitches
- Temporary issues within PowerPoint possibly hinder screen recording from functioning.
Part 2. 9 Solutions to PowerPoint Screen Recording Not Working
Now it's time for you to explore some workarounds to fix PowerPoint screen recording not working issue. All of them are basic and simple to operate. Just take a close look.
Solution 1: Restart PowerPoint
Sometimes, PowerPoint may experience temporary issues that are hard to discover and cause screen recording errors. In this case, rebooting PowerPoint application on your computer is effective. You can simply end it in your task manager and launch again to see whether screen recording functions in PowerPoint.
Solution 2: Restart Computer
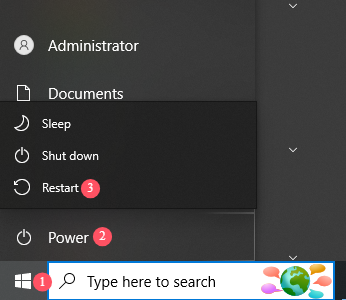
Restarting computer is a simple but feasible solution to fix screen recording not working in PowerPoint. This operation can help to quit all background tasks, refresh system processes, remove temporary errors, and resolve conflicts between different apps. To do this, simply click on Windows button → Power → Restart.
Solution 3: Run PowerPoint as An Administrator
Running PowerPoint as an administrator can work well to bypass potential restrictions and get all permissions from PowerPoint. In this way, you can record screen and audio smoothly.
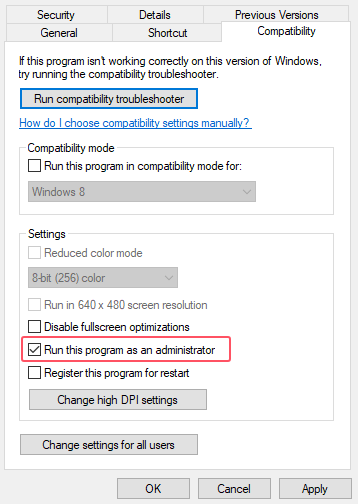
- Step 1: Right-click PowerPoint on the desktop and choose "Properties" option in the list.
- Step 2: Head to Compatibility tab on the top of the window.
- Step 3: Check "Run this program as an administrator" and confirm with OK.
- Step 4: Relaunch PowerPoint as administrator to see if screen recording works properly.
Solution 4: Run PowerPoint in Safe Mode
To make a clean startup and get screen recording feature back to normal, you are advised to open your Microsoft Office in Safe Mode. This can remedy some certain errors related to add-ons or extensions, especially when PowerPoint application crashes. Now, follow the steps below to open it in Safe Mode:
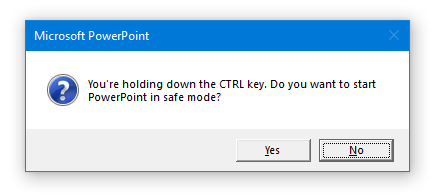
- Step 1: Press and hold the "Ctrl" on your keyboard, and then double-click PowerPoint shortcut icon on your desktop.
- Step 2: You will be asked whether to start the application in Safe Mode. Simple click "Yes".
Solution 5: Initiate Quick Repair
Microsoft Office is well developed with a built-in Quick Repair tool to fixes most issues easily without the need for an internet connection. This effectively resolves software issues and restores problematic files.
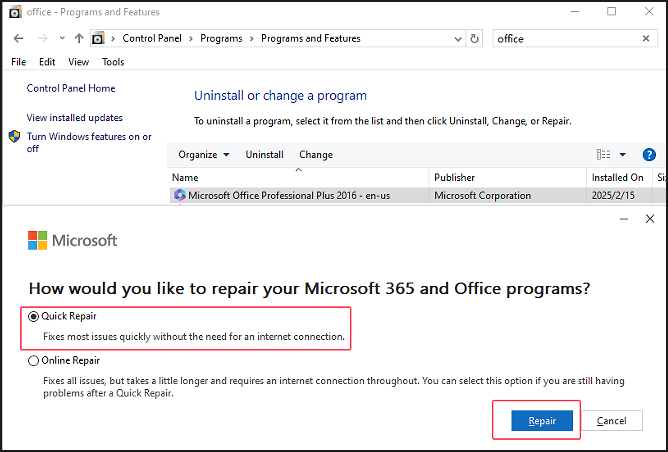
- Step 1: Open Control Panel on your Windows computer.
- Step 2: Head to Programs → Programs and Features and locate Microsoft Office.
- Step 3: Right click it and choose Change option.
- Step 4: Check Quick Repair and click Repair button to get it done.
Solution 6: Update PowerPoint
Don't forget to update your PowerPoint application when recording doesn't function well as usual. An old version may lead to software incompatibility and therefore some built-in tools fail to perform. To fix it, you can head to PowerPoint File → Account → Update Options under Product Information and then click on Update Now.
Solution 7: Uninstall and Reinstall PowerPoint
Based on some user practices and feedback, reinstallation of PowerPoint is also recommended. This helps to remove corrupted files and eliminate software bugs related to screen recording.
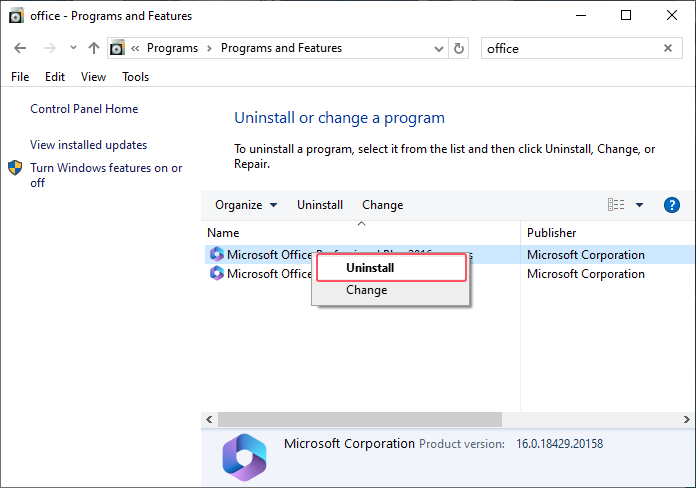
- Step 1: Open Control Panel on your computer.
- Step 2: Select Uninstall a program and search for Microsoft Office.
- Step 3: Right-click it and choose Uninstall option.
- Step 4: After a complete uninstallation, you can install the latest version of PowerPoint again.
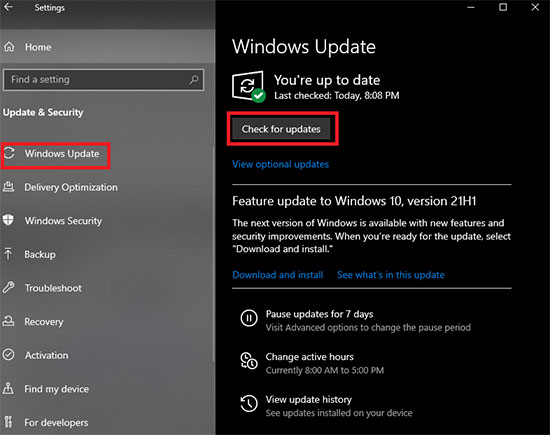
Solution 8: Update Windows
If the screen recording feature doesn't work in PowerPoint, you can try to update your Windows' operating system. This can ensure system stability and compatibility to PowerPoint. To do this, simply head to Settings → Update & Security → Windows Update → Check for updates.
Solution 9: Record with PowerPoint Alternative – Joyoshare VidiKit
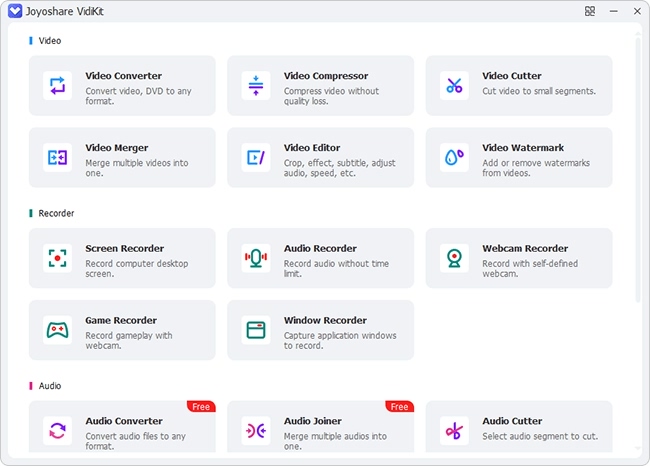
Suppose all afore-mentioned approaches cannot work, you're suggested to try another professional screen recorder. This PowerPoint alternative, Joyoshare VidiKit - Screen Recorder is capable of recording video with audio and saving them to mainstream formats. Aside from getting sounds from system itself, you're able to make narrations by grabbing your own voice from the microphone. It helps you set specific time to schedule task, annotate in real time, trim recordings and more.
- Record video on PC and Mac without frame drops
- Capture screen with audio and webcam simultaneously
- Record full screen, customized region, or specific window
- Add annotations in real time during recording
- Trim recording files into smaller segments for further insertion
Step 1 Get screen recorder started in VidiKit
Download and install the newest program of Joyoshare VidiKit from official website. Then enable Screen Recorder in this video toolkit under Recorder section.

Step 2 Active audio and available recording options
Access to audio section, turn on system and microphone sound, and change volumes based on your actual needs. Hereafter, take a further look at the gear "Preferences" to select output format, preset parameters like resolution, frame rate and more.

Step 3 Pick up a capture area
Choose where you're going to record by clicking the "Select area to record". You can draw a region directly and move it to an optimal position. Or you can select a standard and common ratio from the default drop-down list. It's also viable to lock width and heigh according to your pre-set values.
Step 4 Begin screen recording with audio
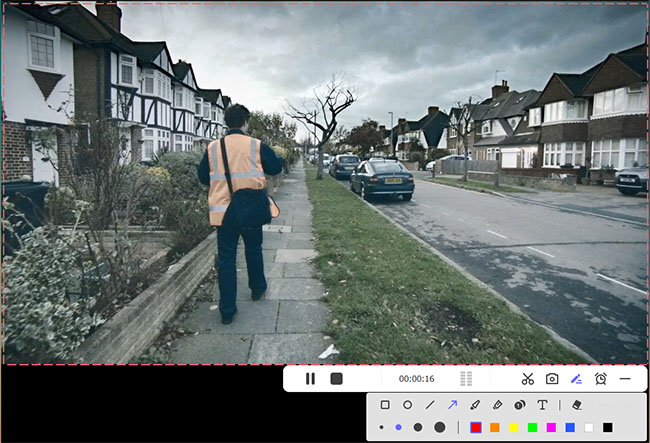
Click the "REC" button and Joyoshare VidiKit will start to capture ongoing activities on your designated screen area. Using tools in the floating recording menu bar, you can cut, annotate, snapshot, pause and stop.

Step 5 Save recorded videos
The recording process will over as long as you hit the "Stop" button. Soon after, a History window will show on the desktop to let you easily rename, trim and preview all recordings.


Part 3. FAQs about Screen Recording Not Working in PowerPoint
Q1: Why does PowerPoint not save screen recording?
A: Your screen recording file may not be saved due to insufficient disk space or a corrupted PowerPoint installation. It's suggested to free up disk space on your computer or repair the installation of Microsoft PowerPoint.
Q2: Why is my PowerPoint screen recording greyed out?
A: If you run PowerPoint in Safe Mode or there are conflicting add-ons, the screen recording option in PowerPoint may be greyed out. To fix this, try to relaunch PowerPoint in normal mode and disable add-ons.
Q3: Why does my PowerPoint screen recording have no sound?
A: If the microphone is not selected, microphone is muted, permissions of microphone are not granted, or audio settings are configured incorrectly in PowerPoint, your screen recording may have no sound. You should check the microphone settings again and ensure microphone access is enabled.
Conclusion
By following the solutions outlined in this article, you should be able to find out possible causes behind PowerPoint screen recording not working and troubleshoot the issue effectively. If none of these solutions work, consider using a third-party screen recording tool, such as Joyoshare VidiKit mentioned above, as an alternative. Create desired content on your screen and make your PowerPoint presentation more engaging.
