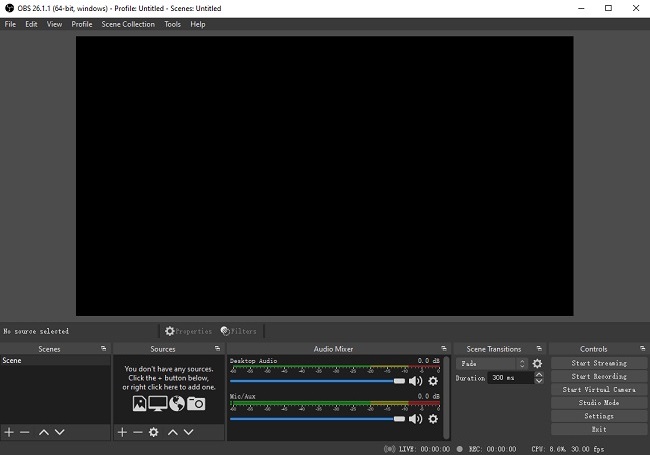
It is known that OBS (Open Broadcaster Software) is a screen recorder that can help you record video with audio expertly. It is a free resource to be downloaded, which is compatible with various operating systems, such as Windows, Mac, and Linux. Also, it can record videos in real time and edit videos. So how to record with OBS when you want to saved or downloaded online tutorials, live games, streaming music, etc. that are not allowed due to some limitations? Below is a simple and clear instruction to guide you on how to use OBS to capture video and audio.
Part 1. How to Use OBS Screen Recorder to Record Video with Sound
Now, you already have known some basic functions of the OBS screen recorder. Let's see how to use it to capture the screen on your PC.

Now, you can record your screen after the above setting. Clicking the "Start Recording" button and OBS will start recording according to your setting. Then you can click the "Stop Recording" button to stop. Also, you can set up hotkeys via the Settings menu to start or stop recording. Finally, you can find the destination files by clicking the "File" on the top left corner and select the "Show Recordings" on the drop-down option.
Step 1 Download the Open Broadcaster Software
Download the OBS from its official website. Please select the compatible version according to your computer's operating system. You may be confused by the black screen and many hotkeys when you run the program for the first time. There are two terms you need to know. The first one is "Scene" that means how the final captured video will display. The second one is "Sources" that means where the video will be from.

Step 2 Set Up OBS before Recording
You will be asked if you want to run the setup wizard when the OBS is opened for the first time. You can set it up intelligently or manually. If you want to customise by yourself, please follow below steps:
Reject the offer for help;
Click the "Plus" icon on the Sources window and select the "Display Capture" option;
Select the area of the screen by pressing "Ctrl" on the keyboard and dragging the mouse;
Click the "Plus" button on the "Source Window" and select "Audio Output Capture" or "Audio Input Capture" if you want to record the sound from system and your microphone;
Click "Ok" button that means you finish the setting.
Part 2. The Best Alternative of OBS - Joyoshare Screen Recorder
After learning how to record screen with OBS, you may find it is not very easy to operate considering it is a bit complicated. Thus, we would like to recommend an alternative to OBS for you - Joyoshare Screen Recorder.This desktop recorder can be used simplly because of its intuitive interface. It can capture any screen videos, including live games, lectures, streaming music and so on.
Besides, you can save the recordings in various formats, such as MKV, AVI, MP4, etc. in high quality. What's more, it owns other serviceable functions like insert watermark, trim recordings, set shortcut keys, take screenshot, highlight cursor and many more.
Key Features of Joyoshare Screen Recorder
Easy to use with the simple and clear interface
Record screen with or without audio as you like
Convert recordings into many formats in high quality
Add a watermark, show or hide the cursor and other properties

Conclusion
To sum up, the above instruction guides you on how to record screen with OBS in 4 ways. You can record your desktop with it professionally. However, if it is hard for you to capture screen on your PC via OBS, you can try to use an alternative - Joyoshare Screen Recorder. The operation of it is simpler and the recordings of it are high quality.

