Q: "How do I record on Nintendo Switch for more than 30 seconds without a capture card?" - From Quora
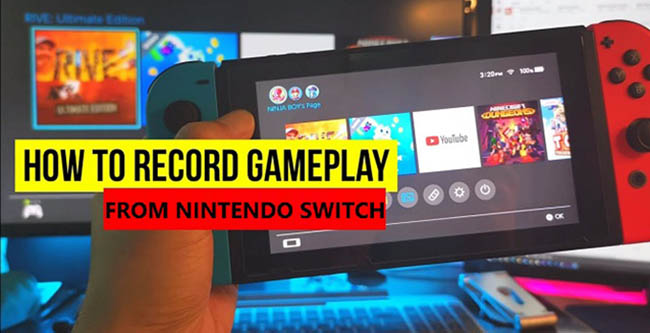
Want to show your friends and YouTube fans what you are doing in games? A game recorder comes in handy when you would like to record gameplay and share your memorable win. In the past, we have introduced how to record gameplay on Nintendo home and handheld consoles like Wii, Wii U and 3DS. And today, we will continue to show you how to record Switch gameplay with or without a capture card. Though Switch itself is able to record whatever happens in the past 30 seconds, sometimes it may be far from enough. Read on to find out up to five hassle-free ways to record gameplay with ease.

- Part 1. Record Gameplay on Switch (30 Seconds)
- Part 2. 3 Tips about Capturing Game on Switch
- Part 3. Use Joyoshare VidiKit (No Time Limit)
- Part 4. Use a Capture Card
- Part 5. Use AnyMP4 Screen Recorder
- Part 6. Use EaseUS RecExperts
- Part 7. FAQs about Recording Switch Gameplay
Part 1. How to Record Gameplay on Switch Directly
It is amazing that you can directly record gameplay on Nintendo Switch by pressing a single button. But be aware that to capture Switch gameplay, you need to update the compatible software to the most recent version. Additionally, Nintendo Switch will record gameplay for no more than thirty seconds.
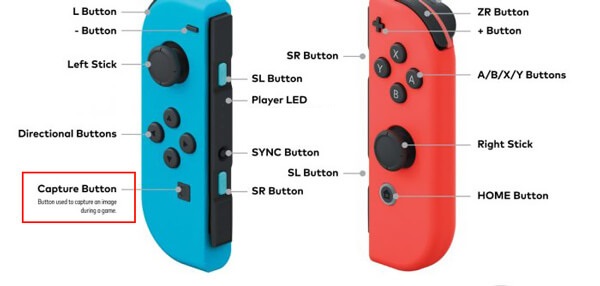
- Step 1: Open a compatible game on your Nintendo Switch at first. Find the square button which can help you capture gameplay in the left Joy-Con. Next, press and hold down the Capture button for a while, a square button on the left.
- Step 2: Switch will automatically save on your 30-second recording clips in the Album. To access your gameplay clips, you can click Album button on the system home page. Also, all the screenshots and footages can be found here.

Part 2. More Tips about Recording Gameplay on Switch
1 Transfer Switch recorded video to PC/Mac
- Step 1: Prepare an SD card to store your videos and screenshots and an SD card reader to read and transfer the files to your computer.
- Step 2: To copy your files on your Switch to SD card, head to Switch interface, click the gear icon and select Data Management - Manage screenshots and videos, then click A button and press Skip. Navigate to Album and highlight the files, then click A and press Copy in the pop-up menu.
2 The quality of video recorded on Switch
The resolution of video that you record on Switch is fixed at 720p, 30 FPS. You can record gameplay on PC if you want to get a high-quality video.
3 What games can be recorded on Switch?
There are 4 games that support video gameplay recording, including Legend of Zelda, Breath of the Wild, Mario Kart 8 Deluxe, ARMS, Splatoon 2, which means that probably more than 99% gameplays on Switch can't be captured. And 3000+ games are not compatible with its built-in recording function.
Part 3. Record Switch Gameplay - Joyoshare VidiKit
Joyoshare VidiKit - Screen Recorder supports a large variety of devices and output formats, including mobile phones, smart TVs, MP4, MP3, WMA, AAC, FLV, SWF, FLAC, OGG, WMV, HEVC, WebM, DV, DivX, etc. More than that, many parameters like codec, resolution, quality, bitrate and frame rate are adjustable. Saving fast-paced game videos in high quality is important in gameplay recording. And that's what Joyoshare VidiKit is good at. Featuring leading recording technology, this software will allow you to record watermark-free games in up to 4K with no lag at all. Additionally, you can use the embedded editor to customize your Switch gameplay recordings instantly and perfectly.

- Capture gameplay in high visual quality with or without sound
- Record Switch games with no time limit and no watermark
- Offer embedded video editing tools to stylize saved gameplay
- Grab the entire screen or any on-screen area you like to record
- Record gameplay on Nintendo Wii, Xbox 360, PS3/4, and more
Step 1 Install and Run Joyoshare VidiKit
First of all, connect your Switch to computer to show your gameplay on the computer screen. After that, you can download and install either the Windows or Mac version of Joyoshare VidiKit. After running the software, you need to press the "Record" panel to activate the screen recording utility. Make sure that the
 icon is enabled so that you can record Nintendo Switch gameplay with sound from computer system or microphone.
Step 2 Set Related Settings
What comes next is to custom gameplay recording settings according to your needs. The settings windows can show up after clicking the little icon on the main interface. During this step, you will be able to set your output format, add a personal logo, set the start/end time of your gameplay recording, show and highlight cursor to record mouse movement, and more.

Step 3Select Capturing Area
There is a "Capture Area" section on the main interface. Find it and press the "+" icon to activate the capturing frame. You are capable of dragging and adjusting it to grab any area you want to record. Alternatively, you can also click on the little triangle icon or set the width and height of the frame manually to select recording region.
Step 4Record Switch Gameplay and Edit Video
Having open the gameplay you want to record and save, gently tap the blue "REC" button to start to record Nintendo Switch game videos. You can find a minimized toolbar outside the dynamic capturing frame. The "Pause" button can be used to remove unwanted content, the "Cut" button to cut saved gameplay into several parts and the "Stop" button to quit recording. When the History window shows up, you can play your recorded game clips using the inbuilt media player and rename them if you like. You are also free to click on the "Edit" icon to cut videos.

Part 4. How to Record Nintendo Switch Gameplay Using a Capture Card
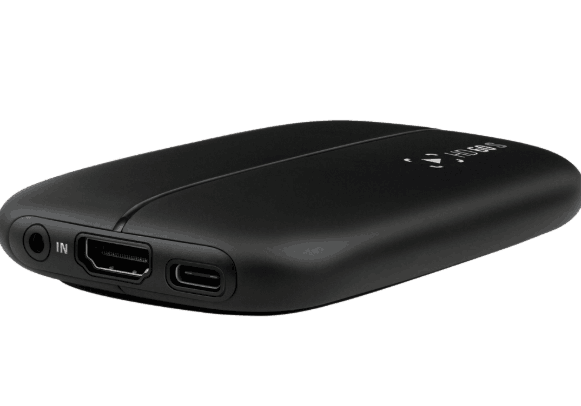
If you have a capture card, then it would be great, as it means that you can record Switch gameplay swiftly and even stream in TV mode. A bit pricey as a capture card is, using it will be well-worth your money since you can stream off almost any gaming console using your computer. In this part, we are going to take Elgato Game Capture HD60 S, a really sought-after product, as an example and show you how to hook up your Nintendo Switch to it so that you can use it to record gameplay from Nintendo Switch smoothly.

- Step 1: Connect the HDMI "OUT" port of the Nintendo Switch Dock with the HDMI "IN" port of the Elgato Game Capture HD60 S;
- Step 2: Link the HDMI "OUT" port of the Elgato Game Capture HD60 S with the HDMI "IN" port of your monitor using the second HDMI cable;
- Step 3: Link your Elgato Game Capture HD60 S to your computer using USB cable and insert your Switch into the Nintendo Switch Dock;
- Step 4: Install and run Elgato Game Capture HD tool to record your Switch gameplay that is displayed on your computer screen.
Part 5. How to Record Switch Gameplay on PC - AnyMP4 Screen Recorder
AnyMP4 Screen Recorder is one of the best choices for you to record Switch gameplay or any other screen activity if you like. It supports a webcam, so you are able to record yourself speaking while displaying your computer screen at the same time. With this screen recording program, you can have enjoyable recording experiences as it will help you record games on Switch in better output quality and save in various formats without sparing efforts.

Key Features:
- Record webcam and take screenshots on Windows and Mac
- Save live streaming videos from Facebook, YouTube, etc.
- Record gameplay videos in HD with sound from different sources
- Step 1: Connect Nintendo Switch to computer and launch AnyMP4 Screen Recorder;
- Step 2: Choose "Video Recorder" on the left side of the screen after opening the main interface;
- Step 3: Customize related settings based on your needs, such as custom recording area, enable microphone device, adjust volume, etc.;
- Step 4: Having open your Switch gameplay, you can press the "REC" button on the right side of the screen now to begin to record it;
- Step 5: Preview the recorded Switch game videos and edit it in the way you like, and next, you will be able to save it to your computer as MP4.
Part 6. How to Record Switch Gameplay - EaseUS RecExperts
To record gameplay from Switch using EaseUS RecExperts easily, you need to connect your Switch with PC/Mac via an HDMI cable in advance. This program allows you to record audio, video, webcam, image and add voiceover to your gameplay videos. Also, you can set time to begin or end a recording process automatically. After recording, the editing functions in this tool like trimming, adding intro, adjusting volume make it easy to elevate your videos.

Key Features:
- Capture gameplay in full-screen or selected area as you want
- Record Zoom meetings, tutorials, games, YouTube videos,etc.
- Save your recorded video as GIF for business and entertainment
- Step 1: Plug HDMI into your Nintendo Switch and computer. Install and activate EaseUS RecExperts on your device.
- Step 2: Customize your recording area by clicking the Region button in the main interface.
- Step 3: Also, you can configure more settings like format, frame rate, quality and more by heading to the General tab.
- Step 4: Click the REC button to begin the recording process. After recording process, you can edit your video with its editing features.
Part 7. FAQs about How to Record Switch Gameplay
1What is a capture card for Switch?
Capture card, a hardware device, is provided for users to capture gameplay videos from Switch. It can convert the signal from your Switch into a digital format recognized by your computer.
2 What are the benefits of recording Switch on PC/Mac?
Time limitation is a well-known drawback if you record gameplay on Switch. You can record video without time limit on PC/Mac and get a high quality recordings no lag.
3 Are capture cards necessary for streaming?
Nope. You can stream your gameplay on your PC after connecting your device with computer using HDMI cable.
4 How to trim or edit a saved game video?
- Step 1: First of all, select Album - All Screenshots and Videos with the HOME menu;
- Step 2: Select the video you want to edit, and then go to Editing and Posting - Trim;
- Step 3: You can adjust the start/end of the video by sliding the marker;
- Step 4: After that, press Save and the edited video will be saved as a new one.
5 How to save a screenshot from a saved game video?
- Step 1: Similarly, select Album - All Screenshots and Videos after opening the HOME menu;
- Step 2: When the video playback begins, you are able to press "Y" to pause the video;
- Step 3: After that, you can go to Editing and Posting - Save as Screenshot.


