Q:"Question everyone, what's the best screen recording software to use when you want to create speedpainting video?" - From Reddit
Generally speaking, in order to improve the drawing ability, skills and creation efficiency, digital artists will complete the work in a limited time through speed painting. Such frequent practice can effectively raise your drawing level. But how can you better discover the problems and neglected details in your painting process and improve it? Or how to share your art pieces visually with others? As mentioned above, you may ask whether there is any screen recording software for speed painting. Relax. You can learn popular speedpaint recorders here.
- Part 1. Record Speedpaints with Joyoshare VidiKit (Screen Recorder)
- Part 2. Record Speedpaints with QuickTime
- Part 3. Record Speedpaints with OBS
Part 1. How to Record Speedpaints - Joyoshare VidiKit (Windows, Mac)
Joyoshare VidiKit - Screen Recorder is one of the best programs to record speedpaints in high quality. Its simple interface allows anyone to operate independently and complete the entire recording task without any difficulty. You can freely capture your painting process no matter how big the area is, like full screen, standard ratio or customized size. Importantly, it's available to set shortcut to take snapshots, add unique watermark, highlight cursor and clicks to ideally track and record key points in the paintings.

- Capture speedpaints in full screen or systematic ratio
- Spotlight cursor movements and clicks
- No recording time limit and no lag for painting capture
- Schedule screen recording for speedpaints in advance
- Take snapshots to save vivid drawing pictures
- Options to grab audio, adjust parameters, add watermark and trim
Step 1 Download Joyoshare VidiKit for Speedpaints
Finish downloading, installing and running the official program of Joyoshare VidiKit. Then you can open up its "Screen Recorder" tool to start with "Record video and audio" mode.

Step 2 Set a painting area to capture with
You're supposed to firstly confirm an area in your computer screen. According to the actual speed painting region, you can click "+" button under Capture Area to zoom in and zoom out flexibly. You can directly select a fixed size from the drop-down box or set specific values yourself.

Step 3 Configure sound source and more settings
Consider whether to capture audio from your microphone or system. You can click to enable or disable the sound and adjust its volume. Furtherly, press on the gear "Options" button at the right bottom to show clicks, highlight cursor, set shortcuts, choose output format, change file location and add image watermark. To better record a speedpaint, you can also schedule to start it automatically.

Step 4 Start to record a speedpaint
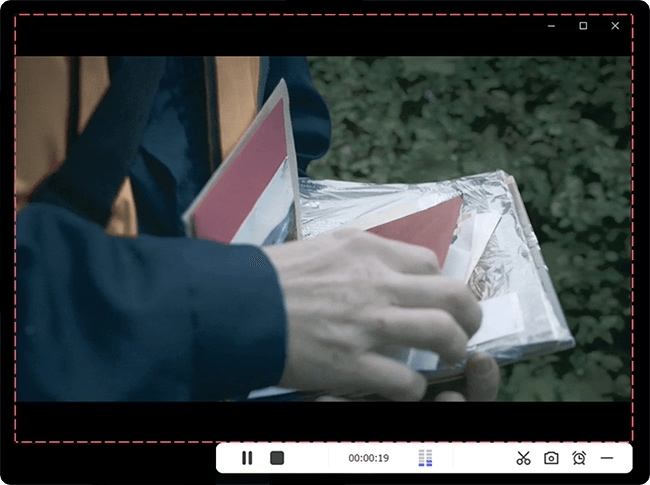
Go to click the blue "REC" button to record a speedpaint on your computer. If you feel that the capture area is not very suitable, you can adjust it in the 3-second countdown. Then trim take screenshots, trim video or pause to skip content in the process.

Step 5 Save and edit recorded speedpaint video(s)
After you complete the drawing, you can click on "Stop" button to save your recorded speedpaint video(s). Next, a History window will pop up to let you preview, rename and trim it.

Part 2. How to Record Speedpaints with QuickTime (Mac)
Are you using a Mac computer to create speedpaints? If you'd like to record your drawing process on Mac straightly and easily, you might as well try its preinstalled app - QuickTime. Aside from serving as a media player with basic video editing ability, it can also function well to help record your screen on Mac. Now let's see how this freeware works to record speedpaints by following steps below.
- Default app on Mac without installation requirement
- Simple to use with clear layout
- Record speedpaints and more screen easily
- Guide:
- Step 1: Spotlight search "QuickTime Player" on your Mac to get it launched;
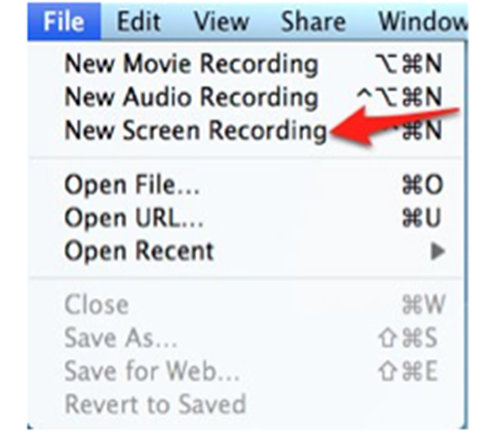
- Step 2: Go to click on "File" > "New Screen Recording" on its top menu;
- Step 3: Grant access to QuickTime and give permission to record your Mac screen on System Preferences;
- Step 4: A recording window will be shown after you click New Screen Recording. You should select an area to capture your speedpaints;
- Step 5: Get ready to paint and click on "Record" button to begin recording;
- Step 6: Hit stop button to end your recording and go for "File" > "Save" to export your finished speedpaint video.

Part 3. How to Record Speedpaints with OBS (Windows, Mac, Linux)
As the name suggest, OBS (Open Broadcaster Software) is a typical open-source with the capability to record different screen activities, such as external and internal audios, webcams, browser windows, streaming videos, etc. You can apply it to record multiple scenes at the same time and configure options as you like. Surely, it can be used as a screen recorder for speedpaint here.
- With real-time audio and video recording and mixing
- Record different sources and scenes easily
- Offer abundant configuration options and hotkeys
- Free to record speedpaints in high quality
- Guide:
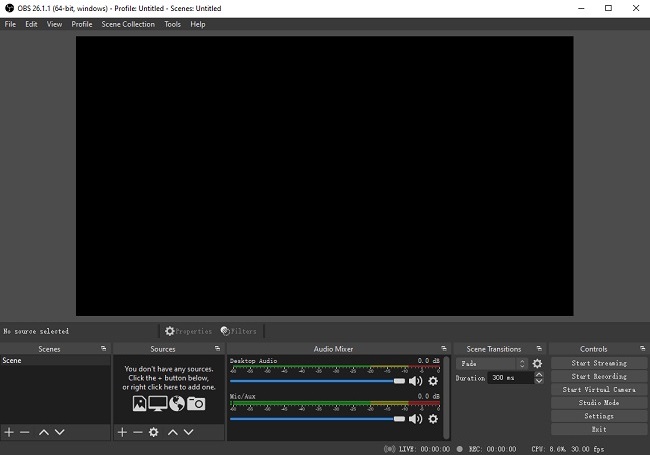
- Step 1: Open OBS on your computer;
- Step 2: Press on "+" under the "Source" tab, select "Window Capture" mode, and choose your drawing program;
- Step 3: Now prepare to draw and initiate the recording process with "Start Recording" option;
- Step 4: Click on stop button to complete recording and save your speed paint video.


