Do you want to live a life that you dream of? Do you intend to be anyone that you want to be? Do you wish to choose whatever career you want? If yes, the Sims 4, video gameplay, can satisfy you. In this game, you can build your own house, create characters, raise a family, and so on. In this social simulation game, you can have your own emotion and personality to enrich the character. That's the main reason why most of users wonder how to record Sims 4 gameplay, which as a result, easily keeps special pieces of life in the game. Right here, we will show you the way to reach there.

Part 1. How Does Sims 4 Record Video - Built-in Camera
To let you record the clips in the Sims 4, and create a personal memoir video, the developer adds a recording function to the game. It can record your growth history and special moments from the game for a certain amount of time. There is no complicated steps. Let's operate and get it to work for you.

Step 1: Load Sims 4 on your computer. Confirm the recording option – "Game option/Video capture". Please select "High" or "Not Compressed" if you desire the best quality to output videos. To avoid grabbing the sounds of click/pause, you'd better disable "UI Sounds".
Step 2: Press TAB on your keyboard to activate free camera mode and remove your UI. This can make you capture the scenes more flexibly. You can utilize the mouse to look around. Press on W, A, S, and D to move the camera, Z and X to zoom in or out, Q and E to up and down camera. Don't forget to press 0, 1, 2 and 3 to control time speed. The higher the level, the faster the speed.
Step 3: To start recording unique stories on Sims 4, you need to press "V". When you want to stop, tap the same V again. Finally, you can find the video in "Documents\Electronic Arts\The Sims 4\Recorded videos".
Part 2. How to Record Sims 4 Gameplay with Voice - VidiKit
Indeed, the built-in camera of Sims 4 only can record the scenes at a certain time. Additionally, some gamers give feedback that the default recorder cannot capture the build and buy section. To remedy these shortcomings, a third-party gameplay recorder is required. As an all-around toolkit, Joyoshare VidiKit - Screen Recorder can help you capture all activities on the screen without time limit. You can use it to record all scenes in Sims 4.
This software is smart and easy-to-use. It allows you to record video and audio simultaneously and separately. You can convert and save the game video in any formats, such as MP4, MOV, 4K Video, AVI, FLV, WebM, MKV, WMV, OGV, 3GP, etc. Therefore, you can watch and share the converted recordings in various devices and social media platforms. Beyond that, you can add a watermark on your recording and the capture area is changeable. You can record the game in full screen or partial screen.

- Record gameplay smoothly with unlimited recording time
- Grab audio and in-game sound from system and microphone
- Pause whenever you want to only record wanted scenes from Sims 4
- The quality can be customized and frame rate can up to 60fps
- Allow to preset shortcuts and schedule recording time
- Gamers can watermark, take screenshots, designate capture area and trim video quickly
Step 1Run Joyoshare Sims 4 Recorder
Launch Sims 4 on your computer. Open Screen Recorder in Joyoshare VidiKit and select "Record video and audio" mode, which is next to the "REC". Enable or disable the system audio and microphone audio according to your demand.

Step 2Confirm the capture area
Click on the + icon to select the recording area. You can adjust the recording size by inputting value or directly dragging the frame. Also, you can choose a presetting resolution from the drop-down list.

Step 3Personalize further settings
In this step, you need to find the gear icon at the low right corner and click it. Then you can change the output format by clicking the "Format" button under the "Basic record options". Set shortcut key to start and stop capture. You can also preset a schedule to start and stop the recording. Adding watermark with an image and highlighting cursor is doable.

Step 4Start to record Sims 4
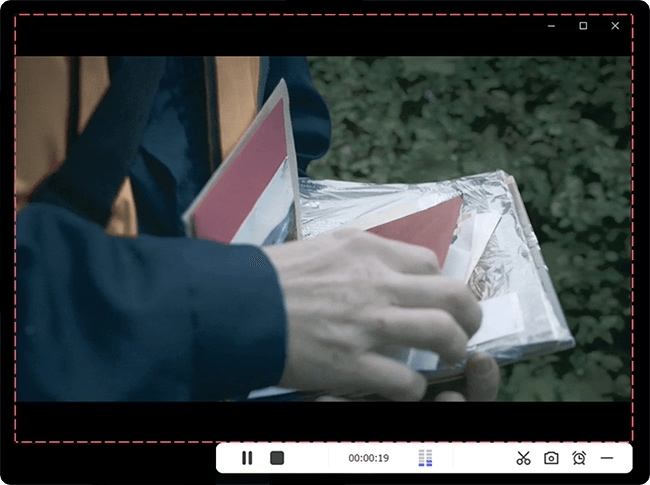
After that, you can click "REC" to capture Sims 4. The recording will start after the 3-second countdown. Then a small toolbar will appear. During the recording, you can click "Pause" to skip unwanted parts. Select the shape of scissors to trim the video. Once the recording is complete, you can tap "Stop" to end the recording. The "History" window will pop up to show the gameplay video. You can trim and rename it.

Part 3. How to Record Sims 4 with OBS
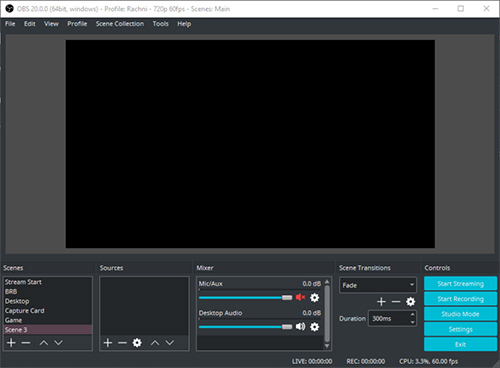
OBS stands out from all sorts of free tools. As an open source, it well runs on popular operating systems including Windows, Mac and Linux. What makes it remarkable are abilities of recording and streaming. Besides, it enables you to record Sims 4 gameplay with audio easily, offering possibility to capture an unlimited number of scenes. You can even apply transitions it provides to naturally combine scenes. There are even virtual camera you can use and more settings to enhance your videos.

Step 1: Get OBS run on your desktop. Then you have to finish setting up both Scenes and Sources at the bottom of its main interface. Simply name your scene, click on Sources to create a new one, and here you need to choose your Sims 4 Game. Confirm that you capture this game in full-screen recording mode.
Step 2: Go to Settings and set bitrate, quality, resolution, FPS, format and more as you wish. Don't check "Use CBR" option.
Step 3: Now begin playing Sims 4 game and you can click on "Start Recording" in OBS to record scenes from it. Once the content you want is captured, you can end to save the recording with "Stop recording" option.
More to learn here: Record Games with OBS
Conclusion:
Here what you can learn are some popular ways on how to record Sims 4 gameplay. You can use the built-in camera to capture memorable scenarios in this game or apply the free open source software - OBS to keep multiple scenes. If you prefer a screen recorder without time limit that is quite simple to operate, Joyoshare VidiKit can be the one. Anyway, enjoy your game and record important moments for your sharing and later recalling!


