It is known that Overwatch is an online shooter game that assigns players into two teams of six to have a match. Both teams need to protect their own control points. As a gameplay enthusiast, you may wonder how to record Overwatch gameplay to show your performance during the game. Apart from saving the video to analyze your footage, recording can also be useful if you want to share a tutorial video on Twitch. Under these conditions, using a screen recorder to capture Overwatch not only improves your gameplay skill but also potentially makes you famous in the game field. So, don't hesitate. Just try to use the following tools to record Overwatch.

- Part 1. Joyoshare VidiKit - PC/Mac
- Part 2. OBS - PC/Mac
- Part 3. ShowMore - Online
- Part 4. Record Overwatch on PS4
- Tips for Recording Overwatch with High Quality
- Detailed Comparison Chart about Overwatch Recorders
Part 1. How to Record Overwatch with Joyoshare VidiKit [PC/Mac]
Joyoshare VidiKit - Screen Recorder is good at capturing screen with audio and outputting the video with high quality. It is easy for you to use it to capture Overwatch on your Mac or Windows computer. It supports export recording in various formats, such as MP4, WMV, AVI, MPEG, MOV, M4V, WebM, etc. You can save the recording on any compatible devices, like iPhone, iPad, Xbox One, Xbox 360, Nintendo Wii, PSP and so on.
It allows you to record Overwatch gameplay with a full screen or selected screen. You can record all actions on your desktop with or without audio. It can highlight the cursor and the clicks. You can also utilize it to add a watermark on your recordings. Scheduling recording time and setting shortcut keys are available. Besides, as a professional gameplay recorder, this program can help you reset the codec, resolution, frame rate, bitrate, and quality of the video.

- Record all activities on the screen with high quality
- Save gameplay video as MOV, MP4, AVI, etc.
- Grab voice from the system and microphone
- Capture screen with full screen or partial screen
- Customize quality, resolution, frame rate, bitrate
Step 1Run best recording software for Overwatch
Open Overwatch on your computer. Then get Joyoshare VidiKit working. Next, select "Record video and audio" mode by clicking the camera icon beside the "REC" after selecting Record → Screen Recorder. Then, you can choose to enable or disable the audio from the system and microphone, depending on your requirements.

Step 2Personalize the recording setting
After confirming the recording mode, tap the gear icon at the low right corner. You will see a new small tab, including "Basic record options", "Record time options" and "Cursor options". In this window, you can change the saving format and shortcut keys. Also, you can set the start time and stop time to record Overwatch. Add a watermark to prevent pirating without permission. It is doable to show or hide the cursor.

Step 3Adjust recording area and audio
Tap the "+" icon to select the area to record. You can adjust the capture area by dragging the frame, inputting value, and selecting the presetting resolution from the drop-down list.

Step 4Start to record Overwatch gameplay
Everything is done. Press the "REC" button to capture Overwatch. It will start the recording after the 3-second countdown. During the process, you can trim and skip any disliked parts. Click the "Stop" button to finish the recording. Then you can rename, trim, and preview the video.

Part 2. How to Record Overwatch with OBS [PC/Mac]
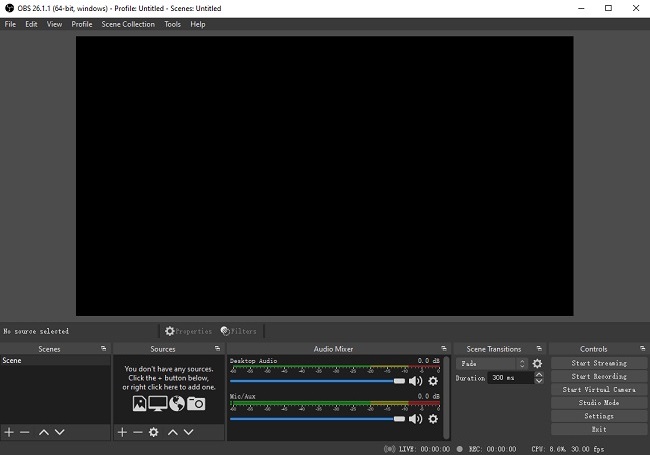
As we all know, OBS (Open Broadcaster Software) is an advanced video editor that is packed with multiple customizable functions to enhance your video. In fact, it also provides feature to record all contents on Windows, Mac and Linux with customized frame rate, bitrate, capture region, format, channel and many more. Also, with the assistance of OBS, you can live stream and share the video to social websites like YouTube, Vimeo, Twitter, etc.

- Step 1: Download and initiate OBS on computer. Then set new scenes and choose sources by clicking little plus icon. Choose "Game Capture" from the pop-up list.
- Step 2: To set your desired recording area, simply hold Ctrl button on your keyboard and drag the mouse. Full screen is default recording area in OBS if you don't change it.
- Step 3: Play Overwatch as usual on computer. Click the Start Recording to begin the process. Stop Recording button is used to finish the recording.
Part 3. How to Record Overwatch Gameplay with ShowMore [Online]
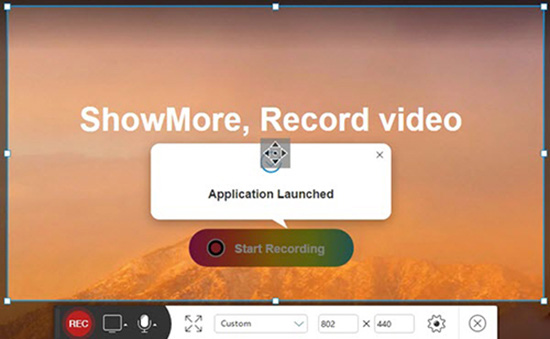
If you are not fond of downloading software on your computer, you can try to use ShowMore, an online screen recorder. With this tool, you can easily record Overwatch. In addition, ShowMore offers cloud storage space for you to store all the videos. You can directly share the videos on various social media platforms. It has an editing function, which allows you to draw and add shapes to the video. It can grab the system as well as the microphone voice.

- Step 1: Launch Overwatch. Open a browser and visit ShowMore's official website. Click "Start Recording". Then a pop-up window will show up and ask "Do you want to allow this app to make changes on your device"? Select "Yes";
- Step 2: Allow to open ShowMore Online Launcher. Next, you will see a blue square frame appearing on your screen. You can drag it to adjust the recording area. Select to whether record audio from the system and microphone or not by tapping the microphone icon on the toolbar;
- Step 3: You can customize the recording setting on the "Option" window;
- Step 4: Click the "Record" button to start recording Overwatch. Once you finish the recording, you can choose to save the video to local or ShowMore.
- Note: You need to sign up to save the video and the output formats are limited. Besides, the recording video will be added ShowMore watermark.
Part 4. Best Way to Record Overwatch on PS4
If you have browsed the official website of Overwatch, you will find that this game is compatible with Xbox One, Nintendo Switch and PS4. No wonder there are many users who search for the answer to how to record Overwatch on PS4. Indeed, it is effortless to do that as a screen recording feature is placed in PS4 for users to record all gameplays. However, it only provides limited features. If you want to get gameplay recordings with amazing effects, a capture card is essential for you. Also, you can utilize two methods to capture gameplay, which are expounded in detail below.

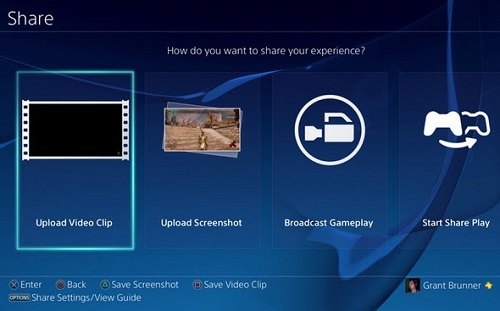
- Step 1: Open PS4 and configure the settings by heading to Settings. Now, open Overwatch on PS4 and enjoy it.
- Step 2: If you want to record ongoing moment, merely press SHARE button twice. Press SHARE button twice again to finish recording. Recording previous Overwatch gameplay can be performed by pressing the SHARE button once and PS4 will save last 15 minutes by default.
- Step 3: To check the recorded clips, press and hold SHARE button.
Warm Tips for Recording Overwatch with High Quality
If you want to capture high-quality Overwatch gameplay footage, this is important section you can't miss.
- Make use of advanced equipment. The better gears like PC and graphic card you use, the better performance you have.
- Confirm that your Internet connection is stable lest lag appears in recording process.
- Choose a game recorder that is good at recording gameplays like Overwatch as you can get customizable settings in professional gameplay recorder.
- In your gameplay recorder, configure the settings like frame rate, bitrate, and resolution.
Comparison
The above shows you several screen recorders, including desktop screen recording software like OBS and Joyoshare VidiKit and online screen capture like ShowMore. To let you learn the differences among them more clearly, we list a table below:
| Joyoshare VidiKit | ShowMore | OBS | |
| Platform | PC/Mac | Online | PC/Mac |
| Take snapshot | Yes | No | Yes |
| Custom hotkey | Yes | Yes | Yes |
| Microphone recording | Yes | Yes | Yes |
| Separately record video and audio | Yes | No | Yes |
| Hide cursor | Yes | No | Yes |
| Support almost all format | Yes | Limited | Limited |
| Customize capture area | Yes | Yes | Yes |
| Change resolution | Yes | No | Yes |


