Q: "How do I record a video in the imo video calling app?" - From Quora
If you have a question such as "how to record imo video calls", then this article can solve your problem up to a remarkable extent. imo is a free app for you to have stable audio and video calls. You can also send messages, text and expressions at any time. For people who study abroad or work far from home, imo will be a great app for them to stay connected with their family and friends. So if you wonder how to save precious video conversations on imo, you can always refer to this article to learn three quick ways, no matter what kind of device you use.

- Part 1. Record on iPhone - Apowersoft iPhone/iPad Recorder
- Part 2. Record on Android - DU Recorder
- Part 3. Record on Windows and Mac - Joyoshare VidiKit
Part 1. How to Record imo Video Calls in iPhone
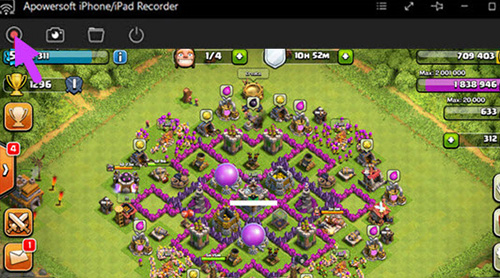
Apowersoft iPhone/iPad Recorder deserves your trust in recording imo video chats or other onscreen activities in iPhone. It is compatible with iOS 14. What makes it unique is that it is a desktop program, but it can make use of iOS's AirPlay mirroring function to stream videos from your iPhone to your computer. To do this you will need to make your iPhone connected to your computer via the same Wi-Fi network.

Step 1: Set up your iPhone and your computer in the same Wi-Fi network;
Step 2: If you have an iPhone before iOS 10, you can swipe up from the bottom of your screen to open Control Center and then choose the AirPlay option; if you are an iOS 10 user, you select AirPlay Mirroring on your Control Center; and if you have iOS 11, you need to tap the Screen Mirroring option;
Step 3: Once you have enabled AirPlay, you can see many available mirroring devices, and you need to choose the item you want to enable mirroring;
Step 4: After that, "Mirror - Connecting" will show up at the lower right corner of Apowersoft iPhone/iPad Recorder, and at this time, you are able to display your iPhone screen on your computer screen;
Step 5: Now you can start to have a imo video call on your iPhone with your friends, and then perss the "Start recording" button at the upper left corner of the iPhone recorder, and this app will start to record your imo video chat;
Step 6: Click on the "Stop" button to stop recording and tap the "Open folder" button to check your recorded videos out.
Part 2. How to Record imo Video Calls in Android Mobile
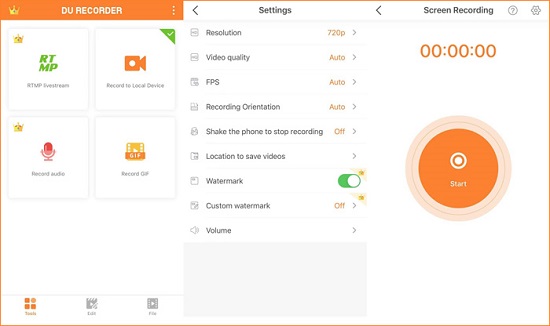
Unlike Apowersoft iPhone/iPad Recorder we mentioned above, DU Recorder does not require you to mirror your smartphone to your computer, which may come across many problems during the process sometimes. DU Recorder allows you to record imo video calls on Android directly. You can easily download it opening its official site. By default, this app will add a watermark to your recorded video calls, but this can be switched off easily. With the help of this Android screen recorder, you can record imo video conversation in high quality quickly.

Step 1: Open DU Recorder on your Android device and you will see an overlay on your screen;
Step 2: You can press the Record button and then the "Start Now" option to confirm that you are going to use DU Recorder to record a video call on imo, and after that, a three-second countdown will begin;
Step 3: To stop recording imo video chats, you can press the organe button again to access to the DU Recorder menu, and then click on the "Stop" button, and your recordings will be saved to your camera roll.
Part 3. How to Record Video in imo on Windows and Mac
Handy and smart, Joyoshare VidiKit's popularity continues to grow. As an optimal choice of a video call recorder, it allows you to record video calls on Whatsapp, WeChat, Tango, Skype, Facebook, Yahoo Messenger, Omegle, and a whole lot more in extremely high quality. Most surprisingly, you will be able to record video with no watermark, no time limit and no lag at all.
With wide support of output formats as well as numerous gadgets and portable devices, Joyoshare VidiKit enables you to save imo video and voice calls easily and efficiently. Using its video editing tools and a screenshot function, you can also choose to customize your recorded video calls and take screencasts at any time. More powerful features of this tool such as cutting, trimming, adding watermark, adjusting bitrate, etc. are waiting for you to explore.
- Drag to select a recording region of any size without any hassle
- Support a number of video and audio formats on Windows and Mac
- Grab sound from computer system audio and/or microphone device
- Customize video codec, frame rate, bitrate, resolution, quality, etc.
- Record video calls for as long as you want in up to 4K at 60FPS
- Skip any unwanted content during recording and edit recorded videos
Step 1 Run Joyoshare VidiKit on Computer
Download either the Windows or Mac version of Joyoshare VidiKit and then install it on your computer. Double-click the software and then press the "Record" panel to select "Screen Recorder". Remember to check whether the
 icon has been activated so that you can record imo video calls smoothly.
Step 2 Customize Relevant Settings
As long as you click the gear icon near the "REC" button, you shall be open to deal with many settings options such as output format, watermark, frame rate, screen resolution and other efficient recording features such as letting the program start/stop imo video call recording automatically, hide cursor, change keys controls, and more.

Step 3 Change Screen Size
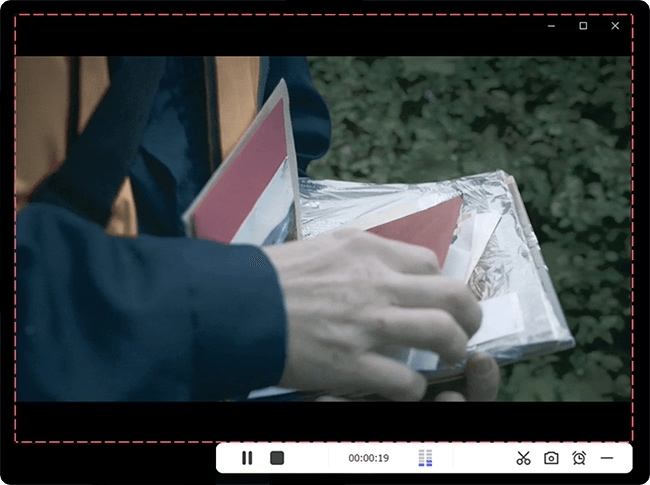
The "+" icon can be seen on the "Capture Area" on the main interface. Once you click on it, a blue frame will appear and you are free to drag and adjust it to select your recording area. Another straightforward way to choose screen size is to press the triangle button right next to the "+" icon. Next, turn on "System Audio" and/or "Microphone" and drag the volume bar as you like.

Step 4 Record imo Video Call
The final step for you is to start your imo video chat at any time and then press the "REC" button so that Joyoshare VidiKit can help you record a video with audio. If you would like to save a video call into several clips, you can press the "Cut" button on the minimized toolbar. Click on the "Stop" button to quit recording and after that, you will be able to play and edit your recordings on the History window.


