Q: "How Can I record Dead by Daylight?" - Big Chonk from Steam community
Developed by Behaviour Interactive, Dead by Daylight can be run in Windows, Unreal Engine 4, PlayStation 4, Xbox One, Nintendo Switch, Android, and iOS. It is a game that allows online multiplayer to play. One player takes on the role of the aggressive killer, and the other players act as survivors who are trying to escape the killer and avoid being caught. To win the game, some players intend to find a way to record their footage during the game as Big Chonk. Therefore, the following guide will show you how to record Dead by Daylight with different solutions.

- Part 1. Record Dead by Daylight with Small CPU
- Part 2. Record Dead by Daylight with FPS
- Part 3. FAQs About Recording Dead by Daylight
Part 1. How to Record Dead by Daylight - Joyoshare VidiKit
The most effortless way to record Dead by Daylight gameplay is using Joyoshare VidiKit - Screen Recorder. This program is compatible with Windows and Mac platforms. With its simple interface, you will learn how to utilize it at first glance. It can record all the actions on your desktop, such as movies, music, and online tutorial. You can capture not only Dead by Daylight, but also Clash of Clans, CSGO, PUBG, and so on in high quality.
Beyond that, you can save the gameplay video in any formats, like MP4, AVI, MOV, WMV, 4K video, DV, etc. The converted video can be played on different kinds of devices, including the iPad, iPhone, Apple TV, Xbox One, PSP, and more. As a comprehensive gaming screen recorder, it allows you to record the gameplay with or without sound. Also, you can set shortcut keys, preset recording schedule, add watermark, highlight cursor, and show clicks.

- Record game at 60fps with no frame drops
- Grab audio from the system and the microphone
- Capture game with full screen or selected screen
- Change codec, frame rate, bit rate, and resolution
- Support non-stopping recording without lag
Step 1Run Screen Recorder
Run Dead by Daylight on your PC. Then open "Screen Recorder" in Joyoshare VidiKit. Use the camera-shaped "Record video and audio" mode to capture gameplay. You can turn on or off audio from the system and your microphone by clicking the corresponding button. To record the game's audio and your team's communication during the game, you need to enable the system audio and microphone audio. Please make sure that an audio input device has been connected to your computer.

Step 2Confirm recording settings
For further settings, you can click on the "Options" button at the lower right corner. Then you can customize the "Basic record options", such as format, saving path, and shortcut key. Hitting on the "Format" button to find any format you want to convert. If you wonder to upload your Dead by Daylight gameplay video on social media platforms, you can select "Web Video" → click "YouTube" or other platforms → tap "Ok". Besides, the software allows you to set the start and stop time to record the video, highlight the cursor, add an effect on the cursor, and more.

Step 3Start recording Dead by Daylight
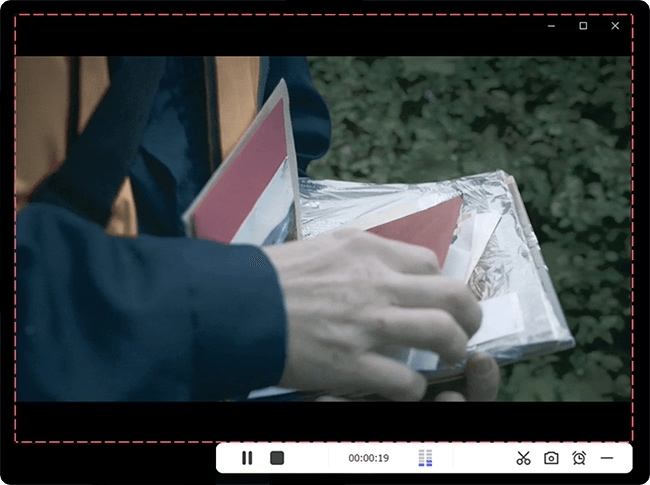
Choose to record the game in full screen or customize the size under Capture Area section. Click "+" to drag the box inward and outward or select the preset size from the drop-down menu. Now, play DBD on your desktop and click REC button to record it. Then you can trim and skip the unnecessary parts by clicking the scissors-liked and "Pause" buttons.

Step 4 Save gaming video(s)
Once finish the recording, you can click "Stop" and this screen recorder will automatically save the video in History window. Have a further check by previewing and editing as you wish.

Part 2. How to Record Dead by Daylight Gameplay - NVIDIA ShadowPlay
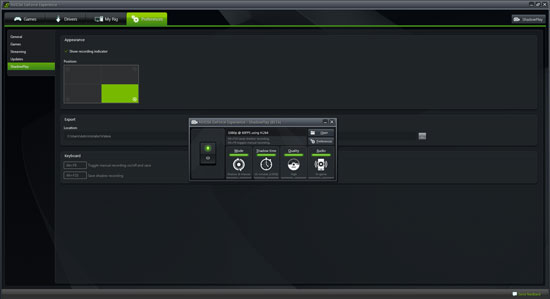
NVIDIA ShadowPlay is a professional gameplay recorder. It can help you record gameplay on your Windows computer, which has modern NVIDIA graphics. In other words, firstly, you need to check whether your computer can run ShadowPlay or not. To do it, you can visit NVIDIA' website. Then see the list of NVIDIA graphics hardware that supports ShadowPlay. If your PC meets the demand, install the software on your computer.

Step 1: Install NVIDIA ShadowPlay. To get it run, you need to launch the NVIDIA GeForce Experience application and click on the "ShadowPlay" button at the top right corner. Open Dead by Daylight;
Step 2: Click the button at the left of ShadowPlay window. Then you will see a green light appear;
Step 3: ShadowPlay has two modes - Shadow mode and Manual mode. When you press "Alt + F10" on the keyboard, "Shadow mode" will record your gameplay and keep the last five minutes. Under the "Manual mode", you can press "Alt + F9" to manually record a clip on Dead by Daylight. Pressing "Alt + F9" again to stop the recording;
Step 4: Finally, you can find the recordings in a default folder or a folder that you preset.
Part 3. FAQs About Recording Dead by Daylight
Q1. How to fix OBS not recording Dead by Daylight?
A: Some users have reported in the forum that OBS doesn't capture Dead by Daylight and shows a black screen. It's possible to reboot your computer as a temporary solution. Additionally, you can close MSI Afterburner and end up rivartuner in your running process first, then launch the game, record it in OBS, and load Afterburner. Another solution you can try is to check "Use anti-cheat compatibility hook" under Game Capture properties in OBS.
Q2. Nvidia ShadowPlay won't record Dead by Daylight, how to solve it?
A: You should enable Desktop capture in ShadowPlay settings and then it works to record Dead by Daylight.
Conclusion:
You have already known how to record Dead by Daylight, right? If your computer doesn't have high configuration, you are suggested to use game recording software for low-end PC, such as Joyoshare VidiKit here. It occupies small CPU to capture gameplay without a time limit. However, if your computer runs fast with powerful hardware support, you can use ShadowPlay. Anyway, enjoy playing Dead by Daylight and create recordings as you like.


