Everyone may have this kind of experience: You would like to record audio from Chrome when stumbling upon an amazing music track, playing on some websites or getting inspired while watching certain speeches. If you want to record audio but do not know or cannot decide the solution, this article is designed for you. In the following part, you will see the best methods to get what you want with high quality easily and quickly, along with detailed steps.
- Part 1. Capture Chrome Audio with High Quality [Hot]
- Part 2. Record Chrome Audio Online with Extension
- Part 3. Record Chrome Audio Offline
- FAQs about Recording Audio from Chrome
Part 1. Record Chrome Tab Audio with High Quality
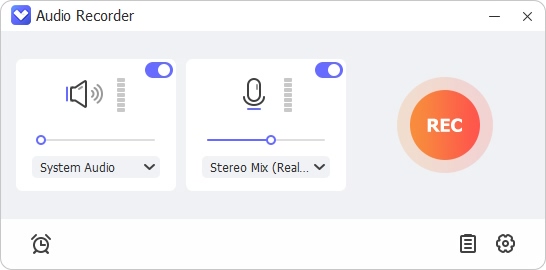
Joyoshare VidiKit - Audio Recorder is a mighty audio recorder that is able to record any sound, coming from Chrome. The recording is of excellent quality and can be saved to multiple formats, including MP3, AAC, AC3, AIFF, ALAC, FLAC, M4A, M4B, etc. If what you record is music, the software will automatically match the ID3 tags of the tracks. Its post-recording features will also amaze you. The software is equipped with a multi-functional audio editor that allows you to trim the recordings and adjust their sound effects. The built-in auto-split feature will detect the silence between audios and then split the tracks, increasing the recording efficiency greatly.

- A multitude of audio formats available on Windows and Mac
- Split the recordings automatically to enhance audio recording
- Record high-quality audio from search engine like Chrome, Firefox, Safari, etc.
- Provide great freedom for personal customization about ID3 tag, channel, bitrate and more
- Best Chrome audio recorder to capture audio from Chrome
Step 1 Download and launch Chrome audio recorder
Download Joyoshare VidiKit from the buttons above and launch it. Then, click the Record and choose Audio Recorder. In the main interface, press the
 "Input Source" icon to the left of the "Start Recording" button in the bottom toolbar, and set "System Audio" as the input source. In this way, Joyoshare VidiKit will record the sound coming from Chrome.
Step 2 Configure the pre-recording settings
Click on the
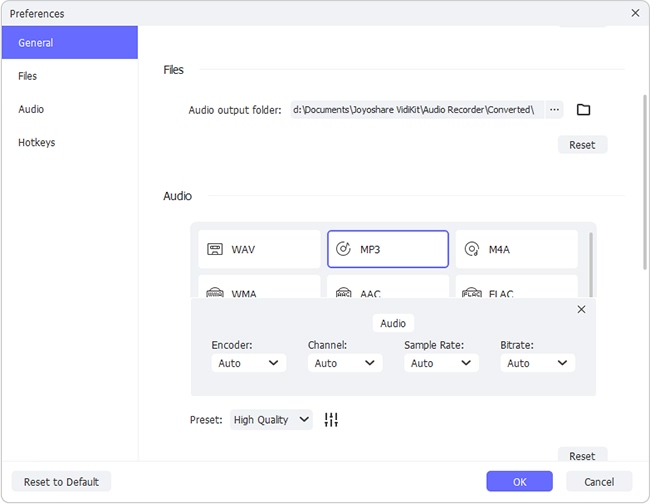
 "Format" icon to open the Format menu, where you can adjust the format, codec, channel and some other parameters of the final recordings. If you think these options are too complicated, you can simply choose "High Quality" or "Small Size" in the "Preset" option. The rest options will automatically match the "Preset". Next, click on the "Preferences" icon in the upper right toolbar to open the Preferences menu, where you can set the folder you want the recordings to be saved.
In addition, the automatic split function can be turned on in this menu. In the popped-out menu, go to the "Convert" column and tick the box under the "Split the Recordings Individually", then set the time to at least 2000 milliseconds. Next, tick the "The recording is silent" option under the "Delete Recordings Automatically". In this way, Joyoshare VidiKit will split the tracks when it recognizes silence over 2 seconds. Of course, the time can be changed according to your own needs.

Step 3 Capture audio from Chrome
Now, find the audio you want to record in Chrome first, but don't play it yet. Press the "Start Recording" button and then play the audio, and Joyoshare VidiKit will start capturing the tracks. If you need to record multiple audios, you merely need to play them one by one directly without constantly pressing the recording button, thanks to the auto-split feature. After all the audios are recorded, press the "Stop Recording" button to stop the recording process and get them saved in the local folder.

Step 4 Edit the recorded audios
Tap the
 "Edit" icon beside each track to launch the audio editor. With this tool, you can trim the tracks, adjust the sound equalizer and add sound effects to make the recordings more enjoyable. Additionally, you can rewrite the tags.
Part 2. Record Chrome Tab Audio Online with Chrome Extension
1Audio Recorder
Audio Recorder, as its name implies, is a chrome extension that can capture sound from your Chrome and microphone. When you finish the Chrome audio recording process, it will export your recoded audio to the default location in your system. However, you should note that you can merely save your recordings in WEBM format. If you want to change format, simply use third-party program to convert your file. With easy and intuitive interface, you can familiarize with this audio capture within short time even though you are a beginner.

- Step 1: Open your Google Chrome and play the audio or video that you want to record.
- Step 2: Navigate to Audio Recorder by searching for this tool and click Add to Chrome.
- Step 3: Click the record button to start the Chrome audio recording process. To finish the recording, simply click the stop recording button. Then download your recoded audio.
2Chrome Audio Capture
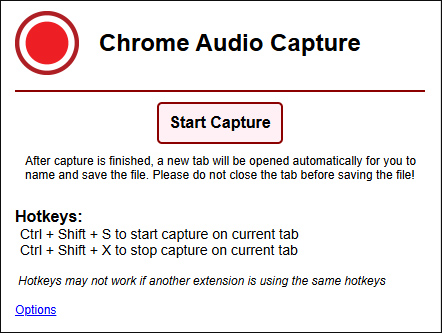
Another way to record audio from Chrome on the current tab and output the recoded audio file is using Chrome Audio Capture, which is a Chrome extension that enables users to record multiple tabs at the same time. You can save the audio file in MP3 or WAV as you want. This audio capture extension support hotkeys to start and stop recording, which makes the recording process easy and quick. Due to its audio quality changing feature, you have the power to change the audio quality as per your needs.
- Step 1: Add this tool to your Chrome by opening this tool in your Google Chrome.
- Step 2: Play the audio that you want to capture and start the recording by using appropriate button or hotkeys.
- Step 3: When you want to finish the recording, a new tab will appear on your screen so that you can save your audio file, customize the format and quality as you want.
Part 3. How to Record Audio from Chrome with Stereo Mix
In fact, there is an inbuilt audio recording tool called Stereo Mix if you are a Windows user. It can not only capture sound from your microphone but also grab audio within the computer, which means that you have the chance to get audio from Chrome easily by using this tool. There is no advanced functionality for users to enhance audio files, so the process of recording audio with Stereo Mix is very easy. Once you have done the recording, you are entitled to customize the output path to save recoded audio to your desired location.
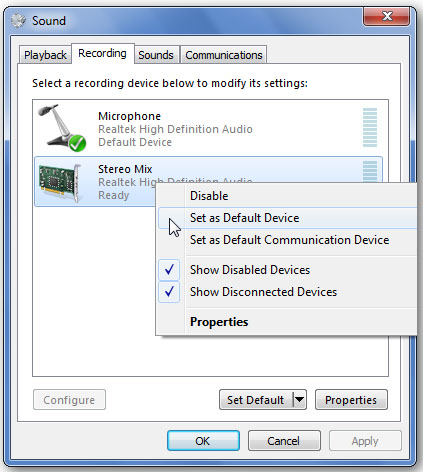
- Step 1: Open Control Panel on your computer and select Hardware and Sound - Sound.
- Step 2: Choose Recording tab from the menu and right click on Stereo Mix to choose Enable option. Now, click Set Default to confirm settings and click the OK button.
- Step 3: Open an audio recording tool and play audio on your Chrome to start and stop the recording.
Frequently Asked Questions about Recording Audio from Chrome
Q1. Can you record audio with Chrome screen?
A: Absolutely, there are many solutions that you can use to grab audio with Chrome screen. Note that you should choose the appropriate mode or enable screen recording function before you begin the recording.
Q2. What is Chrome Audio Capture?
A: Chrome Audio Capture is a Chrome extension, which is designed to capture audio from Chrome and allows user to change output format, storage destination, recording time and many more.
Q3. Does Google have a voice recording app?
A: Yes, Google have a voice recorder application for Android devices, which can record audio when the person is speaking. Also, this tool can turn recording into text.
Summary
Those are 4 best ways to record audio from Chrome. While the first one provides more amazing features, better sound quality, larger format selection and greater freedom of customization, the rest methods are quicker and easier. Each of the methods has its advantages, and it is up to you to decide which one to choose according to your needs.
