Q:"I am working on a documentary in iMovie. A great part of the video is interviews in French to which I need to add captions in English. Due to my insufficient experience with iMovie, I encounter a series of problems while adding captions with it. Can anyone give a detailed guide on how to add subtitles in iMovie or suggest a quick alternative?" - from MacRumors
For ones who are operating on Mac computer, iMovie is supposed to be the perferred candidate springing in the mind when having the need of inserting captions or subtitles to a video. Developed as a non-linear video editor by Apple, it comes with various title styles that can be used as subtitles free of charge. How to achieve this? Below explains a full guide as well as gives a simple iMovie alternative to make your video subtitled.
Part 1. How to Add Subtitles in iMovie
As the free video editing software available for Mac, iMovie turns to be a preferred choice of Mac users adding captions to video. For experts, this action is virtually a piece of cake. But beginners may be asking: how to add subtitles to iMovie on Mac? In case you either have no way of knowing how-to, follow the step-by-step instructions.
Step 1 Open iMovie and import video
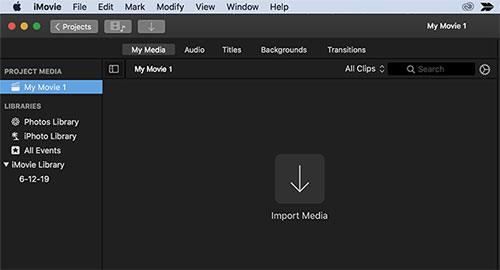
First of all, please launch iMovie on your Mac system. Then go to "Create New" > "Projects" to create a project for the video to be added. Afterward, tap on "Import Media" to load your video that needs to be subtitled.

Step 2 Add subtitles to iMovie
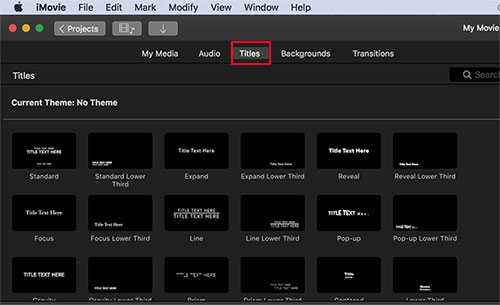
Once your video is uploaded, drag it to the timeline for editing. To add captions or subtitles to video in iMovie, now you ought to find and select the "Titles" tab to bring out the text menu. Next, opt for the desired text style and insert it to your video. After you enter correlative texts, it is going to work as subtitles of your video.

Step 3 Output the video with captions
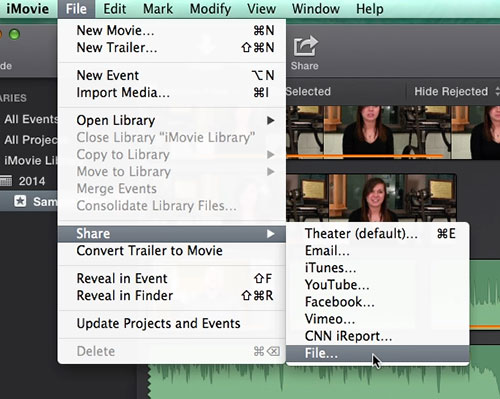
When you video has been subtitled, go to "File" at the top menu bar > "Share" option > "File..." to save it to your computer. Or, you could also directly share it to YouTube, Facebook, iTunes, etc.

Note: The instructions above are for those who operate in iMovie 8/9/11. If you add subtitles in iMovie 10, there is a slight difference. That's you should locate "Titles" from the left-hand "Content Library" option while starting subtitling your video.
See Also:
Part 2. How to Add Subtitles in iMovie Alternative - Joyoshare Video Joiner
iMovie is efficient in adding captions to video, but its operation is not that simple. Even with a how-to guide, beginners might still have difficulty in inserting texts or captions on iMovie. In consideration of this, here, a simple alternative to add subtitles in iMovie - using Joyoshare Video Joiner, is suggested for novices and veterans.
Working the same in both Mac and Windows operating system, Joyoshare Video Joiner is well received by millions of users for its handleability and wide compatibility. With an intuitive operaton interface, you can insert subtitles to any video within minutes. What counts more is that it is fully compatible with almost all encoding formats, covering general media formats, web videos, HD videos, and device formats. Whatever format of video you want to add subtitles to, it can be to your satisfication.
Remarkable Features of Joyoshare Video Joiner:
Merge the same media files with lossless quality
Convert video to any other format at 60X quicker speed
Built-in editor to add subtitles, music, watermarks, effects, etc
Enhance video quality by adjusting codec, bit rate, frame rate, etc
Support adding subtitle files in in ASS, SSA, SRT, SUB, SMI, LRC, etc
Step 1Import video to Joyoshare Video Joiner
Open Joyoshare Video Joiner on the desktop and upload the video file that you need to add subtitles by the bottom-left-corner "Open File" button or direct drag-and-drop. It is generally suggested that you drag the video to the interface, which is easier and faster.

Step 2Activate the encoding mode
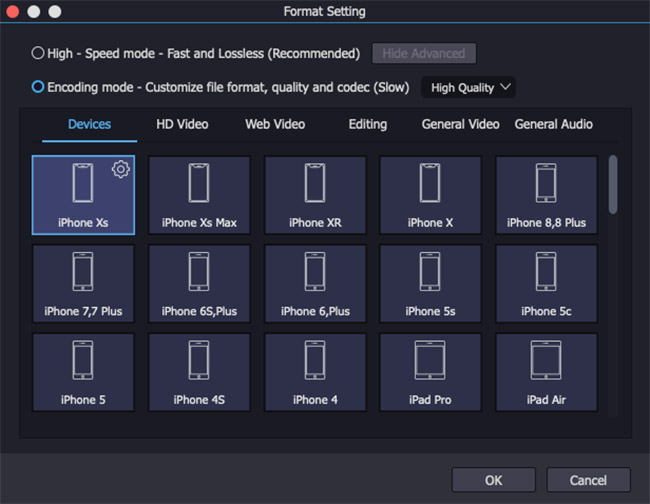
Head to "Format" at the bottom right. It will direct you to the next window where you should enable the encoding mode so as to add subtitles to your video. Afterward, specify an output format and click a gear icon to enhance the quality of the output video by customizing codec, resolution, bit rate, frame rate, etc. If you wouldn't like to convert the video, choose the original format.

Step 3Add subtitles to video
Return to the main interface after formatting. Suppose you are in need of deleting titles and credits off the video, control the yellow timeline to do it. Then, locate an "Edit" icon next to the uploaded video file to access the editing interface. Among all edit tabs, please select "Subtitle" > "File" > "..." to browse the local folder and add your required subtitle file.
After it is added, see the result in the right preview window. On the basic of own requirements, flexibly adjust the subtitles margin, scale, transparency or touch "T" icon to custom color, size, font, style, etc of the captions. Eventually, tap on "Convert" in the lower-right cell of the first window to export the video with subtitles.

Final Thought:
How to add subtitles in iMovie? The best answer is given above. Plus, the optimal alternative to add subtitles to video on iMovie - making use of Joyoshare Video Joiner is appended. In terms of captioning a video, Mac users can work with any of them while Windows users have only to consider Joyoshare. On the side of their individual operation principle, it is more convenient to use Joyoshare video merger software. With it, you only need to stitch the downloaded subtitle files to the video and then the subtitles will adapt to your video automatically. However, in iMovie, you are required to manually enter corresponding texts to make them work as subtitles in your video, which takes too much time and effort if your video is produced with many frames.
