"Why is my phone taking forever to back up on iTunes? I've done an iPhone backup a week ago that took more than 9 hours but is still not complete. My computer estimates that it will take me 10 hours to back up my iPhone 11 Pro Max to my computer again. Does that sound normal?" – From an iPhone user
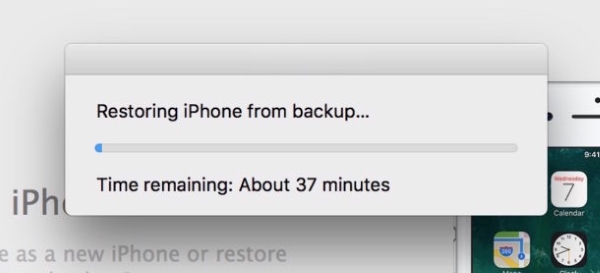
Backup your iPhone data to iTunes is a great way to store data on your computer at home, whether you're switching to a new iPhone or just like to keep your information safe and secure. Apple provides users with Apple iTunes as an effective tool for backing up their iPhone to a computer using a USB cable. However, it can be upsetting when your iTunes stuck on backing up iPhone. In this case, you have to use iCloud to back up your data, which is not only expensive but holds limited space. The following paragraphs explain why iTunes backing up is not working and give you several ways to solve it.
- Part 1. FAQs about Backing Up Data on iTunes
- Part 2. How to Fix iPhone Stuck on Backing up in iTunes?
- Fix 1. Reboot Your iPhone
- Fix 2. Check Your Cable
- Fix 3. Check Apple System Status
- Fix 4. Check Network Connection
- Fix 5. Update iTunes to the Latest Version
- Fix 6. Manage Backup Size
- Fix 7. Check Your Computer's Security Software
- Fix 8. Reset iPhone Settings
- Fix 9. Grasp at a Straw – Joyoshare UltFix iOS System Recovery [Easy & Effective]
- Part 3. Conclusion
Part 1. FAQs about Backing Up Data on iTunes
Q1: Why Is It That iTunes Taking Forever to Backup iPhone?
A: There are a number of factors responsible for this. These are some of the most prominent ones. Firstly, iTunes version is outdated, so it can't work with iPhone smoothly. Secondly, connectivity between iOS device and PC is faulty. Thirdly, the security software may stop the backup process. iTunes and iOS devices may be incompatible with some security programs. Moreover, system glitches and incompatible backups will lead to a messed-up iTunes backup.
Q2: How long it takes to back up iPhone with iTunes?
A: It depends on the amount of information you need to back up to iTunes, and the network condition will also affect the time consumption. The less information you need to back up and the stabler network you connect, the less time it will take. Therefore, it usually spends 15 to 40 minutes to back up your iPhone to iTunes.
Q3: Do I need to enter password for backing up iPhone?
A: It depends on your needs. If you want to encrypt your backups, you are able to set up a password by enabling the Encrypt iPhone backup option on iTunes. Then, you need to enter password for backing up iPhone and restoring data.
Part 2. How to Fix iPhone Stuck on Backing up in iTunes?
Fix 1. Reboot Your iPhone
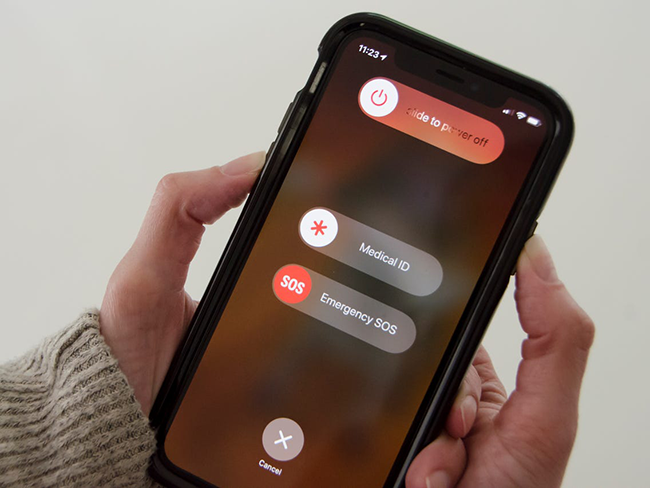
If the USB and Wi-Fi connection is working well, try to restart your computer and iPhone. The PC and iPhone will be activated after restarting, allowing the device to bypass the iTunes backup failure. As the steps to restart different models of iPhone are various, it is suggested to go to Settings → General → Shutdown and drag the power-off slider to turn off your iPhone. Then hold the Power button to power on.
Fix 2. Check Your Cable
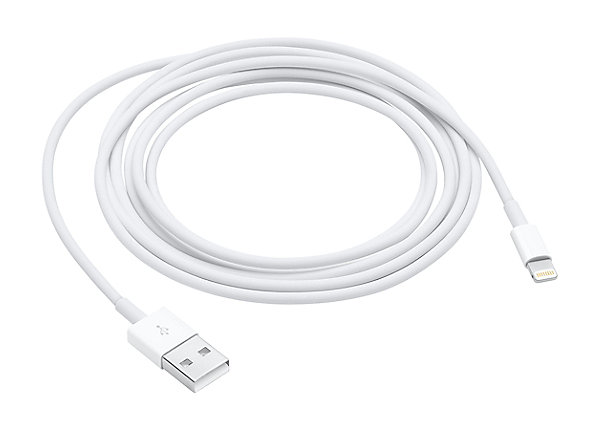
When encountering iPhone taking forever to restore from iTunes backup, make sure your internet connection is stable. Choose the right cable for your computer. A lightning cable from Apple or an MFi cable, which were created with Apple's technology to allow it to communicate with your iPhone and computer, are the best. It must also be a good quality USB cable and that the USB ports on the PC are functioning properly. iTunes backups may get stuck due to corrupt USB cables.
Fix 3. Check Apple System Status
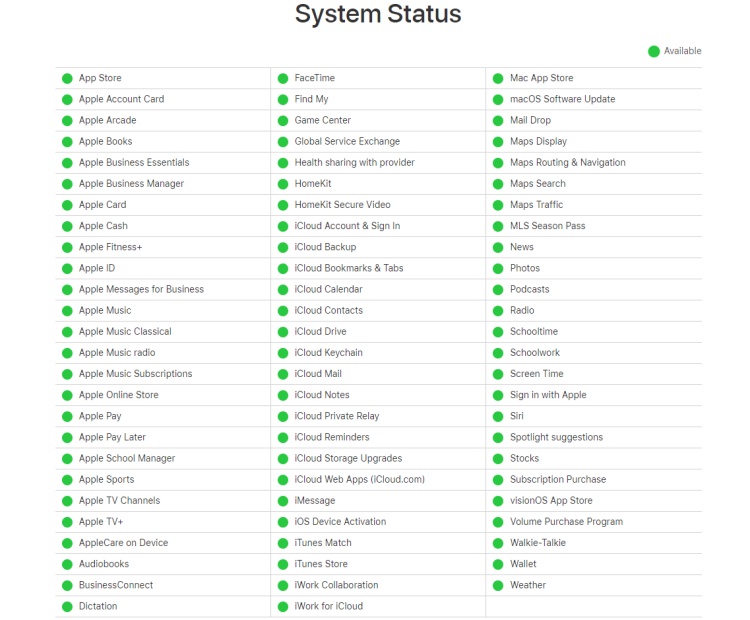
If iTunes stuck on backing up iPhone, you need to rule out the possibility that the Apple server is in a bad condition and make sure that iTunes runs well. Head to the Apple System Status page and check whether there are green dots in the front of each option. When something goes wrong showing the yellow or red icon, you have to troubleshoot the problem.
Fix 4. Check Network Connection
After ensuring the computer and iPhone are properly connected by turning them on and off several times, you need a stable and reliable network for backing up iPhone. Check the network cable and make sure your computer has an internet connection. If not, connect to a Wi-Fi network and make sure that the router runs well.

Fix 5. Update iTunes to the Latest Version
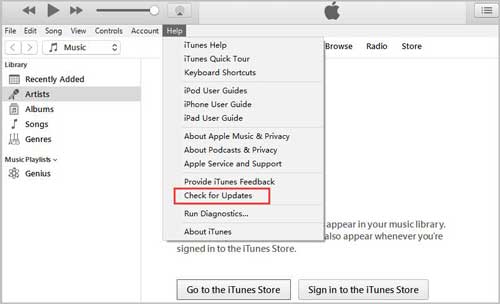
It's critical to check the iTunes version when iPhone taking forever to backup iTunes. iTunes backup might take a long time if your computer's iTunes client is out of date. Your iPhone hardware might not work properly with iTunes. To find out if iTunes needs to be updated, follow the steps below.
Check for iTunes Update on Mac:
On Apple Menu → System Preferences → Click on Software Update (Apple will automatically update iTunes if the new version is available.)

Check for iTunes Update on Windows:
On your computer, open iTunes → Hit Help → Click on Check for Updates. Then follow the instructions to install the latest version.
Fix 6. Manage Backup Size
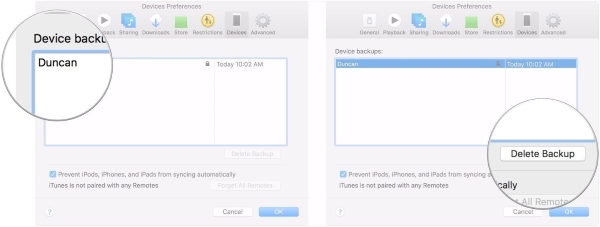
Sometimes, you may experience the iPhone stuck on backing up screen simply because your iTunes does not have enough space, or your new backup is conflicting with an already existing one. It is therefore recommended that you delete old backup files. You can do this by going to iTunes app → iTunes menu → select Preferences from the dropdown menu → Devices. Here you will find all of your backup lists. Pick the backups you want to delete and click on Delete Backup.
Fix 7. Check Your Computer's Security Software
It has been reported that some iTunes users have observed that certain security software, such as firewalls, security guards, or other malicious software, can stop iTunes and result in iTunes taking forever to copy items during backup. It can sometimes prevent users from restoring their iPhones, as well. For this reason, if iTunes is unable to back up iPhone to computer, you need to disable or close your security software on your computer temporarily until iTunes can finish the backup.
Fix 8. Reset iPhone Settings
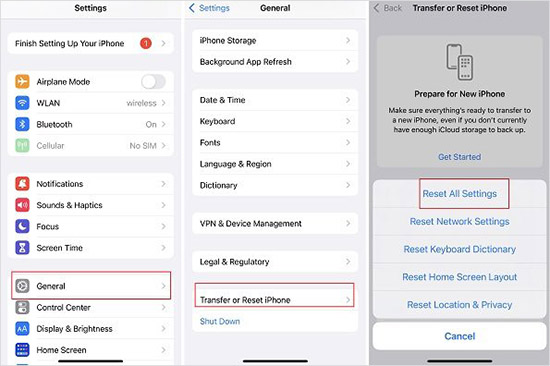
Even after trying all the above solutions, iTunes is still stuck at the backup stage. To resolve this, you can try resetting all iPhone settings.
- Step 1. On your iPhone, open the Settings.
- Step 2. Next up, scroll down to the bottom and select Transfer or Reset iPhone.
- Step 3. Tap Reset at the bottom of the screen and choose Reset All Settings from the menu that appears.
- Step 4. Finally, you will be prompted to enter your device passcode. As soon as the passcode has been entered, you will receive a message at the bottom saying "This will reset all settings. No data or media will be deleted." Tap Reset All Settings again to confirm.
Fix 9. Grasp at a Straw – Joyoshare UltFix iOS System Recovery [Zero-Loss 100%]
If none of the above solutions resolves your issue, it is likely that you have a serious software error with your iPhone. If your iPhone is having this problem, it would be beneficial to wipe it clean. That, however, could result in loss of data that has not been backed up. To resolve iOS system glitches without losing data, here we highlight Joyoshare UltFix iOS System Recovery. With this program, you can solve the most severe iOS problems quickly and easily. Over 150 different problems can be fixed by this program, including iOS updates failing, iTunes stuck on preparing iPhone for restore, among others. Despite these issues, the program works quickly to solve them all while safeguarding your information. Furthermore, Joyoshare UltFis has the features to factory reset all models of iPhone, iPad and iPod, downgrade and upgrade iOS system, and put device into or get out of the recovery mode with a single click.
- Fix over 150 iOS system errors and iTunes problems with dual modes
- Downgrade iOS to the former versions and upgrade it to the newest version
- Free to enter/exit recovery mode with one click
- Compatible with the latest iOS 17 and all iOS device models
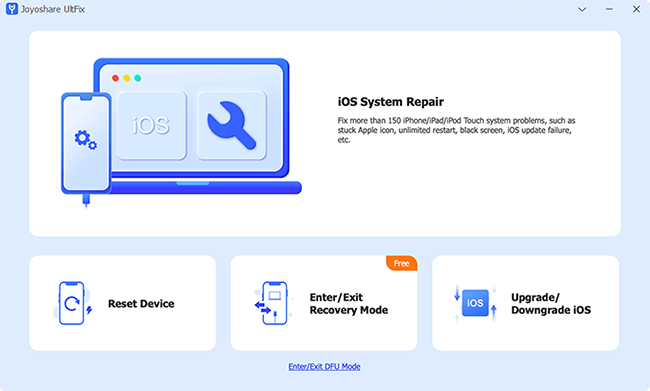
Step 1 Install Joyoshare UltFix and Connect iPhone to Computer
Connect your iPhone to the PC using a genuine Apple USB cable and launch Joyoshare on your PC. Select the iOS System Repair module and click on Start.
Step 2 Set Standard Repair Mode
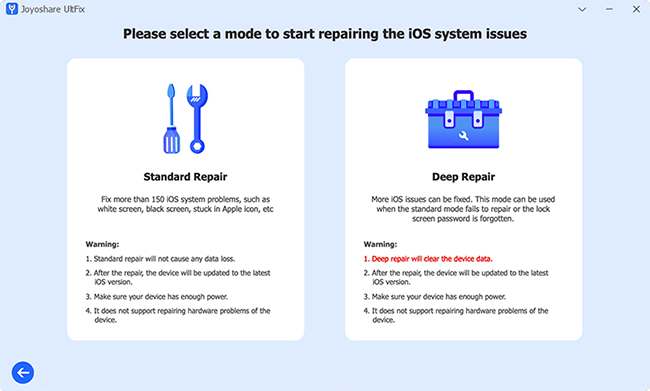
Two recovery modes will be available on the new interface: Standard Repair mode and Deep Repair mode. Select the previous one as your recovery mode to repair iPhone with no data loss. If your iPhone is recognized successfully, you will enter the next page. On the contrary, you are asked to put your iPhone into DFU mode or recovery mode manually.
Step 3 Download Firmware Package
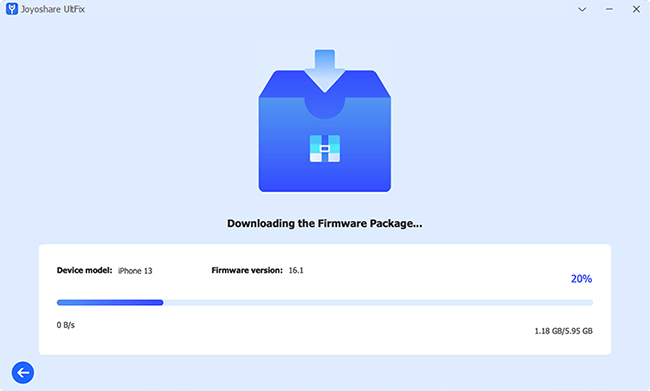
Make sure that the firmware package matches the information about your device in the new window. Click on the Download button at the bottom to download the firmware package.
Step 4 Fix iTunes Stuck on Backing up iPhone
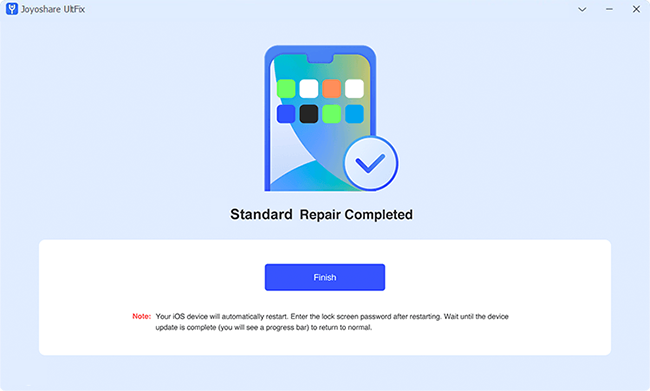
Click on the Repair button after the downloading process is finished. The software will automatically fix the annoying problem. Keep connecting your iPhone to the computer during the whole process to avoid any further problems.
Part 3. Conclusion
Before fixing iTunes stuck on backing up iPhone, you could get to know the related information about using iTunes to back up data. Several methods can be used to troubleshoot the issue after you reboot your device. Joyoshare UltFix iOS System Recovery tool is a popular choice among users due to its high success rate. Easy to use, quick, and without data loss, the tool works to resolve system problems no matter whether iTunes stuck on backing up or iPhone stuck on backing up. The Apple customer service desk can provide corresponding help if none of the methods works. Hopefully, you got the concept of how to do it when iTunes stuck on backing up iPhone.
