
If you have been paying attention to iPhone technical support forums, you will notice that iTunes error 14 has been more frequently reported in recent days. This error often occurs when you tried to update or restore your iDevice, and it will stop the update and restore process. What's most annoying is that it cannot be solved by restoring the device with iTunes.
But don't worry, here you can find the perfect solutions. Just follow the steps provided below and the problem will be fixed.
- Solution 1: Check the Connection
- Solution 2: Update Everything
- Solution 3: Use iOS System Recovery Software
- Solution 4: Find Apple Support
Part 1. Fix iTunes Error 14 by Checking the Connection
In most cases, error 14 iTunes (also known as iPhone error 14) results from connection issues, which may be related to the USB cord or the computer itself. Not only a normally functioning computer is necessary, but also an original USB cord is a guarantee to a stable connection. Therefore, all we need to do is to ensure that the computer, the USB cord and the Apple device all connect smoothly. To do this, simply follow the 2 steps below: 1) Connect other functioning Apple devices with your computer and see if the error 14 notification pops up. If the error stops showing up, then it's the Apple device that needs to be fixed. If it happens again, there is a probability that your cable or your computer is not designed for Apple devices. 2) Next, use the same USB cable to connect other functioning Apple devices with other computers. If the error code 14 iTunes stops showing up, then it is possible that your computer is problematic. Otherwise, you will have to find a Made for Apple USB cable

Part 2. Update iTunes and the Mobile OS to Repair iPhone Error 14
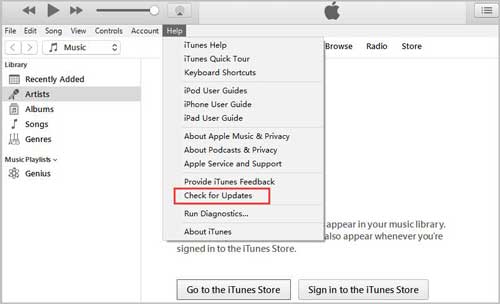
An outdated iTunes or an old mobile OS might lead to compatibility problems and thus result in iTunes error 14. In this case, the solution is obvious - update both of them to the latest version. While the update of mobile OS can be easily found in the Setting menu, may users may not know how to update iTunes on the computer. Thus, we provide a guide as a reference. How to install the latest iTunes: 1) Open the iTunes and find the "Help" menu, where you can see the "Check for Updates" button. 2) Click on the button, and iTunes will automatically check for the latest update. If there is a newer version, simply update and the error 14 of iTunes may disappear.
Part 3. Fix iTunes Error 14 with iOS System Recovery Software
If the test in the first step confirms that the iTunes error code 14 originates in your Apple device, but there is no physical damage on the device, then there might be a system error or bug that exists in the Apple device. Joyoshare UltFix is the perfect solution to system errors. As a reliable iOS system recovery tool, it can repair the OS of iPhone, iPad, iPod and Apple TV. It is able to tackle over 30 iOS issues, including iPhone error 4013, iPhone error 14, without deleting a single piece of your precious data.
As for dealing with the iTunes error 14, this program has an unique advantage. It is able to put your Apple device into the recovery mode even when there is iTunes error 14. In fact, when your Apple device is stuck on the white screen or the black screen, you can also use Joyoshare UltFix to save it.
Key Features of Joyoshare UltFix iOS System Recovery
Fix iPhone error 14 without any data damage
Provide two repair modes to tackle different issues
Compatible with almost all models of iPhone, iPad, iPod and Apple TV
Let your Apple device enter/exit the recovery mode easily
Guide of Using Joyoshare UltFix
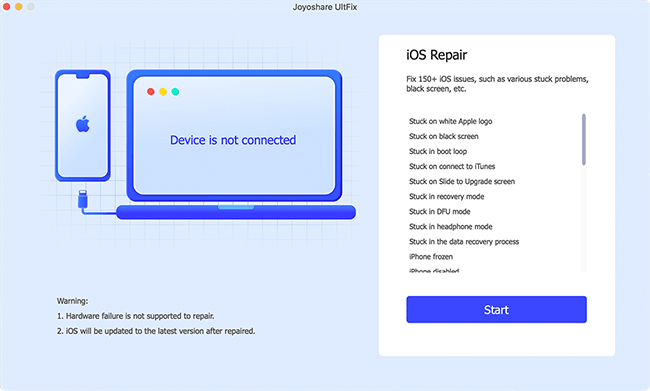
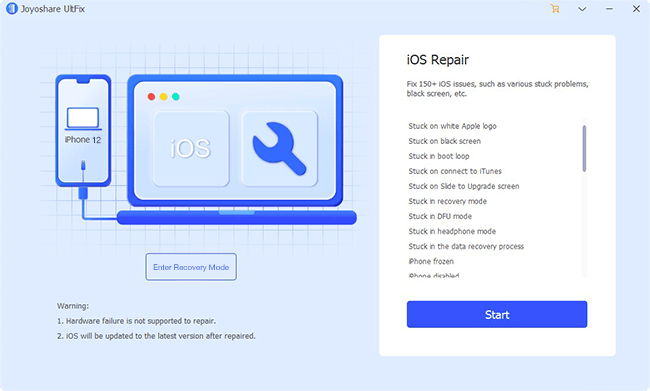
Step 1: Connect your Apple device with the computer and wait until the device is detected. Then press the Enter Recovery Mode button to usher your device into the recovery mode. Now that your device is in the recovery mode, press the Start button.
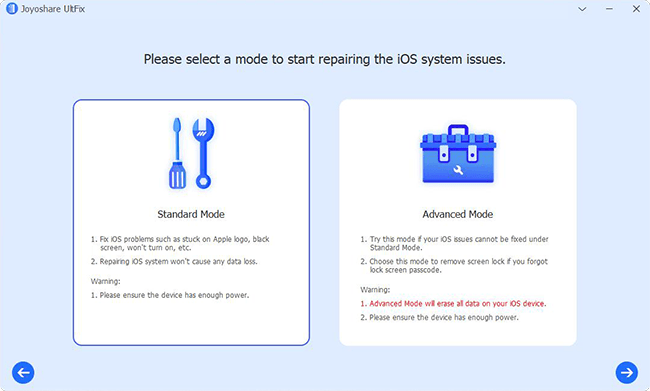
Step 2: You will be taken to the next window, where there are two modes for you to select. For basic problems like error code 14 iTunes, the Standard Mode is more suitable in that it will not erase your data during the repairing process. Press the Next button to continue.
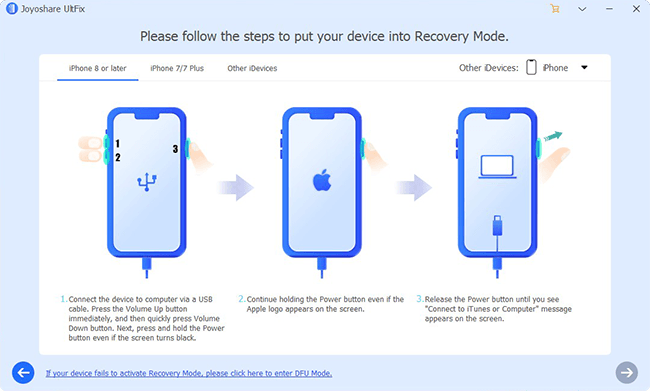
Step 3: If you have not entered the recovery mode in the first step, then a guide will be shown to teach you how to manually put the Apple device into the recovery mode. However, this step will be skipped if you have done the work in the first step.
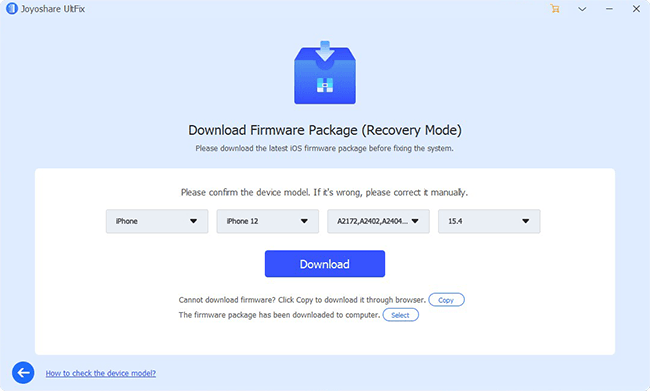
Step 4: In the next window, some basic info of your device will be shown and you need to ensure everything is correct. To correct the improper info, simply change them into the right one in the drop-down menu. After that, click on the Download button to download the matching firmware.
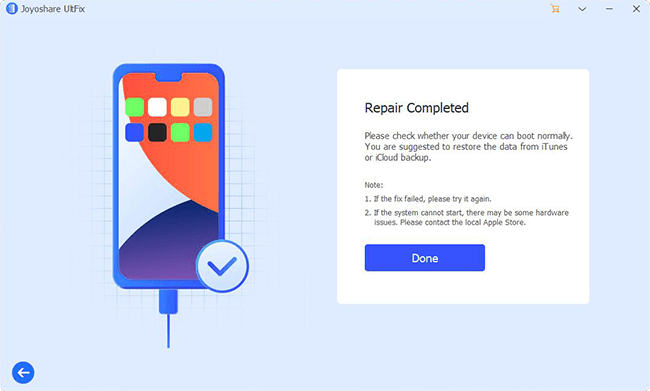
Step 5: When the firmware is downloaded, Joyoshare UltFix will start to unzip the package and verify it. Finally, press the Repair button to initiate the actual repairing process. A few minutes later, your device should be able to connect to iTunes normally.
Part 4. Resort to Apple Support to Fix iTunes Error 14
If all the previous solutions don't work, then the problem may be out of our hands, especially when there are hardware malfunctions or physical damages to the device. In this case, the last and safest help we can get is the official support from Apple. It is unwise to arbitrarily restore the Apple device, which will erase all your personal data but cannot guarantee the solution of iTunes error 14. Therefore, don't hesitate to go to the Apple support center when you are running out of solutions.

Conclusion
We understand the inconvenience that iTunes error 14 caused and your urgency to get it resolved. Follow the solutions provided above is the most efficient way to get rid of the trouble. Last but not least, we sincerely hope that our guide actually helps, and that you gain much enjoyment from using the Apple device.
