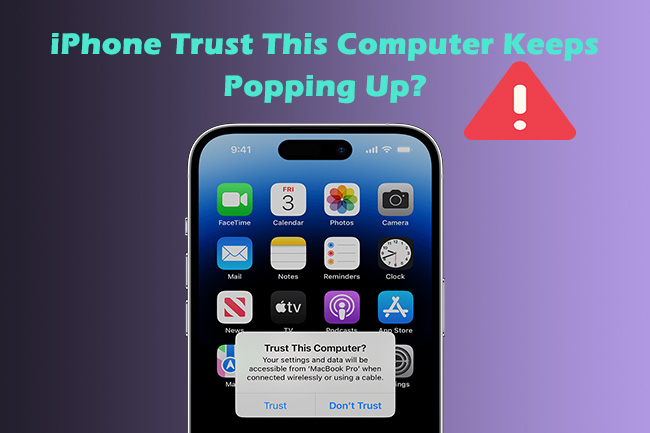
If you connect your iPhone to the computer for the first time, it is natural that you will get an alert message "Trust This Computer" because of data security concerns. Normally, you won't receive this notification once you have trusted the computer. But strangely enough, iPhone trust this computer keeps popping up for some reason. Here's where it gets a little tricky as the computer might be unavailable to access your iPhone. Whether you want to save photos locally or download files with your computer, it is likely to fail. Yet this problem could be managed if taking appropriate action. Let's see what you can do to fix this issue.
- Part 1. Know More about "Trust This Computer" Alert
- Part 2. Why Is Trust This Computer Stuck on iPhone?
- Part 3. Fixes to Trust This Computer Keeps Popping Up on iPhone
- Part 4. Conclusion
Part 1. Know More about "Trust This Computer" Alert
As for this trust alert, you could know more about it before dealing with the problem. The alert shows to ask for trust in case the unauthorized computer acquires your data. Once the computer is trusted, it can sync with your iPhone to get photos, messages, and other content. And this computer will remain trusted in the subsequent connection. If you don't trust the computer, the content of your device would be not accessible. Next time you plug your iPhone into the computer, you'll get this alert message again. Collectively, trust this computer aims to secure your device by asking for your permission.
Part 2. Why Is Trust This Computer Stuck on iPhone?
You connect your device with the computer and tap Trust for sure. Why does trust this computer keep flashing? Or why does iPhone keep asking you to trust computer each time you hook up your PC? Here are several possible reasons.
- For iOS 16 and later, trust this computer would show up when you back up your iPhone. Hence, if your device creates backup content automatically, the alert will keep displaying on your screen.
- Resetting privacy settings would also cause the problem. Your iPhone won't trust your computer by doing that and the trust message keeps popping up.
- Outdated device is another potential reason. You need to check whether you have updated both your iPhone and computer to the latest version.
- Software glitches can bring a wide variety of issues. The unusual behavior of trust alert may arise due to this cause.
Part 3. Fixes to Trust This Computer Keeps Popping Up on iPhone
Now we land on the troubleshooting methods to fix the problem that iPhone keeps asking to trust computer. Before trying this method, it is suggested to check your cable first. Sometimes a frayed cable may cause various issues. Switch to an original and undamaged cable and check the solutions below.
1. Reconnect Devices
The quickest and easiest way to fix the problem is to reconnect iPhone and computer. The stubborn trust notification could be generated by an unstable connection. In this case, you can reconnect these two devices and observe whether the message disappears. If not, head to the next option.

2. Restart Devices
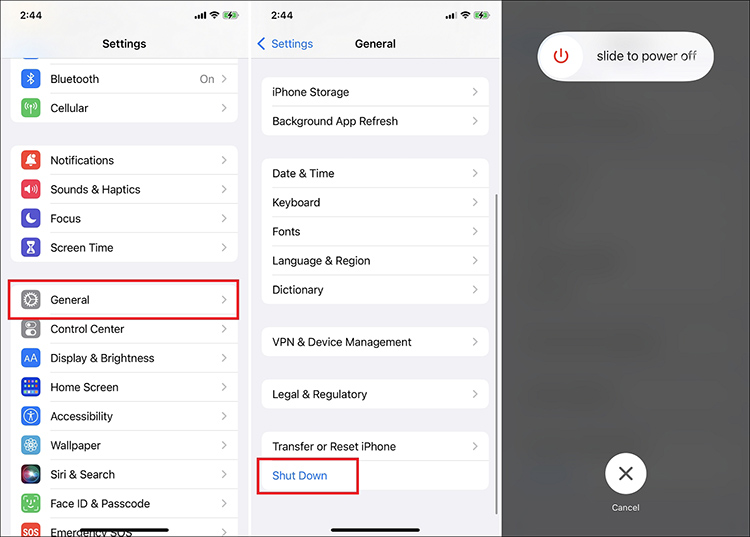
A simple restart can always fix some minor issues and get your desired result. If iPhone trust this computer keeps flashing, you could restart both devices and reconnect them again. Some users reckon that the method is useful, while some poses that it can only temporarily resolve the issue. A few days later, the same alert may appear again.
3. Update Devices
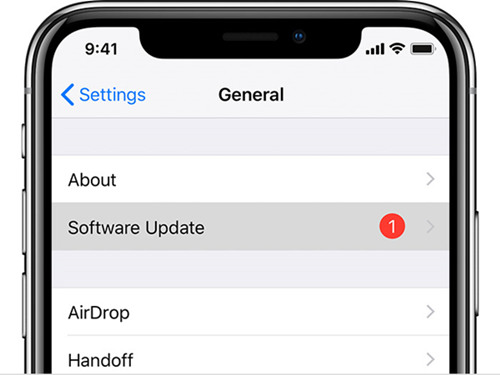
Updating your devices might be a workaround to the message loop. If you are using Mac, head to System Preferences and click Software Update. It's simple to update your iPhone as well. Just locate General in Settings application, then choose Software Update. Your phone will detect the latest update by itself. Click Download and Install to run the newest version on your iPhone.
Note: Make sure you are using the latest iTunes on your computer at the same time. It is because an older version might have unknown bugs and security concerns. If you are running iTunes on Windows, you need to check further that iTunes Mobile Device Helper is on at startup. Go to Windows's Settings → Apps → Startup, and turn iTunesHelper option on.
4. Exit Security Apps
If you get trust notification, you can inspect your iPhone to see whether it has security apps. They may trigger the trust this computer alert on certain occasions. The same situation can happen when it comes to antimalware programs and antivirus apps. So, you could disable them and check if the notification keeps flashing. Otherwise, you can remove these security apps completely if the problem still exists.
5. Reset Trust Settings
Resetting trust settings will erase all computers on the trust list. Next time you connect your iPhone to the computer, the alert will pop up again to get your permission. When you choose Trust, the message may stop coming out and your problem should be fixed.
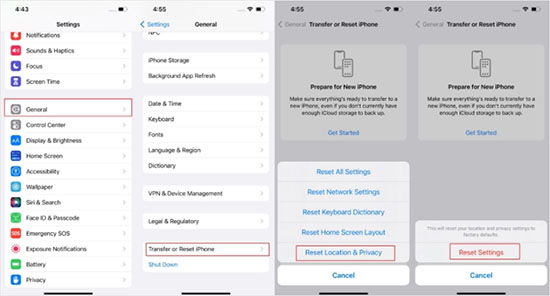
- Step 1: Open Settings application on your iPhone and click General.
- Step 2: Scroll down to the bottom of your screen and select Transfer or Reset iPhone option.
- Step 3: Tap Reset and choose Reset Location & Privacy, followed by entering your password.
6. Reset Network Settings
In case resetting trust settings fails to stop iPhone from asking for trust, you can try to reset network settings. This won't wipe all your data, but the network settings will be erased.
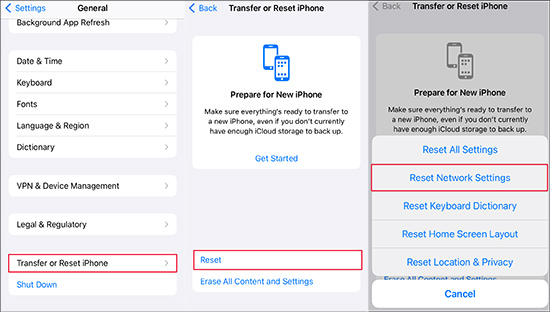
- Step 1: Open Settings and hit General.
- Step 2: Choose Transfer or Reset iPhone and click Reset on the next screen.
- Step 3: Last, select Reset Network Settings and wait to check the result.
7. Disable Personal Hotspot
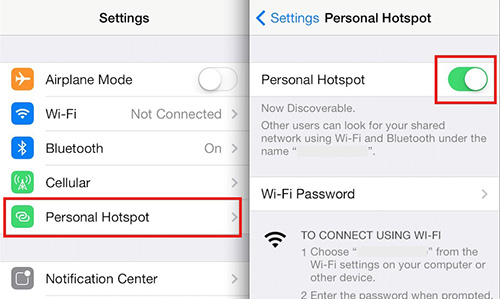
There is another approach to disabling trust this computer warning. Yet it is only applicable when you turn on personal hotspot. If this feature is on, your device will ask for request to the hotspot network. You can go to Settings → Personal Hotspot, and make sure you turn it off before connecting your iPhone with the computer.
8. Repair iOS System
If you still can't remove this alert notification, use Joyoshare UltFix. It is an iOS system recovery tool that can be used to fix more than 150 iOS problems without hassle. With it, you can fix various iOS issues quickly anywhere, such as iPhone keeping connecting and disconnecting from Mac, iOS update failure, iPhone restore failure, and much more. An additional advantage of this tool is that it is able to repair the iOS system without any data loss. You can get your iPhone back to normal and preserve all your precious data. The prominent aspect of Joyoshare UltFix is its internal dual repair modes, which contain basically all common iOS glitches. You could employ this efficient software to fix your problem right now.
- Fix Trust message keeps turning up quickly in the simplest manner
- Enter and exit recovery mode free of charge
- Support updating to the iOS 17 beta as well as downgrading iOS 17 beta
- Easy to restore iTunes errors and reset iDevices
Step 1 Connect your iPhone with Computer
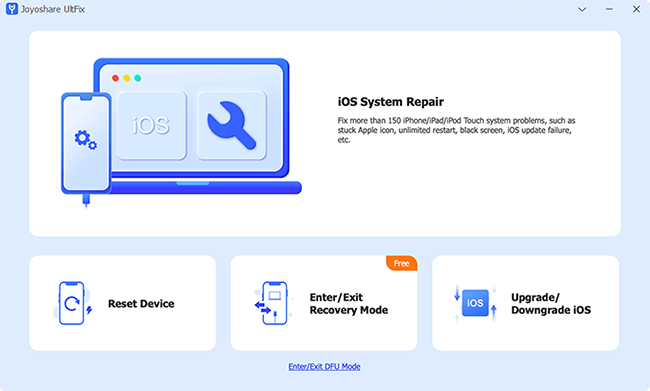
Run the latest Joyoshare UltFix on your computer and connect your iPhone with it. Open the tool and choose iOS System Repair. Next, hit Start.
Step 2 Opt for Standard Repair
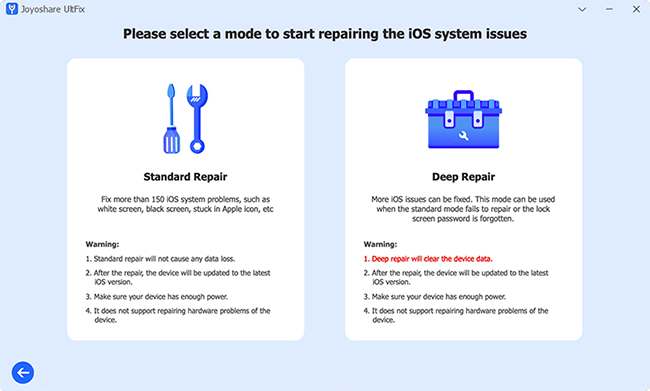
Joyoshare UltFix has built-in dual modes to fix iOS problems. Standard Repair is suitable for all common iOS issues, while Deep Repair is applied for those severe problems. In order to get your iPhone to stop asking for trust permission, you can click Standard Repair mode.
Step 3 Download Compatible Firmware Package
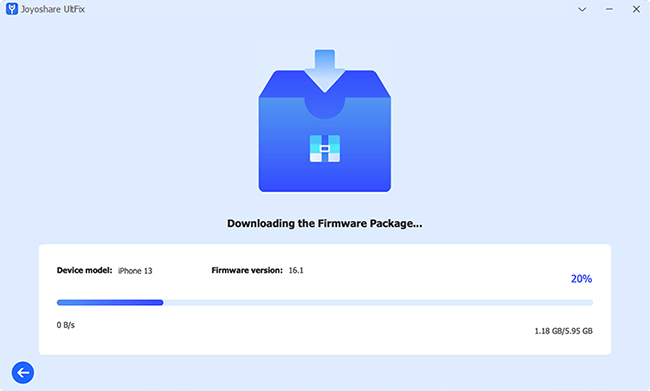
This repair tool will inspect your device after selecting the mode. You should check all the basic information of your device carefully. Then click Download button to get the compatible firmware package.
Step 4 Fix iPhone Trust Alert Keeps Popping Out
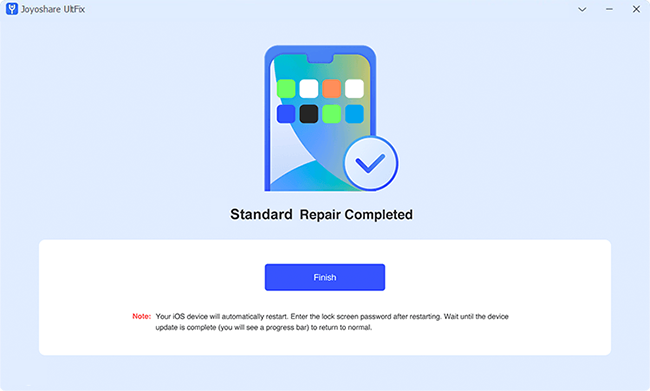
Once the firmware package is ready, you can click Repair button to start fixing the problem. It takes a little time to fix iOS, and you can reconnect your iPhone with the computer to have a close look after the repair process.
Part 4. Conclusion
We have tried to offer as many helpful solutions as possible to fix the issue. If your iPhone trust this computer keeps popping up, you can try to reconnect, restart, or update your devices. You can adjust your settings as well. Last, you can seek professional help with Joyoshare UltFix to solve possible iOS problems. Do these methods help you out of trouble? Feel free to use the comments below.
