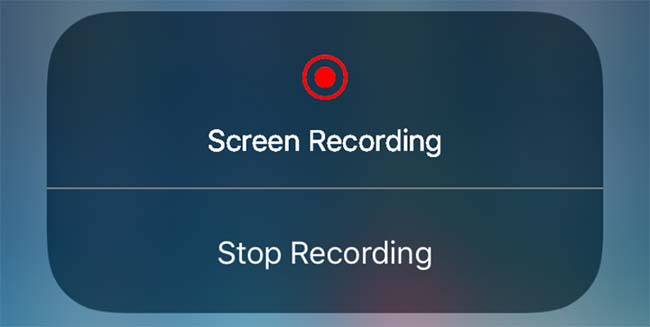
You can record your iPhone screen when you wish to collect and share a film with colleagues, family, or co-workers. An iPhone is almost useless without screen recording function, so if it can't help you record your screen, it's an issue you need to address right away. For example, if you want to demonstrate to someone an iPhone error, explain using an app, film your games, etc. While screen recording on your iPhone usually is relatively easy, it can be infuriating when it doesn't work. However, there are a few fast fixes you may attempt when you face "iPhone screen recording not working" issue.
- Way 1: Restart Your iPhone
- Way 2: Enable Screen Recording in Control Centre
- Way 3: Check Available Storage
- Way 4: Use iOS System Recover
- Way 5: Reset All Settings
- Way 6: Maintain Temperature of Your iPhone
- Way 7: Disable Screen Recording Restriction
- Way 8: Update iOS
- Way 9: Turn off Lower Power Mode
- Way 10: Check App Limitation
- Way 11: Enable Microphone
- FAQs about Screen Recording on iPhone
Way 1: Restart Your iPhone
The screen record does not operate when the screen recording fails to record your iPhone. You must try, restart your device.
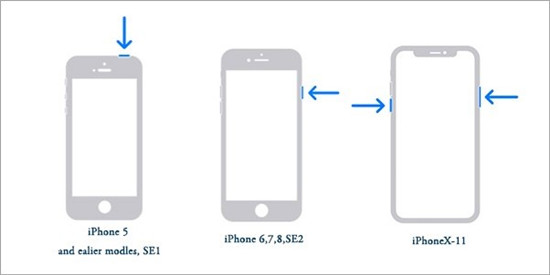
iPhone 8 and newer:
Press and release the Volume Up button quickly. Go ahead to press the Volume Down button. After that, press and hold the Side button simultaneously until you see the Apple logo on the screen.
iPhone 7/7 Plus:
Press and hold the Side button and Volume Down button until the Apple logo appears on your screen.
iPhone 6S and earlier:
Press and hold the Home button and the Side button until you see the Apple logo appear on the screen.
Way 2: Enable Screen Recording in Control Centre
Before using screen recorder to capture your iPhone screen, be sure that Screen Recording is enabled on your device. You may enable it by following the below-mentioned steps to fix iOS screen recording bug:
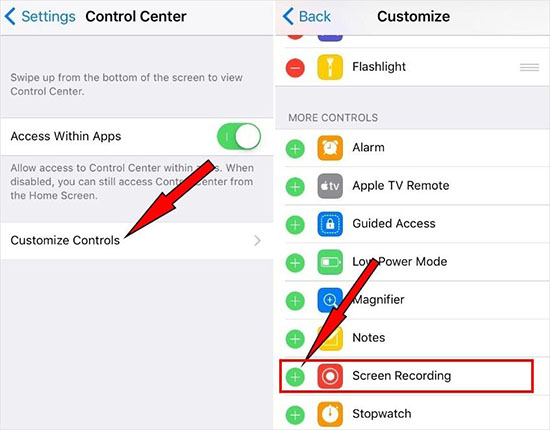
- Step 1: Go to Settings.
- Step 2: Press on Control Centre.
- Step 3: Scroll down to Screen Recording.
- Step 4: Tap the "+" icon next to it.
Way 3: Check Available Storage
If you don't have enough space on your iOS device, you may face "screen recording iPhone 7 not working" issue. Now you can see the primary memory status of your iPhone, including the amount of accessible memory. When there is no additional free space on your iPhone, you can erase some unwanted apps, folders, images, and other extra things to free up space. Here is what you can do:
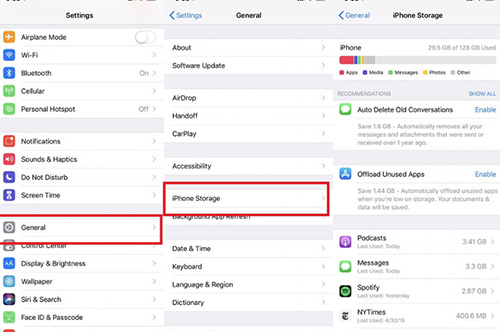
- Step 1: From the Home screen, select Settings.
- Step 2: Select General - iPhone Storage.
- Step 3: Select and delete your unwanted content.
Way 4: Fix iPhone Screen Recording Not Working with iOS Recovery Tool
Joyoshare UltFix can tackle iOS issues without a hard reset or reinstallation of the operating system. You won't have any trouble using Joyoshare UltFix to fix your iOS difficulties as soon as possible if you keep the suggestions in mind. It is compatible with Mac and Windows operating systems and allows you to enter and exit recovery mode for free. Also, it solves your problem in following steps no matter what the problem is:
- Designed with a two-mode repair system
- Suitable for all iOS devices and versions, including iOS 15
- One-click option to enter/exit recovery mode
- Repair 150+ potential iOS issues with no data loss
- Fix issues related to recording like iPhone video no sound recorded
Step 1 Connect iPhone to the computer
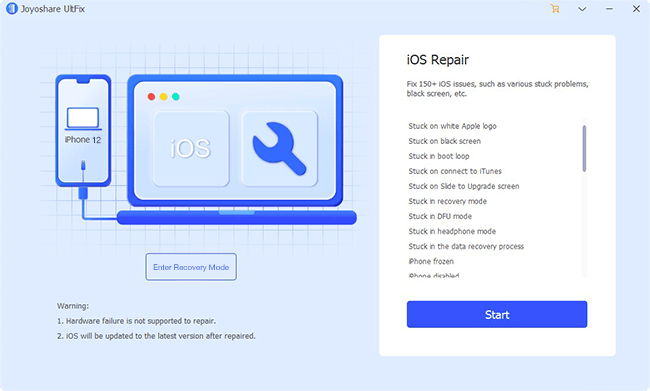
It only takes seconds to install and configure Joyoshare UltFix. This program may be downloaded from the official website and should install without issue on your PC/Mac. Following that, you should proceed by following the on-screen directions. Link your iPhone to the PC/Mac with a USB cable and click the Enter Recovery Mode. Then, select Start option to proceed.
Step 2 Choose a repair mode
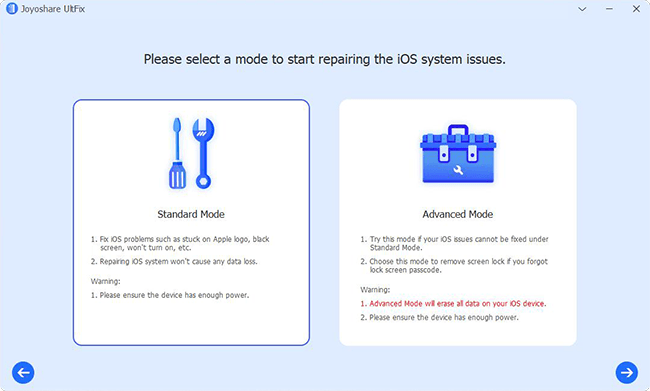
Then, depending on the device's present state, you are able to pick between both the Standard Model and the Advanced Mode. To fix issues without data loss, simply choose Standard Mode.
Step 3 Download the firmware package
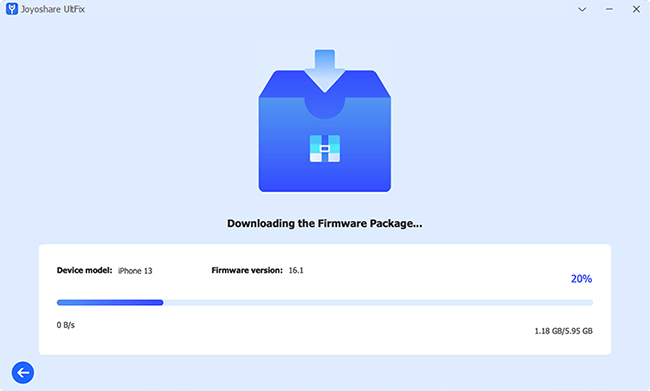
It may take a few moments for Joyoshare UltFix to identify your device. Then, confirm your iPhone information on your screen and download firmware package by clicking Download button.
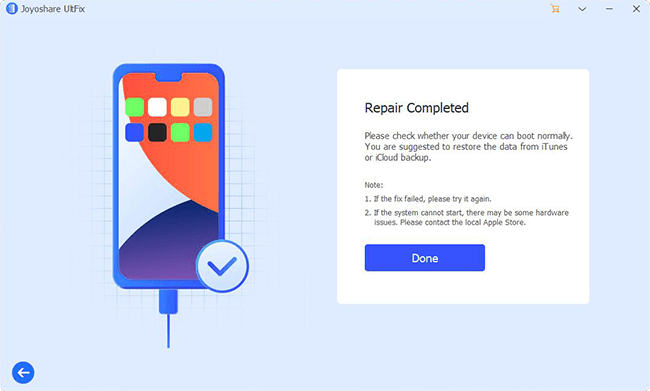
Step 4 Repair iPhone screen recording not working issue
After the downloading process, just click the Repair option to begin repairing your iPhone with "iPhone screen recording not working" issue.
Way 5: Reset All Settings
If the preceding four solutions fail to solve your problem, you might try resetting your iPhone. This method will not erase any information from your iPhone, but it will allow you to reset several settings that may interfere with screen recording. This strategy is acceptable if you don't mind configuring all the settings from scratch. With that in mind, below are the instructions for resetting the preferences:
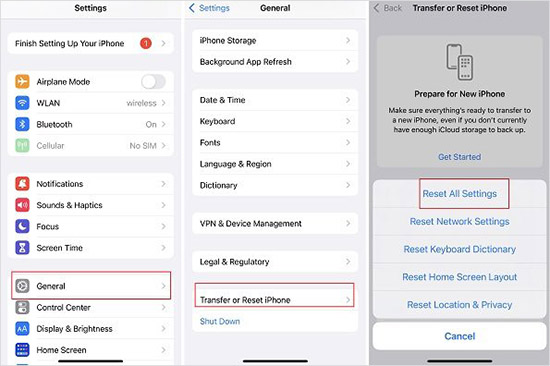
- Step 1: Open the Settings app. Select General from the drop-down menu.
- Step 2: Scroll down to the bottom of the page and pick Transfer or Reset iPhone.
- Step 3: Then, at the bottom of the screen, touch Reset and select Reset All Settings.
- Step 4: You'll be required to enter your iPhone passcode next. After entering the passcode, an option will appear at the bottom of the screen that says "This will reset all settings". To confirm, press Reset All Settings once again.
Way 6: Maintain Temperature of Your iPhone
Another issue that some customers have encountered is that the gadget heats up to a specific level when recording, playing video games, or viewing videos. However, you can resolve iOS issues like "iPhone screen recording no sound" by doing the following tips:
- Tip 1: Turn off some heating apps, such as Bluetooth, games, films, and GPS. If they aren't needed throughout the recording, turn them off.
- Tip 2: Turn off your device's charger till the screen recording is finished.
Way 7: Disable Screen Recording Restriction
The most valuable function on the iOS 15 is screen recording. It enables users to record game footage from their favourite games and create dynamic films for their non-tech-savvy pals. You can follow the below steps to fix "iPhone screen recording not working" issue.
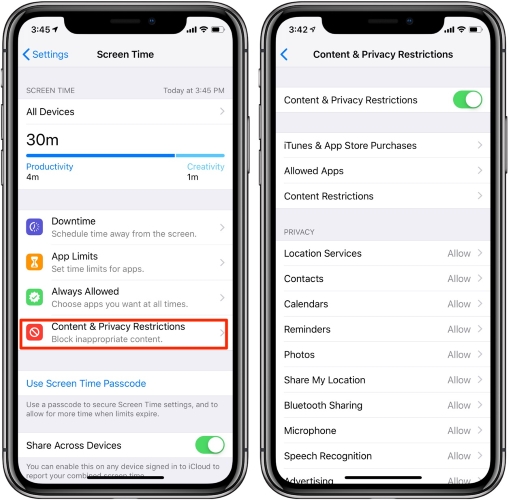
- Step 1: Tap "Settings" after unlocking your iPhone.
- Step 2: Select "Screen Time" from the "Settings" menu. Select "Content & Privacy Restrictions" after you're on the Screen Time panel.
- Step 3: Activate "Content & Privacy Restrictions", and select "Content Restrictions" under the "Content & Privacy Restrictions" section.
- Step 4: Scroll down to the "Screen Recording" and then tap "Don't Allow".
Way 8: Update iOS
If none of the above techniques successfully resolve the iPhone screen recording not functioning issue, you should wait for a new iOS version and attempt to update your iOS device. Each update will include bug fixes and enhancements. Updating iOS may solve your problem without any effort.
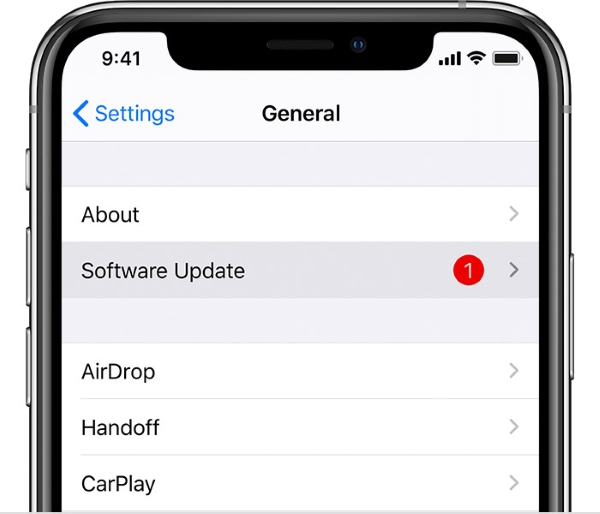
- Step 1: Launch Settings. Go to General.
- Step 2: Press on Software Update, and turn on Automatic Updates.
- Step 3: Hit on Download and Install if an update is available.
Way 9: Turn off Lower Power Mode
If you get an error message "Screen recording not saving on your iPhone" while screen recording, it's most likely because you're using Low Power Mode. Some features may not operate if the mode is active until you turn it off.
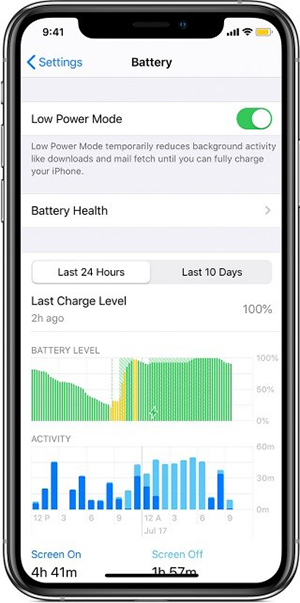
- Step 1: Press on Settings.
- Step 2: Press on Battery.
- Step 3: Switch off the button next to Low Power Mode if it's on.
Way 10: Check App Limitations
Is the Screen Recording function not working when you try to record certain applications? If this is the case, the functionality is most certainly restricted. It is what you'll do to remove the limitation.
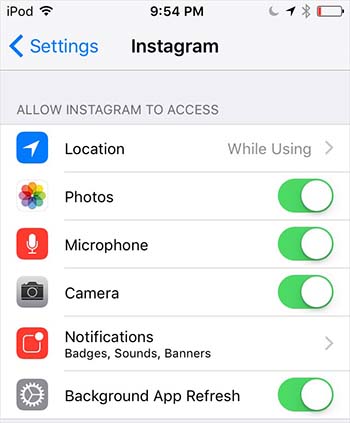
- Step 1: Open the Settings app first. Scroll down to find and choose the application that can't be recorded.
- Step 2: Then, you can find Camera option under the ALLOW (APPLICATION) TO ACCESS.
- Step 3: Switch on the option and check whether this solution fixes issue.
Way 11: Enable Microphone
Some users have claimed that they get no sound on their devices when they start screen recording. It's a simple issue because the Microphone isn't switched on. To repair "iPhone screen recording no sound" issue, do the following:
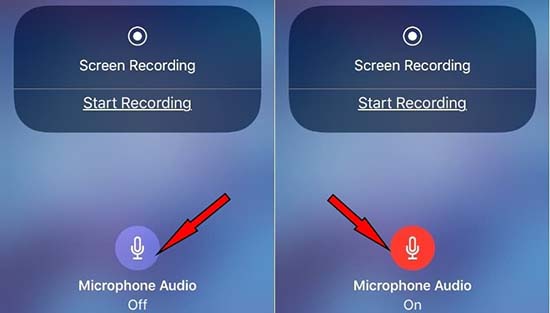
- Step 1: Open Control Centre.
- Step 2: Press the Screen Recording symbol.
- Step 3: Press "Microphone" icon to activate the audio.
Frequently Asked Questions about iPhone Screen Recording
Q1. How to get screen record on iPhone?
To share with colleagues or use in documents, you can record the screen as it displays or a video of operations on the net. Swipe down from the top of your screen and press the white circle button. Then, back to the screen that you want to record. To stop the recording function, just press the red button at the top of your screen.
Q2. How long can you screen record on iPhone?
A: Many people are curious about how long they can record their screens on iPhones without being disturbed. Apple claims that screen recording is unrestricted. The only factors that influence the amount of time are battery charge and storage space.
Q3. How to edit screen recording on iPhone?
A: When you stop recording your screen, you'll see that your recording is saved in the Photos app. You can take advantage of all the constructed iOS video editing options to improve your screen recordings. There's a significant probability that your recording will include some extra stuff at the beginning or finish. You probably don't want to have the shot of the Control Centre disappearing or the scene where you switch off the screen recording. Thankfully, you can remove such elements from the Photos app directly. Go to Photos and open them. Select Edit. Drag the arrows at the bottom-placed to trim the start or end. Press the Done button.
Conclusion
Screen recording is a useful feature with a variety of applications. It allows you to capture your precious memories on your iPhone, share intricate processes and provide feedback to app developers. Hopefully, the solutions listed above are helpful to fix iPhone screen recording not working issue, and you are now back in business.
