Q: "when trying to record an 8-minute online training video, the video will record but not the audio. It has nothing to do with the length of video as I tried recording several times with smaller videos but no audio got recorded." – From Apple Community
With the built-in screen recording feature on iPhone running on iOS 11 and later versions, recording screen becomes as easy as apple pie now. You can save any favorite YouTube clips, capture gaming consequences, and share interesting videos with your friends within easy reach. However, iPhone users benefit from a new technology followed by rising issues and bugs. Some of them have complained of this kind of issue in Apple Community and feel at a loss on how to fix iPhone screen recording no sound. If you have the same question, this article will help you a lot and free you from trouble by trying solutions one by one.
- Part 1. How Do I Screen Record on iPhone with Sound?
- Part 2. Why Is There No Sound on iPhone Screen Recording?
- Part 3. Full Fixes to No Sound on iPhone Screen Recording
- Method 1. Keep Microphone Audio On
- Method 2. Check If Certain Apps Refuse Recording with Sound
- Method 3. Remove Restriction on Screen Recording
- Method 4. Restart Your iPhone
- Method 5. Upgrade iPhone to the Latest Version
- Method 6. Ask the Help of Professional iOS System Repair [Highest Success Rate]
- Method 7. Reset All Settings
- Method 8. Restore Your iPhone
- Part 4. Know More about iPhone Screen Recording
- Part 5. Final Words
Part 1. How Do I Screen Record on iPhone with Sound?
With the release of iOS 11 versions, screen recording feature is widely popular among iOS users. But you may have trouble finding how to screen record on iPhone with sound. As a matter of fact, it can be operated with ease.
- Step 1: You need to add the recording feature to Control Center first. Head to Settings → Control Center.
- Step 2: Find Screen Recording option in MORE CONTROLS. And tap + button.
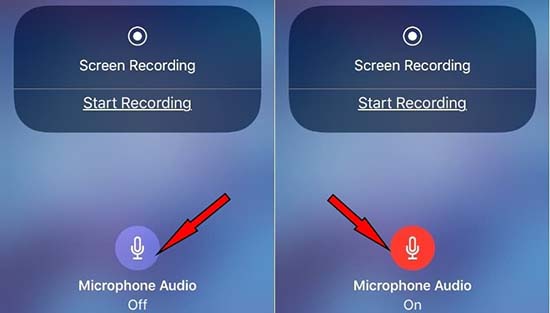
- Step 3: Then you'll see record icon in Control Center, which resembles a circle with a dot. Keep pressing it and tap the Microphone icon when a popup appears.
- Step 4: After the gray Microphone icon turns red, tap Start Recording.
Part 2. Why Is There No Sound on iPhone Screen Recording?
Nevertheless, it demonstrates that the no sound issue still exists after Microphone switch is enabled. Why is there no sound when we record on iPhone?
- Application prohibition: Some apps won't allow you to record with audio and that's why your recordings have no sound.
- System issue: If your system has not been updated for a time, your iPhone is prone to behave not as usual and the recording issue might occur.
- Microphone problems: A faulty microphone is not able to capture any sound. You can check your microphone whether works well before recording.
- Software glitches: Bugs or glitches in the software is most likely to be responsible for the annoying trouble.
Part 3. Full Fixes to iPhone Screen Record No Sound
Now we move to the problem-solving part. You can resort to all these methods and your problem should be fixed with no trouble.
Method 1. Keep Microphone Audio On
Only with the microphone on, your iPhone screen recorder would be able to catch audio. Otherwise, you are basically wasting your time if no mic on. Hence, you can do a quick check on your microphone if you can't hear anything from your recordings. Yet, if you follow the instruction accurately in Part 1 and turn the gray microphone into red, maybe the problem isn't related to this. You can skip to the next option.
Method 2. Check If Certain Apps Refuse Recording with Sound
Sometimes there is nothing wrong with the iPhone recorder itself when you get recordings with no sound. It is because some applications won't allow you to capture audio for security or privacy concerns. For example, Apple Music makes it clear that it will mute the recording when attempting to capture the app. The similar situation happens to FaceTime and other applications. Next time you find no sound on your screen recording, check whether the app allows users to perform that action.
Method 3. Remove Restriction on Screen Recording
It's also the case that the screen recording just doesn't work. You can't apply it to capturing both the video and audio. And you'll see the screen recording button on Control Center is grayed out. In this case, you need to remove the restriction on iPhone screen recording feature.
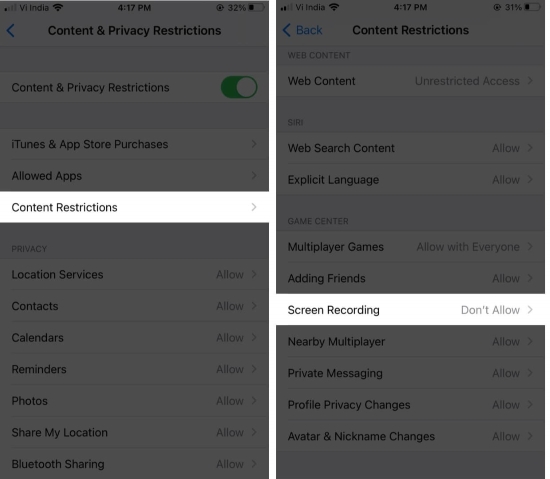
- Step 1: Open Settings app and go to Screen Time.
- Step 2: Choose Content & Privacy Restriction, then click Content Restriction.
- Step 3: On the next screen, scroll down to make sure Screen Recording is allowed.
Method 4. Reboot Your iPhone
Consider restarting your iPhone whenever you run into application crash and software glitches. It has been widely promoted and certified by iPhone experts on a variety of technical forums. Errors and bugs involving screen recording can be cleared within this process. It may be the major cause of this issue.
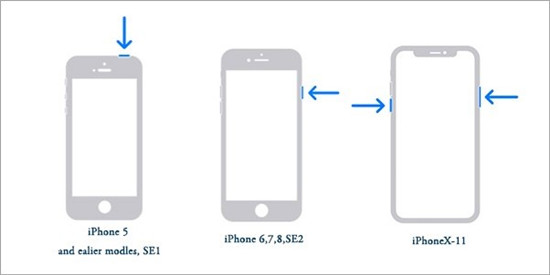
For iPhone X/11/12/13 or later:
● Press and hold either volume button and the Power button in the meantime. After dragging the slider, press and hold the Power button to activate your iPhone.
For other iPhone models:
● Pressing and holding the Power button twice is sufficient to reboot your iPhone.
Method 5. Upgrade iPhone to the Latest Version
Each newly released iOS version is intended for offering more customizable features, modifying bugs, and fixing errors occurring in the previous versions. At this point, when screen recording on iPhone has no sound, you might as well check whether there is a new iOS update available.
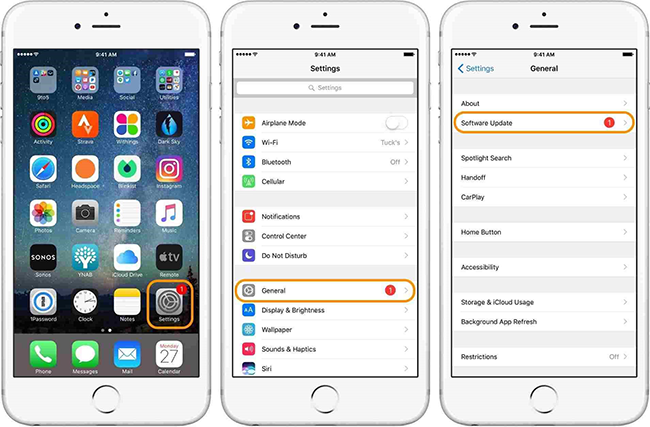
- Step 1: Go to Settings and enter General screen.
- Step 2: If a red icon shows beside Software Update option, tap on it.
- Step 3: Locate Download and Install button.
Method 6. Ask the Help of Professional iOS System Repair
If updating software can't work at all, system errors and bugs might stop screen recording from working properly on your iPhone. Joyoshare UltFix is the most suitable iOS system repair tool for you. It is developed to solve 150+ system issues without data loss. While it is compatible with iPhone, iPad, and iPod touch, it is able to work well on iPhone 15 and iOS 17, regardless of how complicated the problem is. The most attractive point is that dual repair modes are capable of fixing common iOS system problems and dealing with locked iPhone and complicated errors within simple clicks.
- Get your device in and out of recovery mode free of charge with one click
- Offer standard mode and advanced mode to get rid of nearly all troubles
- Intuitive interface makes it effortless to operate it
- Update and downgrade iOS 17 beta in simple steps
- Fix iPhone screen recording and video no sound recorded issue with ease
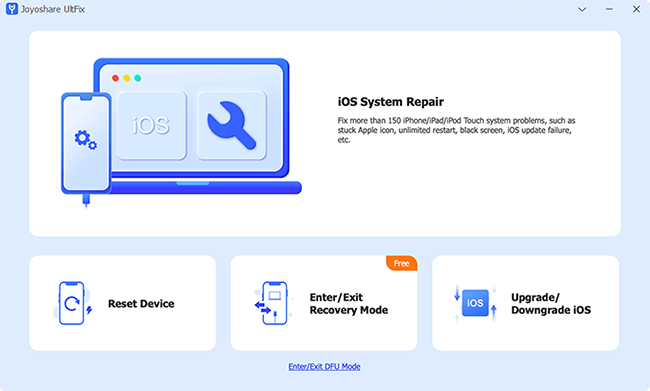
Step 1 Download Joyoshare UltFix and Connect iPhone
Download Joyoshare UltFix from the link above. Launch it and then connect your iPhone to your computer. Then click "iOS System Recovery" button. And click "Start" on the next interface.
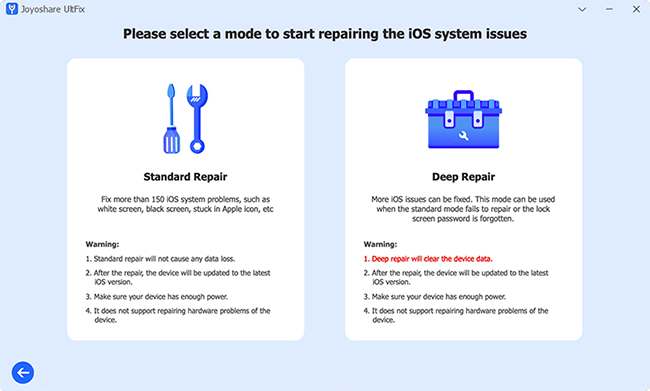
Step 2 Set Standard Repair Mode
While standard mode is able to repair nearly all iOS system issues without data loss, select "Standard Repair" mode first. Most of the time you can go to the next step directly if the tool has detected your device successfully. If not, you are required to put your iPhone into recovery mode or DFU mode manually by following onscreen instructions.
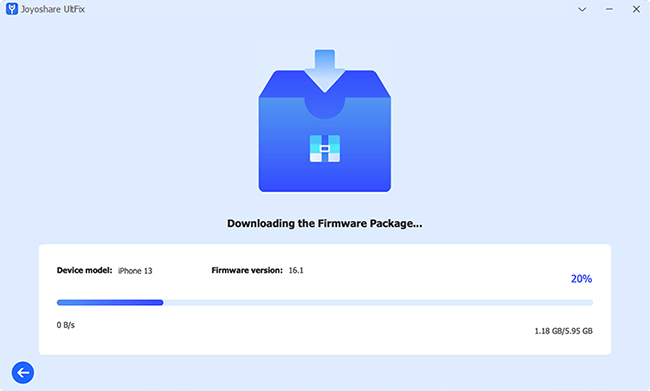
Step 3 Download the Firmware Package
Make sure the shown device information is correct. Hit on "Download" button to download and verify the machining firmware package. You require a little patience to wait for its completion.
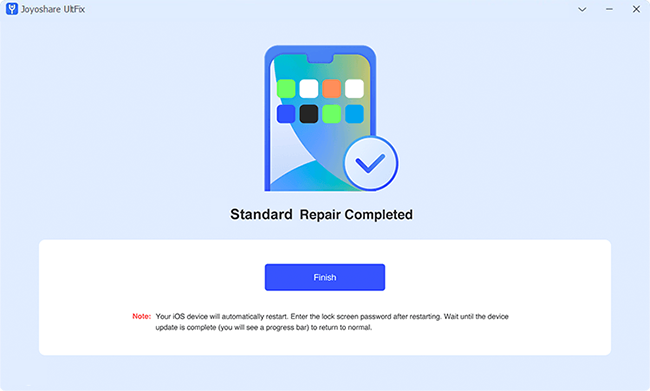
Step 4 Solve No Sound on Screen Recording iPhone
In the end, click the "Repair" button. This tool will unzip the firmware package and repair your iPhone automatically. Generally, your iPhone will get back to normal with the "Finish" button displaying on the interface.
Method 7. Reset All Settings
If none of them can take effect, resetting all settings might be workable on this problem. In order to eradicate system errors, you need to erase all settings data, but fortunately, it will keep your files stored on your iPhone intact.
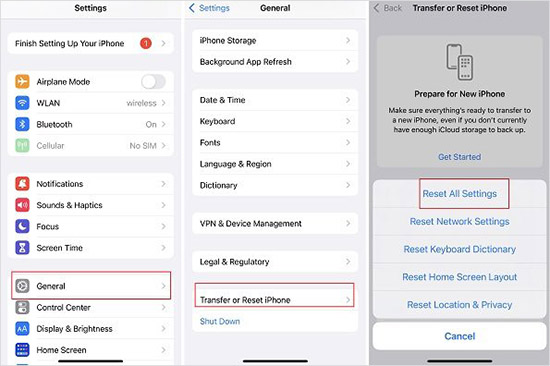
- Step 1: Head over to Settings and choose General tab.
- Step 2: Find Transfer or Reset option and then click Reset, followed by Reset All Settings.
- Step 3: You are required to enter passcode to reset settings on your iPhone.
Method 8. Restore Your iPhone
It has proved effective on such a system problem that restoring your iPhone using iTunes. You just need a computer and the newest iTunes version. Nevertheless, as the name implies, it will erase all data and set up your iPhone as a new one. It's more of the last resort to address iPhone issues.
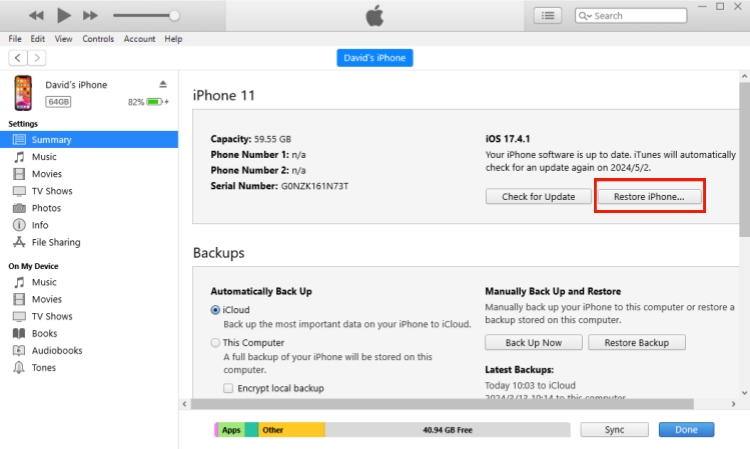
- Step 1: Connect your iPhone to your computer via an original USB. Locate the device icon.
- Step 2: Choose "Back Up Now" option under Summary tab to avoid data loss.
- Step 3: Afterward, click on "Restore iPhone…". After completing restoring your iPhone, select the "Restore Backup" button.
Part 4. Know More about iPhone Screen Recording
Q1. How can I export iPhone recording videos to my computer?
A: What you record on your iPhone will save on your Photos by default. Computer can get access to your Photos when they are connected. So, you only need a cable to export recording videos to your computer. First, connect your iPhone with PC via a USB cable. Then unlock your iPhone and choose Trust when a trust alert shows on the screen. The computer would access your iPhone's Photos and present them on its screen, which includes your recording files. You can select what you want and save them on your computer.
Q2. Can I record as long as possible on iPhone?
A: There is no time limitation for iPhone recording. However, the storage capacity and battery level will affect its recording process.
Q3. Can I record a live conversation on my iPhone?
A: Actually, iPhone doesn't support recording with microphone while users are having a live phone conversation. So you are not able to record this directly on your device.
Part 5. Final Words
If iPhone screen recording no sound still can't be fixed, there are possibly hardware issues on your iPhone. You need to contact Apple Support and describe what you are facing. If necessary, it is better to send your iPhone to Apple store to detect iPhone microphone. We sincerely hope you can enjoy the screen recording feature again with the help of this article. We are always here to provide you with reliable and helpful solutions to get issues repaired. If you have further quires about iPhone screen recording not working, welcome your more comments.
