Q:"iPhone is disabled connect to iTunes, How can I fix this issue?" - From Apple Community
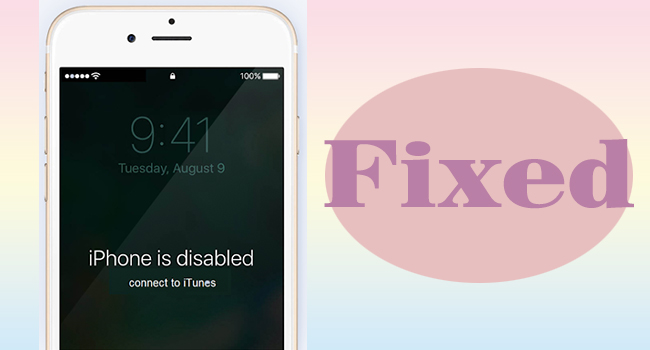
As is often the case, if you forget the passcode and make the wrong attempts up to 10 times in a row, your iPhone will become disabled and you'll be asked to connect to iTunes. This situation is truly frustrating and can leave you a little overwhelmed. Not being able to access devices is a struggle, but never mind. To make your iPhone available to use as soon as possible, keep an eye on us in this article and see which solution is best for you. We will elaborate on the specific reasons and talk about how to fix iPhone is disabled connect to iTunes in different ways.
- Part 1. Why Is iPhone Disabled Connect to iTunes?
- Part 2. Video Tutorial to Fix iPhone Disabled Connect to iTunes
- Part 3. How to Fix iPhone Is Disabled Connect to iTunes
- Method 1: Restore Disabled iPhone with iTunes in Recovery Mode
- Method 2: Repair Disabled iPhone with iOS System Recovery
- Method 3: Unlock Disabled iPhone with iPhone Unlocker
- Method 4: Erase Disabled iPhone with iCloud
- Method 5: Reset Disabled iPhone with Find My App
- Part 4. FAQs about Disabled iPhone
Part 1. Why Does iPhone Say Disabled Connect to iTunes?
There are many situations that can cause your iPhone to be disabled. For example, your child is playing with an iPhone and enters a mismatched passcode multiple times on the lock screen. Or someone else wants access to your iPhone to snoop on privacy and keep typing the wrong passcode. Of course, you could also suddenly forget your passcode and try a wrong one, rendering your iPhone unusable. In the sake of security, your device will lock itself and become inaccessible. The more times you try, the longer it will be disabled.
- 5 incorrect passcode attempts: iPhone is disabled, try again in 1 minute;
- 7 incorrect passcode attempts: iPhone is disabled, try again in 5 minutes;
- 8 incorrect passcode attempts: iPhone is disabled, try again in 15 minutes;
- 9 incorrect passcode attempts: iPhone is disabled, try again in 60 minutes;
- 10 incorrect passcode attempts: iPhone is disabled, connect to iTunes.
Part 2. Video Tutorial to Fix iPhone Disabled Connect to iTunes
If you're not sure what to do when your iPhone says disabled and connect to iTunes, watch this video tutorial carefully. You can view each solution and try it yourself.
Part 3. iPhone Is Disabled Connect to iTunes How to Unlock?
As the prompt shows on your lock screen, when your iPhone says disabled connect to iTunes, you can ask iTunes for help. If this solution doesn't work, try using iCloud, Find My app, iOS system recovery or iPhone unlocker. You can walk through all details as follows.
Method 1: Restore Disabled iPhone with iTunes in Recovery Mode
In order for iTunes to better detect your disabled iPhone, you must first force the device into recovery mode. However, using this method to restore an iPhone to factory defaults requires disabling the Find My feature. So, make sure everything is ready and proceed.
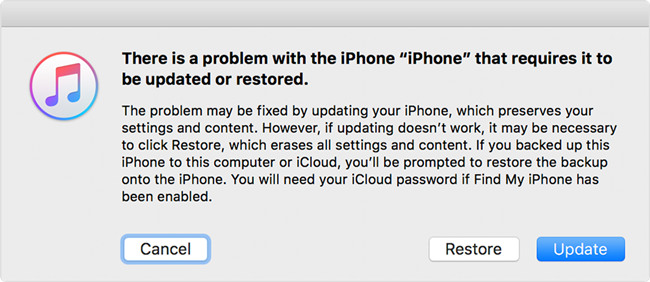
- Step 1: Plug your disabled iPhone into computer and launch iTunes.
- Step 2: Set the connected iPhone into Recovery Mode:
- iPhone 8 and later: press Volume Up and release it, press Volume Down and release it, and hold the Side button until you enter the recovery mode.
- iPhone 7 and 7 Plus: press and hold the Side button and the Volume Down button simultaneously, and release them after you see the Apple logo.
- iPhone 6s and earlier: hold the Home button and the Power button until the Apple logo appears.
- Step 3: Select "Restore" when iTunes pops up a window to ask you whether to "Restore" or "Update" your iPhone.
- Step 4: Wait until iTunes finishes downloading iOS software for your iPhone. After your device restarts, set up device in your own way.
Method 2: Repair Disabled iPhone with iOS System Recovery
Joyoshare UltFix is an easy-to-use software that you can make the most use of. It has the ability to effectively handle thorny iOS issues, such as iPhone is disabled connect to iTunes, stuck in recovery mode, update taking forever to download, iPad stuck in boot loop, and so on. No password is required and you can restore your iPhone to its original state without iTunes. Notably, its full compatibility makes it easy to work with all iOS models and iOS versions. You can also use it to automatically enter or exit recovery mode instantly with just one click.
- Fix disabled iPhone/iPad/iPod touch without iTunes
- Repair 150+ iOS/iPadOS system issues with no data loss
- Free to enter/exit recovery mode in one click
- Downgrade and update iOS software to desired versions
- Factory reset device to get out of troublesome cases
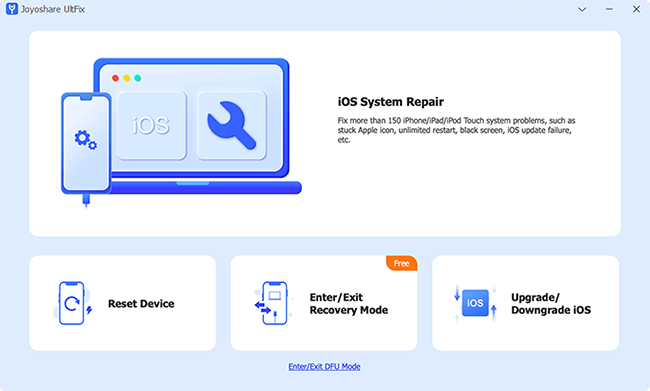
Step 1 Plug into Computer and Enter iOS System Repair
Plug your disabled iPhone into your computer. Open Joyoshare UltFix, enter iOS System Repair in the main interface and then click the Start button.

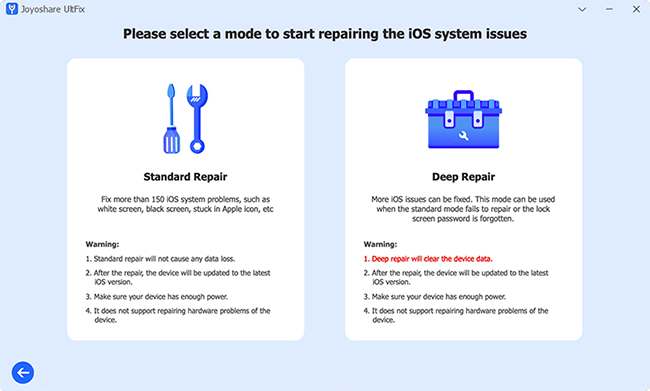
Step 2 Choose Deep Repair Mode
Deep Repair mode is going to erase all the data on your iPhone, including your passcode. So, if your iPhone is successfully recognized, click it and continue to the next step. If it fails to be detected, follow the guide on the screen to enter DFU/recovery mode and move on.

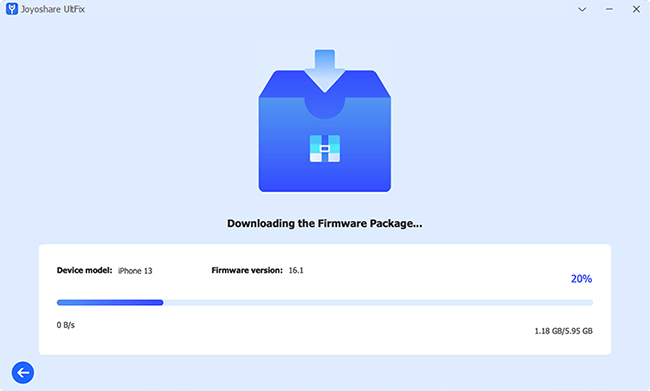
Step 3 Download the Firmware Package
Click the Download button after confirming your iPhone's information. Then Joyoshare UltFix will complete the verification of the firmware package.

Step 4 Fix Disabled iPhone without Connecting to iTunes
Click on Start Deep Repair button to fix "iPhone is disabled connect to iTunes" issue. When your iPhone turns on again, you could restore your data from your backup.

Method 3: Unlock Disabled iPhone with iPhone Unlocker
"iPhone is disabled" means that you are locked out of the device and what you should do is remove the screen lock. Likewise, Joyoshare iPasscode Unlocker is an amazing tool that does well in dealing with lockup cases. It works well on different iOS devices and is compatible with all iOS versions. Remarkably, it guarantees you a high rate of success, a high-security factor and user-friendly operation steps. Apart from this, you could utilize this program to remove Screen Time, Apple ID and MDM restrictions.
- Unlock a disabled iPhone without iTunes effortlessly
- Bypass Screen Time and MDM restrictions without data loss
- Remove Apple ID without password on any device
- Compatible with all models of iDevices and the latest iOS version
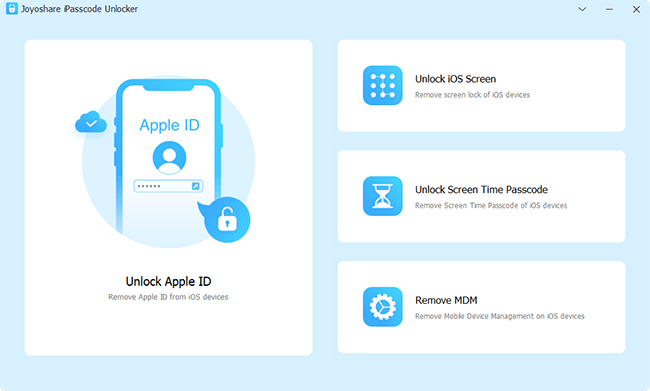
Step 1 Connect iPhone and Run Joyoshare iPasscode Unlocker
Run the latest version of Joyoshare iPasscode Unlocker on your computer, and connect your disabled iPhone to it. Once the program opens, click Unlock iOS Screen.

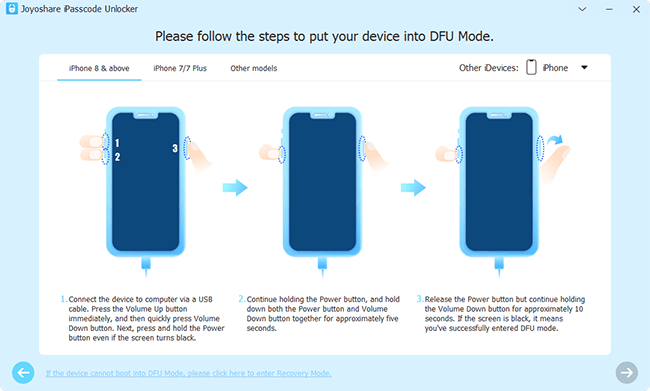
Step 2 Enter Recovery/DFU Mode
Follow the steps in the program to put your iPhone into recovery mode or DFU mode. Once done, you can see that the right arrow at the bottom turns blue and is clickable.

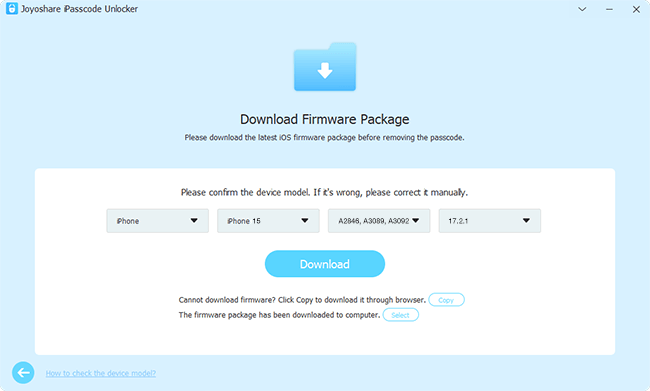
Step 3 Get Firmware Package Downloaded
After previewing the detailed information of your device, click the Download button in Joyoshare iPasscode Unlocker to get the matching firmware package downloaded.

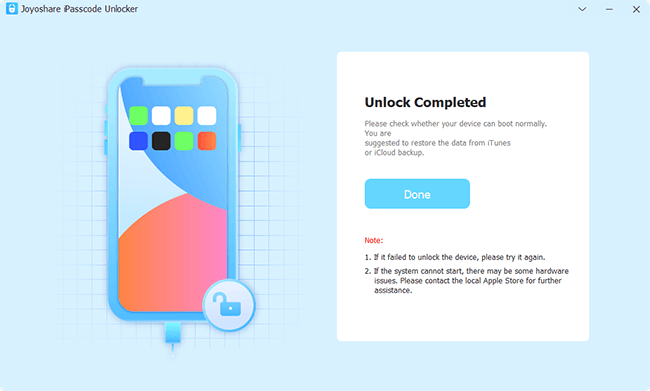
Step 4 Unlock Disabled iPhone without Connecting to iTunes
Click the Unlock button in the program to start removing the screen lock on your disabled iPhone. Once the whole progress ends, your iPhone will restart with no lock screen passcode.

Method 4: Erase Disabled iPhone with iCloud
Luckily, you are allowed to use iCloud to erase data and settings from your disabled iPhone as long as you have enabled the "Find My iPhone" option already.
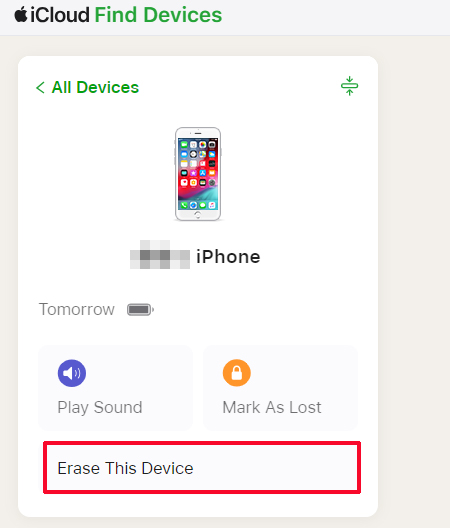
- Step 1: Open a browser on your computer and visit icloud.com.
- Step 2: Sign in iCloud with Apple ID and password.
- Step 3: Go to "Find My" → "All Devices" to find your disabled iPhone in the list.
- Step 4: Click on the name of your disabled iPhone and select "Erase This Device" to wipe all data and settings, including screen passcode.
Method 5: Reset Disabled iPhone with Find My App
If you have another accessible Apple device, you can use the Find My app for device erasure. This method works similarly to iCloud.com and helps you reset your device to factory Settings remotely. However, it also requires that you have "Find My iPhone" enabled and you know the credential information.
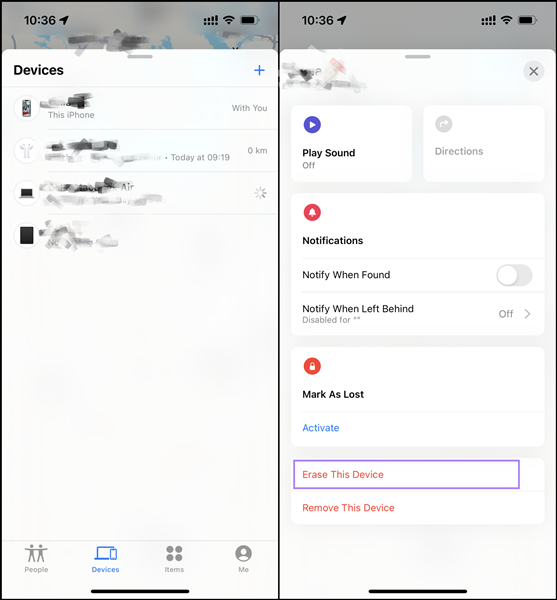
- Step 1: Open another Apple device and enter Find My app.
- Step 2: At the bottom of the screen, locate and tap Devices tab.
- Step 3: In the list, choose your disabled iPhone.
- Step 4: Tap "Erase This Device" option and confirm your actions to finish factory reset iPhone. This can at the same time remove lock screen and give you a chance to set up your device.
Part 4. FAQs about Disabled iPhone
Q1: How to fix iPhone is disabled without iTunes?
A: If iTunes can't work properly to get your iPhone out of the disabled lock screen, you can try iCloud.com, Find My app, Joyoshare UltFix or Joyoshare iPasscode Unlocker.
Q2: Will iTunes fix my disabled iPhone with data loss?
A: Yes. iTunes will restore your disabled iPhone to fix the issue. This will bring your device back to the factory settings and cause data loss.
Q3: How to prevent my iPhone from being disabled?
A: To avoid iPhone being disabled, you can set an easy-to-remember passcode, activate Face ID or Touch ID as a fallback, back up data regularly, and keep other people away from your phone.
Conclusion
Up to now, you have known how to fix iPhone is disabled connect to iTunes. Simply select the most suitable one for yourself according to the actual situation. However, if you only would like to unlock disabled iPhone, Joyoshare iPasscode Unlocker can be a good choice. Compared to it, the mentioned Joyoshare UltFix iOS System Recovery is capable of additionally repairing various iPhone system issues. Both of them are qualified to cope with disabled iPhone. Whichever you choose depends on you whether you prefer unlocking service or system repairing function, and there is no need to worry about compatibility. Anyway, hope this post can give you substantial help.
