Q:"My iPad stuck in guided access mode, can anyone tell me how to exit this glitch?" - From Apple Discussions
Are you easily distracted by push notifications on your iPhone or iPad when you need to concentrate on something? To give yourself a short period of time to efficiently complete the task at hand without interruptions, you are likely to have enabled Guided Access mode on your device, which allows you to quickly limit yourself to specific applications or features you need. Unfortunately, you may not be able to get out of this mode for some reason that interferes with your daily use of the device. In fact, this situation is quite common. Users using iPad Mini, iPhone 13/12/11/8, iOS 14/15/16, etc., have had the same feedback. So, we've gathered 5 post-test ways for you to tackle iPhone/iPad stuck in guided access soon.

- Part 1. What Is Guided Access Mode?
- Part 2. Top 5 Ways to Fix iPad/iPhone Stuck in Guided Access
- Part 3. FAQs about iPad/Phone Guided Access
Part 1. What Is Guided Access Mode?
Guided Access mode allows one to focus on a task on iPhone, iPad, and iPod. It limits the device to a single application. The user can only have access to the available application features if you restrict touch and gestures to a designated area on your screen. Besides, this mode can be used to turn off hardware buttons such as Home button on your device. This mode is of great help when you use applications like TD Snap, Compass, etc.
Part 2. Top 5 Ways to Fix iPad/iPhone Stuck in Guided Access
To get iPhone/iPad out of Guided Access mode, you may don't know which approach can put into effect. As a result, we shows top 5 ways below for you to get started quickly.
Way 1 Use the Triple Click Shortcut
This is an accessibility shortcut that allows the iPhone and iPad users to activate an accessibility feature by triple-clicking the Home button quickly. The Home button is the button that is at the center of your mobile phone. When you triple-click, it displays the available options to settle on the one you want. Therefore, if you are facing Guided Access not working issue, triple-clicking is the most prominent way to get out of that.
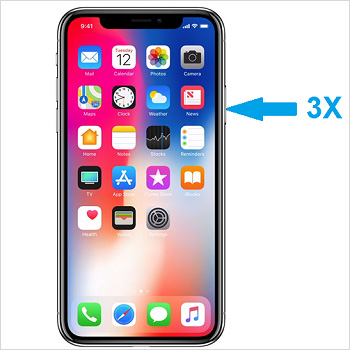
Although the newer versions of the iPhone have been modified a little, it has a Side button. After tapping it triple times, a passcode screen will pop up. Enter the Guided Access passcode you have set previously and then disable the Guided Access by clicking End.
Way 2 Force Restart iPhone/iPad
Another option to solve iPhone or iPad stuck on Guided Access issue is to hard reboot your device, then it will give you the option to turn off the Guided Access mode. Once the force restart is complete, navigate to Settings, select Accessibility, and you will see the option for Guided Access and then turn it off.
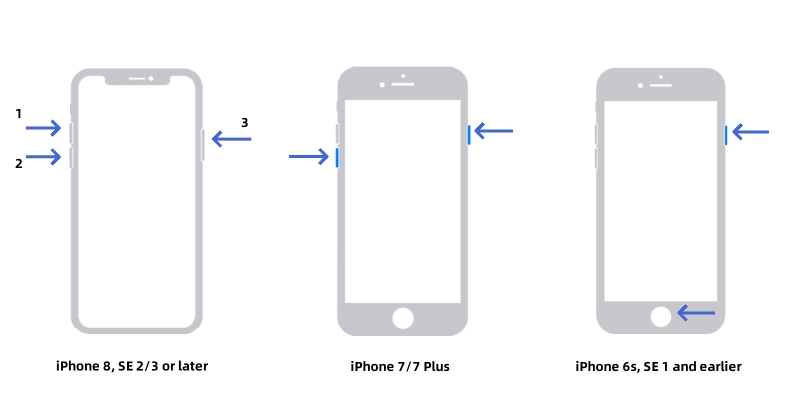
- For iPhone 6 and the ealier: Press and hold the Power and Home button together without releasing them. Press it until the Apple logo appears.
- For iPhone 7: Press the Power button and the low-volume key simultaneously until the Apple logo displays.
- For iPhone 8 and later versions: Quickly and respectively hold Volume Up and Volume Down button, then press the Power button until the Apple logo shows.
Way 3 Use iCloud Lost Mode
Although this process is a little technical and time-consuming, it is among the ways to get you out of Guided Access mode. The operation is different with what you used to do in iCloud and you can follow steps below to get started soon.
- Step 1: Visit iCloud.com and finish login into your iCloud account.
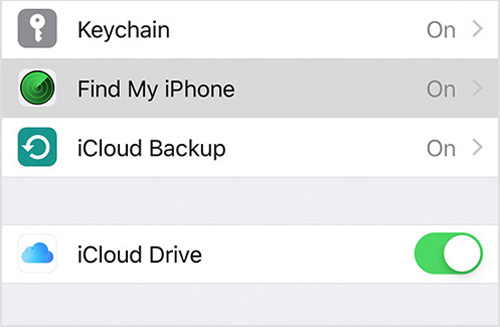
- Step 2: Click on Find iPhone option in the menu and activate "Lost Mode".
- Step 3: A message will pop up. skip it then you will find your stuck device showing the lock screen.
- Step 4: Input your passcode and your device will be removed out of the Guided Access mode instantly.
Way 4 Restore iPhone/iPad with iTunes
There are numerous ways to solve this problem, and restoring in iTunes is among them. If you view this as your best method to fix iPhone Guided Access stuck error, this is how to go about it. In this way, you will be able to restore your iPhone or iPad device to the default setting, and therefore you will not be stuck in the Guided Access mode anymore.
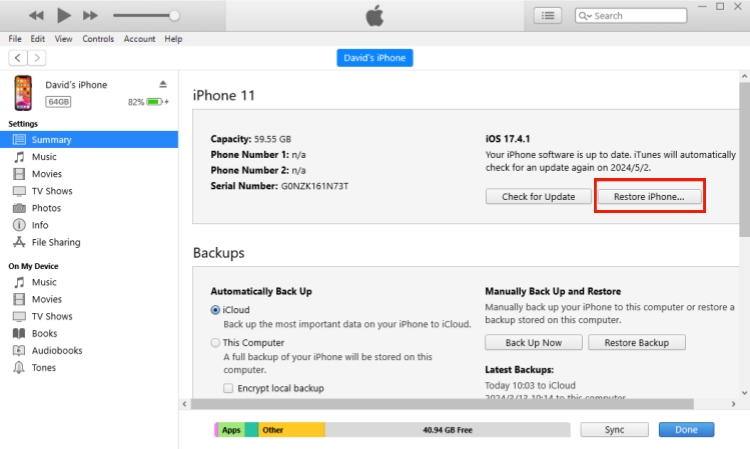
- Step 1: Open the most recent iTunes version and connect your iOS device to it. Put your device into DFU mode.
- Step 2: Navigate to the Device tab.
- Step 3: Then click on the "Restore iPhone" or "Restore iPad", which is located at the Summary tab.
Way 5 Use Joyoshare UltFix iOS System Recovery
If all the above-outlined methods do not work, you will now be left with an option of looking for professional iPhone repair software, and Joyoshare UltFix will get you out of that trouble. This software will help you quickly fix all the kinds of stuck issues on your iOS device, including Guided Access not working. The most amazing thing about using this software is that your data won't be lost. Also, the method works; it doesn't matter if you still recall your Guided Access password or not. It is very easy and straightforward. Another thing to note about this software is that it works in all iOS versions; you don't have to worry about the compatibility issues.
- Repair your iOS devices to normal, no data loss at all
- Friendly for users, no technical skill required
- Fully compatible with all iOS versions
- Support all iOS devices like iPhone, iPad, iPod
- Fix 150+ iPhone issues without data damage
Step 1. Connect your Device to a PC
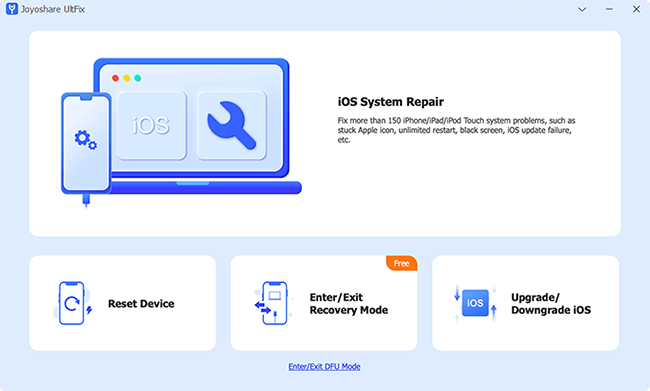
Download Joyoshare UltFix on your computer. Then finish installation and launch it. Get your iOS device connected to computer through the USB cable. Click on "iOS System Repair" and then Start.
Step 2. Choose Standard Repair
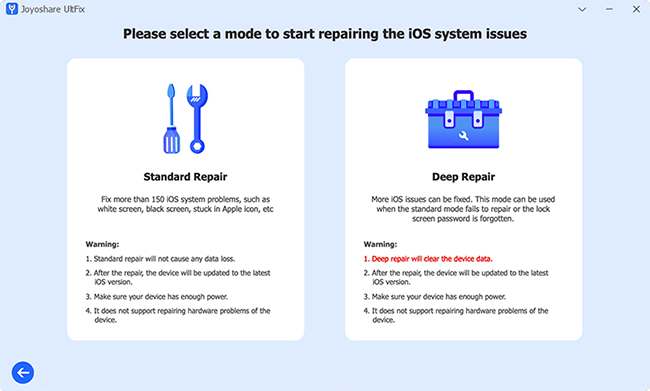
This software comes with dual mode for you to fix system issues. Here you can choose the Standard Repair mode and select the Next button to proceed. If device gets failed to be recognized, you should boot it to either DFU or recovery mode.
Step 3. Get Firmware Package
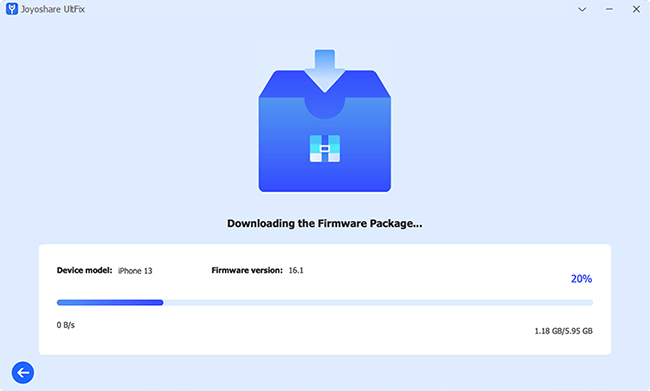
Confirm your iOS device information on your computer. Click Download to get the proper firmware package for your iOS device.
Step 4. Start to Repair Stuck in Guided Access
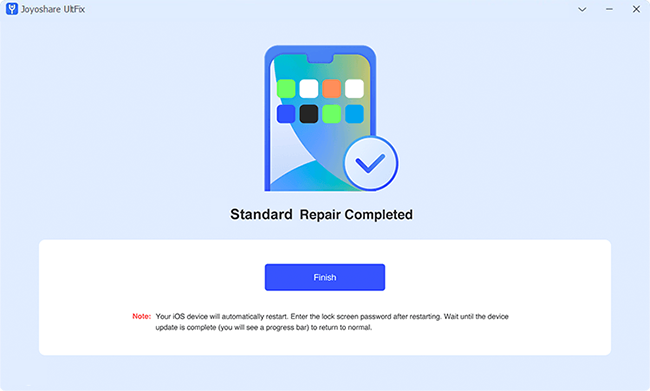
Click on the Start button to start fixing the issues on your device. After the process is completed and the device restarts, the Guided Access stuck mode problem would have been solved.
Part 3. FAQs about iPad/Phone Guided Access
Q1: How do I enable Guided Access?
- Step 1: Open "Settings" on iPhone/iPad, and then find "Accessibility".
- Step 2: Scroll down the screen to the bottom and click "Guided Access" to turn it on.
- Step 3: Tap on "Passcode Settings" to set a passcode or Touch ID/Face ID for ending Guided Access sessions.
Q2: How long will Guide Access last?
A: By default, the Guide Access mode on your iPhone or iPad will put the device to sleep after 20 minutes of use. Of course, if you want, you are able to set Guide Access by using the same timing as Auto-Lock to make your device to sleep.
Q3: Will Guided Access turn off if the phone dies?
A: Yes. Your Guided Access session will be turned off automatically once your iPad or iPhone is died. Therefore, this can be another solution for you to get out of Guided Access. However, for a phone to die completely, you need to drain the device's battery, which is actually time-consuming. So, you can directly force restart your iPhone or iPad to end Guided Access mode.
Conclusion
In conclusion, Guided Access mode is recommended when the users want to focus on a particular work, but sometimes it faces some issues due to the limitations. So, the above-outlined methods will help you get out of the iPhone/iPad stuck in Guided Access issue, choose the one that appears easy and convenient for you. Among the outlined methods, a professional and trusted Joyoshare UltFix software has been tested and confirmed to be the most appropriate method. The best is that it works even if you cannot remember your password.
