With the rapid development of smart phones, the problems encountered by users are becoming more and more diverse in the using process. Several days ago, some Apple users complain about their iPhone GPS not working continually and don't know how to go about it. It is generally known that GPS is used most frequently in the daily life, as many applications need to obtain your location information while you install them. Besides, you can apply it to locate, navigate, order, and so on. Of course, there are many factors contributing to the GPS issue. To resolve it, 6 different solutions are demonstrated below for you to get it normal simply.
- Solution 1: Check the Location Services
- Solution 2: Turn LTE Off
- Solution 3: Reset Network Settings
- Solution 4: Restore Your iPhone
- Solution 5: Soft Reset Your iPhone
- Solution 6: Use Joyoshare UltFix iOS System Recovery Without Losing Data
Part 1. Check If iPhone Apps are Given Permission
You know, if you don't have some specific apps access to your location, GPS won't work when you use them. For instance, you don't allow Maps application to get the certain location service permissions, which incapacitates you from determining your location in the Maps. Or sometimes, you just forget to do it. Take it easy. You can solve the issue that iPhone GPS doesn't work simply according to the following content. The first step is to choose "Settings". And then you need to click "Privacy" - get into "Location Services" and make sure that the applications you frequently use have permissions to utilize the location services function.
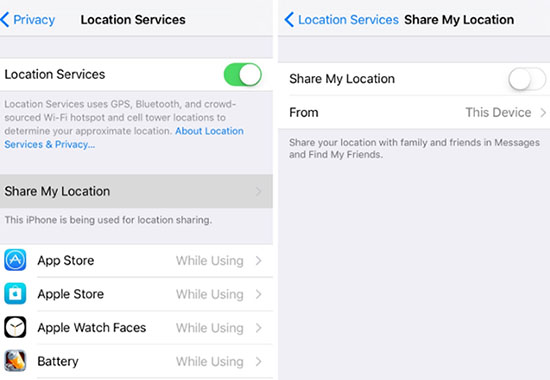
Note: There are three options including "Never", "While Using" and "Always" for you to set up the apps permissions. "Never" means this app is not able to get your location even though you are operating it. "While Using" indicates that only you are running this app can your location information be acquired by it. As the name implies, "Always" means whether you are operating the app or not, it can always get your location information. So you are able to select the different option according to the actual situation.
Part 2. Turn Off LTE to Repair iPhone GPS Not Working
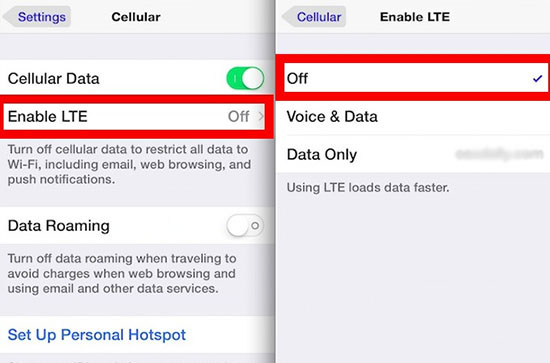
LET is a type of network with higher cellular speed and faster data loading, which is commonly known as 4G network. If your iPhone GPS doesn't work properly with this high-speed network, you can try switching to a lower network band to see if it helps you solve the GPS problem. This is the other solution you can have a try. Some users report that they can fix the issue by turning off the LET. You can also do it easily. First of all, you should get into "Settings" and next tap on "Cellular". Then, you can select "Cellular Data" option and click "Voice and Data". Finally, select 3G to complete it. After finishing the steps, you have to try the iPhone GPS to see whether this way is useful.
Part 3. Reset Network Settings to Solve the GPS Issue
It is a possible reason that network configuration is wrong, which results in GPS not working on iPhone. Under the circumstances, resetting all the network settings of your iPhone is the feasible measure to bring GPS back to normal. But you must be aware that network information on your iPhone including WiFi network information will be deleted in the process. So please write down the information before you reset. When you start to do it, you can follow the step below. You need to go into "Settings" - tap on "General" - enter "Reset" - click "Reset Network Settings". If you set up the passcode, you need to enter your password before it can be reset successfully.

Part 4. Restore iPhone to Factory Settings with iTunes to Fix iPhone GPS Not Working Well
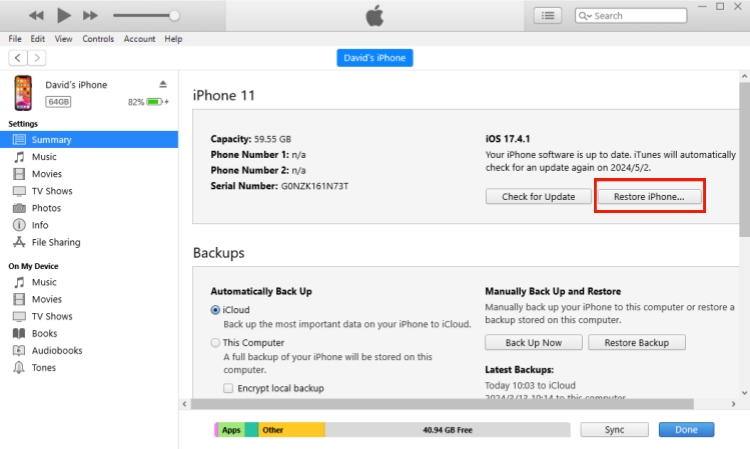
If the above ways are not helpful, you can try this solution to solve the GPS problem. It may be caused by an error attacking the iPhone internal system, and lead to the dysfunction of your iPhone GPS. In such a situation, restoring your iPhone to factory settings will be a nice choice for you. But this process will refresh the iPhone and set it a new one. Therefore, it is necessary for you to back up the whole data information before you do it. You all should know that the iPhone can be reset directly in the iPhone settings, so it would be superfluous to dwell on this method any more. Here are the steps for you to restore the iPhone to factory settings with iTunes.
Step 1: Run iTunes on the trusted computer and connect your iPhone with original USB cable;
Step 2: iTunes will recognize your device automatically;
Step 3: Choose the "Summary" option;
Step 4: Then, click "Restore iPhone" and confirm the action;
Step 5: Your iPhone will restart after iTunes reset it and install the newest iOS system. And you need to set the iPhone again after this operation.
Part 5. Perform a Soft Reset on the iPhone to Resolve GPS Issue
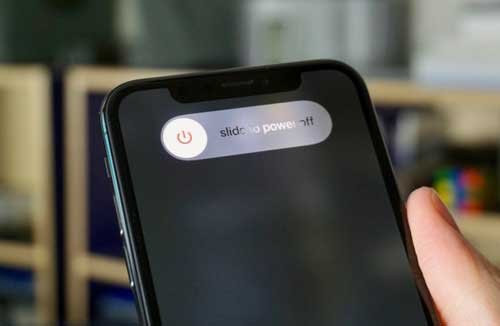
It is possible that iPhone GPS won't work results from many minor software problems on your iPhone. When the GPS issue you want to repair is caused by the random software failure, soft resetting your iPhone maybe helps you go through the problem. To do this, you just need to press and hold the "Power" button until the icon "slide to power off" appears. Then you should slide it to the right side to turn off your iPhone. Wait a minute, press the "Power" button again to restart it. This operation will not impact the data of the iPhone. So you can do it at ease.
Part 6. Repair It with Joyoshare UltFix iOS System Recovery with No Data Loss
If the iPhone GPS not working results from some iPhone system issues that need to be fixed with the third-party software, an excellent iOS issue repair tool - Joyoshare UltFix is introduced to you. You are offered two repair modes to solve your iPhone GPS problem. In addition to fixing more than 30 kinds of iOS system issues causing no data loss with "Standard Mode", you can also use "Advanced Mode" to restore your iPhone to factory settings if the iPhone needs to be done.
Importantly, it allows you to enter or exit the recovery mode for free with one-click. Besides, it not only can repair the iPhone system problems, you can apply it to solve any iDevices system issues like iPad and iPod touch. The way to operate it is very easy, which won't take you a lot of time.
Key Features of Joyoshare UltFix iOS System Recovery:
Offer two repair modes to fix iPhone GPS issue safely
Compatible with iOS 12.3 and all the iOS devices
Can enter or exit the recovery mode free with one-click
Support to fix both iPhone system issues and iPad/iPod system issues
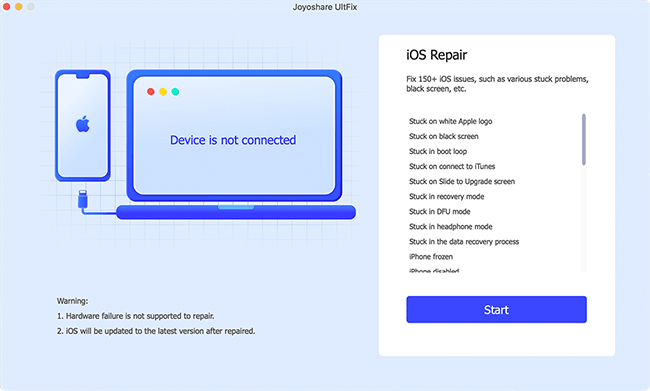
If your iPhone GPS has to be repaired with this way, you should read the following steps with your whole heart.
Step 1: Install Joyoshare UltFix on your computer and plug your iPhone to it with the supplied USB cable. Then, it is time to click "Start" to choose a repair mode;

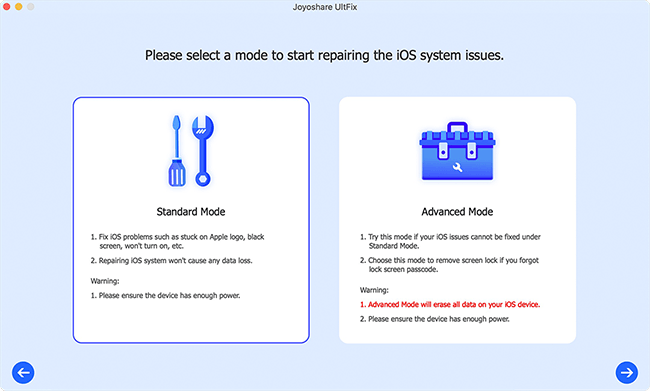
Step 2: In this interface, you should choose the "Standard Mode" to repair and tap on "Next" to continue;
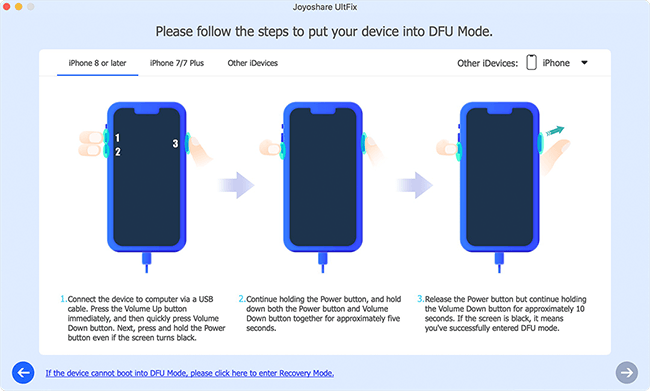
Step 3: Complete the above steps, you need to set your iPhone into DFU mode or recovery mode following the instructions on the screen;
Step 4: Click the "Download" to download the firmware package and verify it;
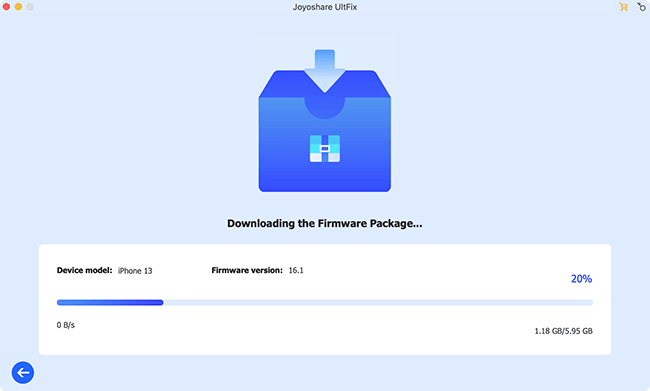
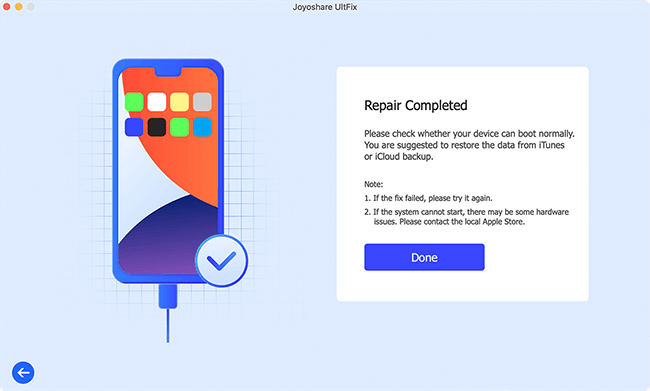
Step 5: End it by click "Repair" to unzip the firmware package. After unzipping, Joyoshare UltFix will fix your iPhone GPS problem.
Conclusion
With these six solutions above, you can completely know how to repair your iPhone GPS not working. You don't need to try them all. And you have to figure out why GPS won't work on the iPhone. After you weigh these options, you can choose the right one to work for the iPhone. Although most of the time, iPhone works properly, occasionally it will show some system issues like iPhone keeps disconnecting from WiFi, Bluetooth not working, etc. In order to solve these problems quickly when they arise, you'd better save this article because Joyoshare UltFix can assist you to fix a series of iOS system issues without causing data loss.
