Have you ever encountered the occasion when you view something interesting and ready to record the amazing moment, you find that your iPhone camera stops working? Maybe it is frozen or black camera. Whichever is the case, iPhone camera not working leaves you in the frustrating situation. So, you want to repair it as soon as possible. But you don't know the specific reasons for this issue. It is possible that a hardware or software flaw causes your iPhone camera problem. Before you will repair it in Apple store, 9 useful methods are proposed below to assist you to fix this issue quickly. After you try them all but no one works, it is time to visit Apple store.
- Tips 1: Inspect Camera with Other Apps
- Tips 2: Force Camera App to Quit
- Tips 3: Switch the Front or Back Camera
- Tips 4: Turn off the "VoiceOver" Function
- Tips 5: Update the iOS Version
- Tips 6: Reset iPhone Settings
- Tips 7: Hard Reset iPhone
- Tips 8: Restore iPhone to Factory Settings
- Tips 9: Utilize iOS System Recovery Software Causing No Data Loss
Part 1. Test iPhone Camera with Different Apps
If you notice that your iPhone camera not working with the black screen with one application, you can open WhatsApp or WeChat to make a video call so that you will see if the camera works with other applications. If it can work, that means there is something wrong with the app. To solve it, you can update the application or uninstall it and install again. If iPhone camera does not work properly with other apps, you can restart iPhone and try it again. Or there is something troublesome with the built-in camera app, you can try the following ways to solve it.
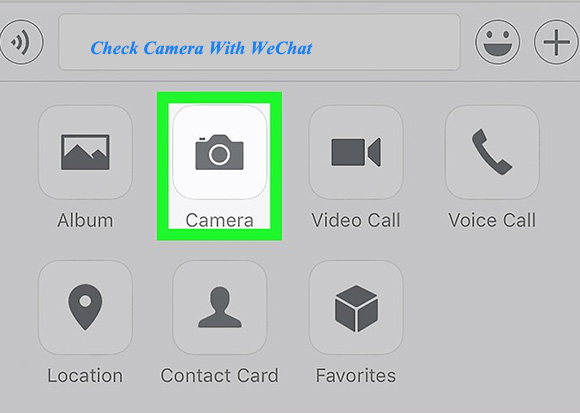
Note: The way to uninstall the app is not difficult. Firstly, you need to long press the screen until it vibrates. And then icon "×" will show in the top right corner of the applications. You just click the "×" button to delete the camera app.
Part 2. Hard Quit the Camera App to Fix iPhone Camera Not Working
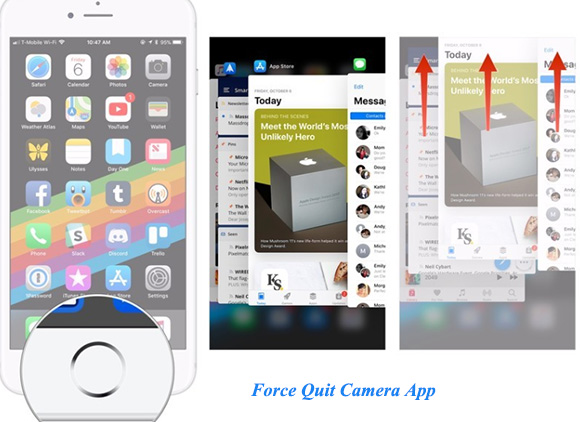
When you make sure the camera lens is clean but it still displays the black screen as you take a shot, maybe there exists something incorrect with the camera app. You can try this way to fix it. It is very simple to do. You just double click the "Home" button to swipe the app list up. Then you should find camera app and swipe it up to close. Finally, you can go back to the home screen and operate camera app again. If it is still not normal, you need to move on to next method.
Part 3. Switch the Front or Back Camera on iPhone
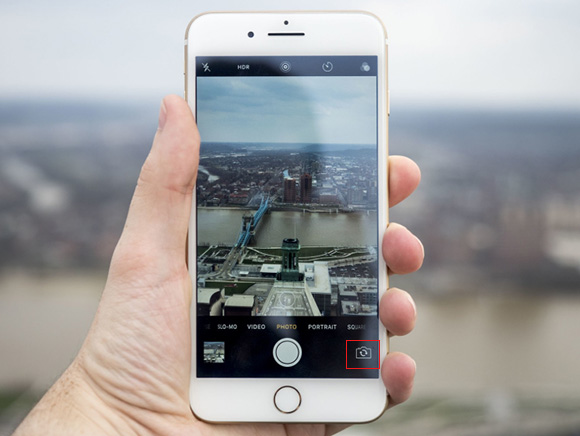
If your camera still shows screen black while taking a picture, this tip can help you manage it. When you find that the rear camera cannot work well, you can switch it to the front camera by clicking the icon for changing the direction of lens. After a moment, when you switch it back, maybe the camera issue is disappeared. This is the easiest way to get iPhone camera back to normal. Hope it can solve iPhone camera not working for you perfectly.
Part 4. Switch off the "VoiceOver" Function to Fix iPhone Camera Won't Work
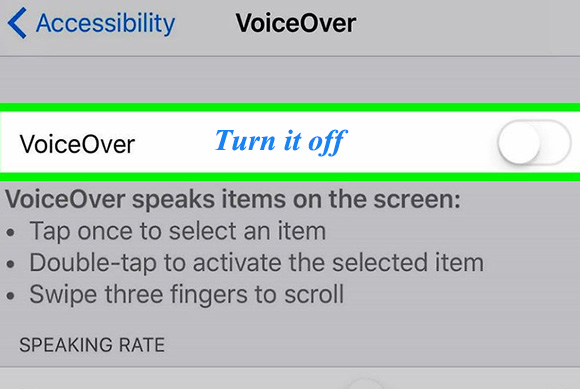
In fact, this method is discussed in Apple Community. It is incredible that "VoiceOver" feature will affect the normal use of the camera. But it is absolutely true. To resolve it, you can switch off the "VoiceOver". The following is how to turn it off. At first, you need to enter "Settings" option and click "General". Then, you should tap on "Accessibility" and turn "VoiceOver" off. After the operation, you can launch iPhone camera again. If this surprising way is useless, you can go on with the following methods.
Part 5. Update the iPhone System to the Newest Version
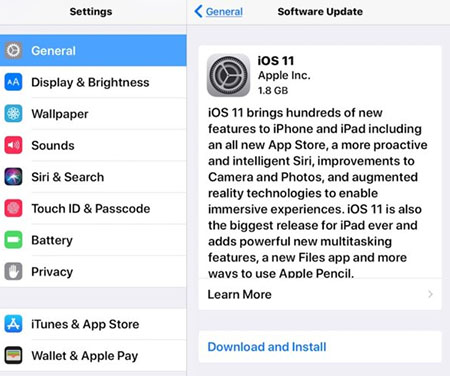
The possible reason for camera not working on iPhone is that the iOS version is outdated and works unsteadily. Hence, you can solve this issue by updating iOS version. If you don't know exactly how to do, the steps are illustrated for you. Before starting, you should make sure your iPhone is full of power and connected with the strong network. And then you just tap on "Settings" - select "General" - click "Software Update". Next, you need to click "Download & Install" to update your iOS to a stable version. When updating is completed, you can try camera to check whether this way takes effect or not. If it fails, you just continue to use the following approaches.
Part 6. Reset the Whole Settings to Repair iPhone Camera Fails to Work
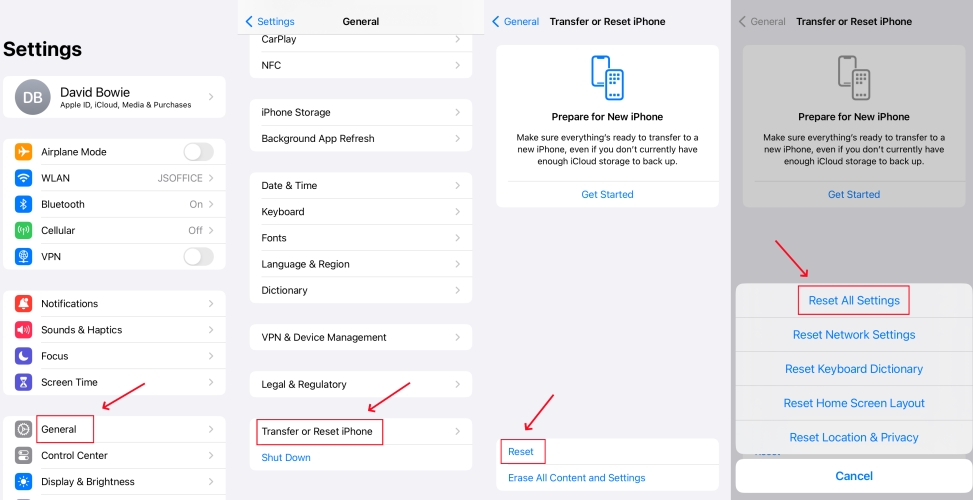
There are high chances of the problem that iPhone camera stopped working due to the default settings. The most common way to solve is to reset all the iPhone settings. It is easy to do. First of all, you need to get into "Settings" and click the "General" button. Next, you should choose "Reset". And then you need to tap on "Reset All Settings" in the reset interface. Before beginning to reset, it is essential to confirm the action. After soon, your iPhone settings will be reset totally and you may use camera properly.
Part 7. Force Restart iPhone to Fix the Issue that iPhone Camera Won't Work
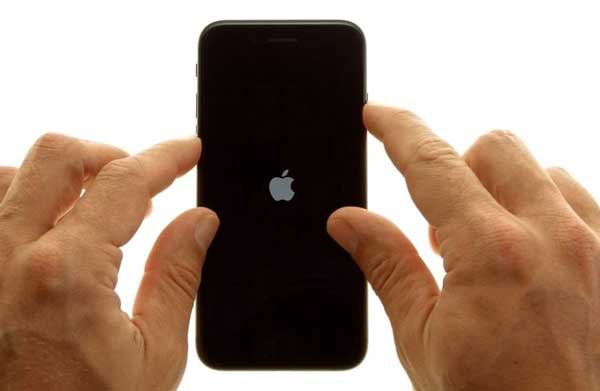
Sometimes, your iPhone camera does not get worked normally, which maybe results from the minor software issues on your iPhone system. In this case, if you have soft reset the iPhone but it doesn't work, it will be necessary to repair the problem by restarting your iPhone forcefully. The way of such operation is not complicated.
For users before iPhone 7, just press and hold the "Home" and "Power" button until the Apple logo appears on the screen. But if you are iPhone 7 user, the method is somewhat different. You need to press and hold the "Volume Down" button and "Sleep/Wake" button until the Apple logo shows. Of course, when you are iPhone 8 and later user, you should press "Volume Up" and release it first. And then press "Volume Down" and release it. Lastly, you can hold the "Power" button until the logo arises. After hard reset iPhone, you may try camera once again.
Part 8. Factory Reset the iPhone to Solve the Camera Problem
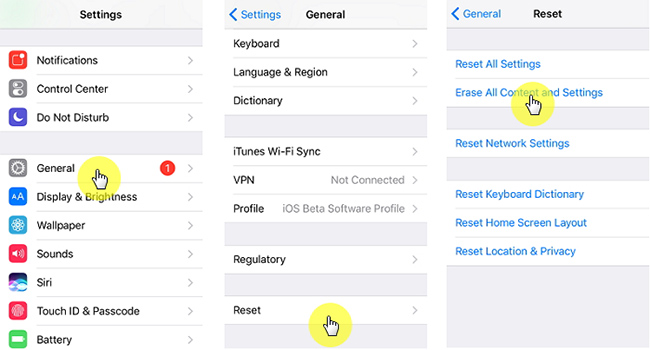
If you have practiced all the above methods but iPhone camera doesn't work, this solution may be helpful. Restoring iPhone to factory settings means cleaning up all the information and set your iPhone up to a new one. To do it, you just head to "Settings" - tap on "General" - choose "Reset" - click "Erase All Content and Settings". After a while, your iPhone will be refreshed. Notice that you need to back up all the data on your iPhone in order not to lose it. If you truly forget to back up, Joyoshare iPhone Data Recovery is recommended to you.
Part 9. Repair with Joyoshare UltFix iOS System Recovery without Losing Data
When iPhone camera not working problem is caused by some deep iOS issues that can not be resolved by the ordinary ways, you can make use of the iOS system repair software - Joyoshare UltFix. Equipped with accurate and powerful algorithms as well as high-tech repair functions, more than 30 types of iOS issues can be resolved without data loss using Joyoshare UltFix. Without doubt it can repair a variety of system problems of all iOS devices including iPhone, iPad and iPod touch.
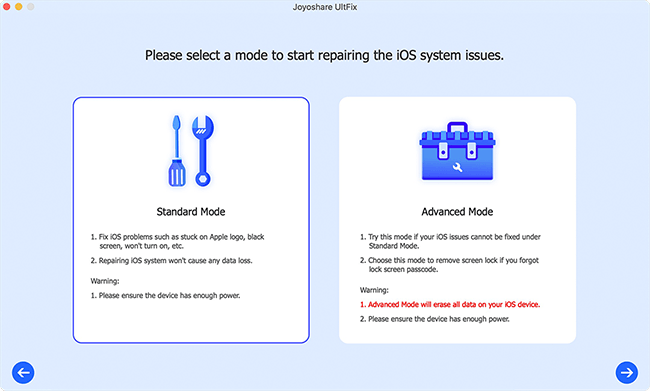
Furthermore, it provides you with two repair modes. One mode is "Standard Mode", which helps you fix many ordinary iOS issues without impacting the information on the iPhone. Another one is "Advanced Mode", with which you are able to restore the iPhone to factory setting if it is necessary. Besides, Joyoshare UltFix offers one-click enter/exit recovery mode function for free. If you don't understand these features, you can install and operate the trial version of it.
Key Features of Joyoshare UltFix iOS System Recovery:
Fix your iPhone camera not working problem quickly and safely
Can enter/exit recovery mode with one click freely
Solve iOS system problems with two repair modes
Support the newest iOS 12.3 and all iDevices
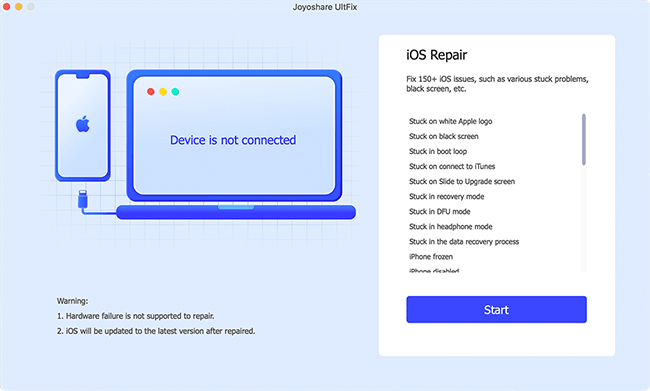
If you are not familiar with it, you can follow the steps given below to do at ease.
Step 1: The first you need to do is to install Joyoshare UltFix on Windows/Mac. Then you should connect your iPhone and click the "Start" button;

Step 2: After clicking "Start", you will see the pop-up of repair mode. Now, you should choose "Standard Mode" as camera not working is included in the common issues. Next, you can click "Next" to proceed;
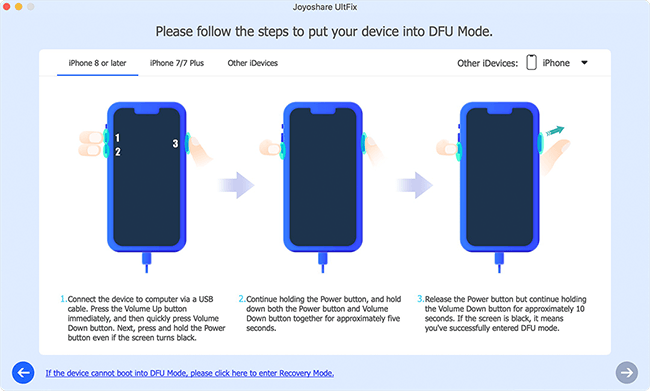
Step 3: In this section, you just set your iPhone into DFU mode or recovery mode following the indications on the screen;
Step 4: Your iPhone model will be detected automatically and you can click "Download" to download and confirm the firmware package;
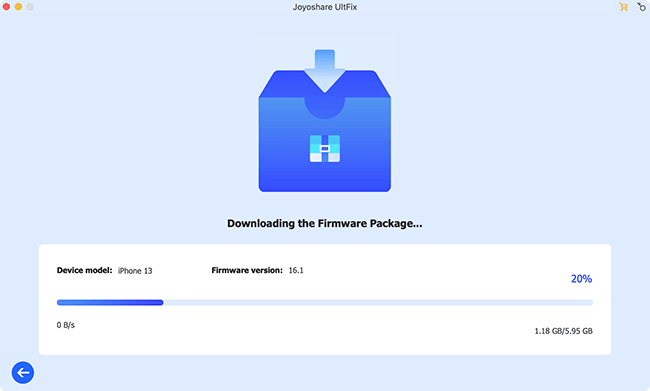
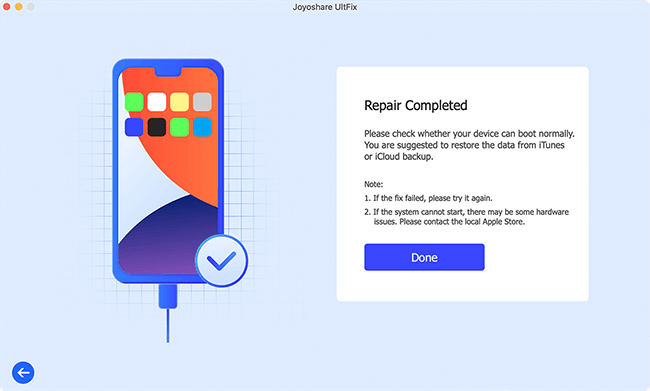
Step 5: Last step, you just click the "Repair" button to unzip the firmware package and start fixing your iPhone not working properly.
Conclusion
The camera is one important feature that is used frequently. If you need to snapshot with it every day, camera not working on iPhone problem will be frustrating especially. When this problem happens, you don't have to go to the repair store immediately. You can search some methods in the Internet or read this post in depth. If there are some slight issues, you just use the common solutions like the first eight ways. Or if there is something unknown with your iPhone system, you had better apply Joyoshare UltFix to solve it. It is better that complex problems are solved by the professional software. More importantly, it can solve a series of iOS issues like iPhone vibration not working, iPad black screen and so forth rather than a single-function iOS system repair tool. It is highly recommended that you take advantage of it.
