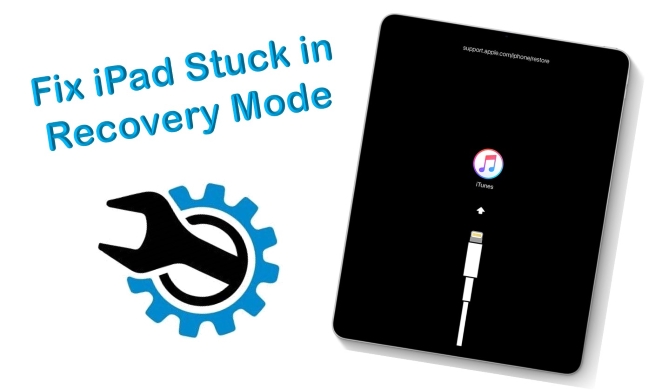
Getting stuck in Recovery Mode is one of the most dreaded issues that occur on various Apple devices. Typically, this issue occurs when you attempt to restore the device through iTunes. The device will still be stuck in Recovery Mode or won't pass the Connect to iTunes screen when it is in Recovery Mode. Major system errors often result in such problems, but hardware problems can also be to blame. The problem with the iPad is discussed in this post. Here's what you should do if you're facing a similar problem with your iPad.
Listed below are some steps you can follow to rule out software-related factors that may have caused your iPad. These solutions may be of use to you if you decide to fix your iPad stuck in Recovery Mode by yourself instead of making an Apple genius bar appointment.
- Method 1. Force Restart Your iPad
- Method 2. Manually Exit iPad Recovery Mode
- Method 3. Use the Top-Notch Tool – Joyoshare UltFix [Highest Success Rate]
- Method 4. Use iTunes to Restore iPad
- Method 5. Restore iTunes from DFU Mode
- Summary
Method 1. Force Restart Your iPad
In most cases, software errors can be resolved by performing a soft reset or restart. Since your iPad is stuck, you cannot perform the usual restart routine because it doesn't respond to touches. To resolve this issue, performing a forced restart on the iPad is needed, which simulates removing the battery. This is a different method of rebooting a frozen iOS device. Let's walk through it:
For models with Face ID or with Touch ID in the top button:
Press and quickly release the Volume Up button and the Volume Down button one by one.
Press and hold the Power button until the device restarts. When the Apple logo appears, release it.

For models with the Home button:
Press and hold the Power button and the Home button together until the iPad turns off and reboots. You can let them go when you see the Apple logo on the screen.

Method 2. Manually Exit iPad Recovery Mode
For iOS users who are experienced, you should know that we can manually put our iPads into Recovery Mode by pressing a few buttons. You can also manually exit Recovery Mode if your iPad gets stuck in Recovery Mode and won't restore. This is how you do it.
Step 1: You should press the Power button and the Home button at the same time for around 10 seconds, after which you should let go of both buttons.
Step 2: Immediately press the Power button and wait for the iPad to turn on.
Method 3. Use the Top-Notch Tool – Joyoshare UltFix [NO Data Loss]
Don't be too frustrated when the above tips failed to work. The third option we recommend here is to use a free tool to get your iPad out of Recovery Mode in just one click, called Joyoshare UltFix iOS System Recovery. With its comprehensive set of tools, you can easily fix more than 150+ iOS-related issues. Joyoshare's series of modules has been widely adopted by iOS users for the management of their devices. To use this software, simply follow these steps outlined below and rectify nearly any problem with your iPad, including the iPad stuck in the boot loop. If one-click didn't help you take your iPad out of Recovery Mode, continue to use this tool to fix it. The interface is user-friendly, and the functionality is extremely flexible. Now let's find out how this repair tool actually works.
- Get your iPad off Recovery Mode for free
- Repair more than 150 iOS system issues
- Support the newest iOS 15 and all iDevices
- Offer Standard Mode and Advanced Mode
Step 1Download and Run Joyoshare UltFix
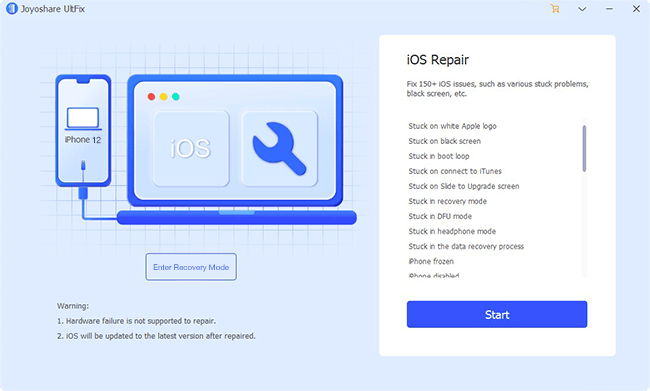
Download Joyoshare UltFix iOS System Recovery and install it on a Mac or PC. Now launch the program and plug your device into a computer. The software will detect your device automatically.
Step 2Exit iPad Recovery Mode
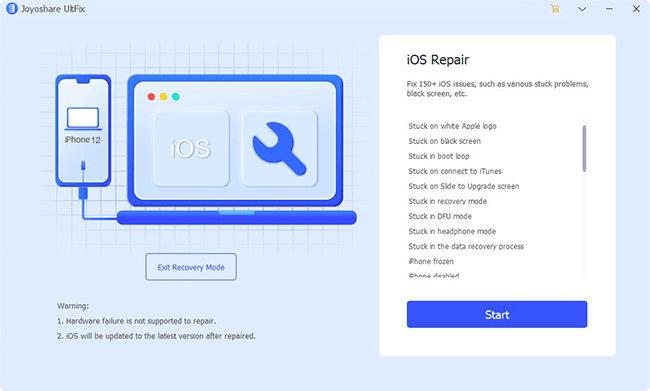
Your iPad must already be in Recovery Mode after it is successfully recognized by the program. In that case, you can click the left blue Exit Recovery Mode button, and the program will exit the Recovery Mode for free. If not, you should continue to the next step to fix your iPad's system.
Step 3Choose Standard Mode and Download Firmware Package
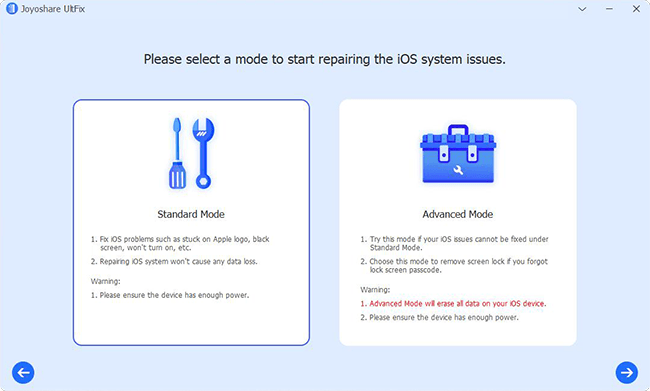
On this screen, you should see two repair modes showing on the screen. Click on Standard Mode, which is a way to fix your iPad losslessly. Check your device info carefully and change the incorrect one. "Download" and verify the iOS firmware package that matched your device.
Step 4Fix Apple iPad Stuck in Recovery Mode
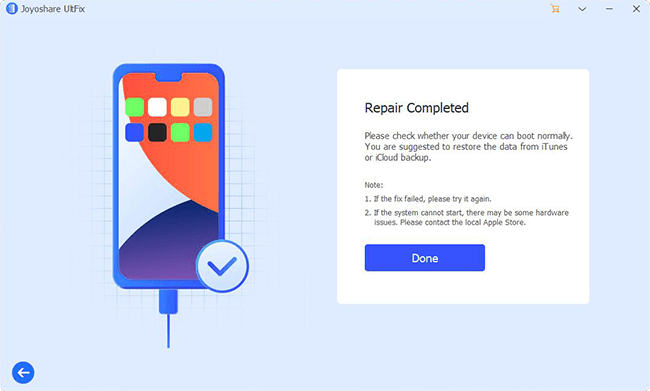
Clicking Repair lets the software instantly fix the issue with your iPad once the download is complete. After the process bar ends, the Recovery Mode will be successfully exited by your iPad. It can be tried again or you can switch to the Advanced Mode to fix it.
Method 4. Use iTunes to Restore iPad
It is possible to fix the issue that the iPad is stuck in Recovery Mode by restoring it using iTunes. But in some cases, users complain to us that their iPad is stuck in Recovery Mode and iTunes won't recognize it. So, we do not recommend that you try this method. If you still want to try, backed up your iPad data beforehand. Then, you can proceed as described below to resolve the issue.
Step 1. Connect your iPad to your computer, open the iTunes app, and update it if it is not the latest version.
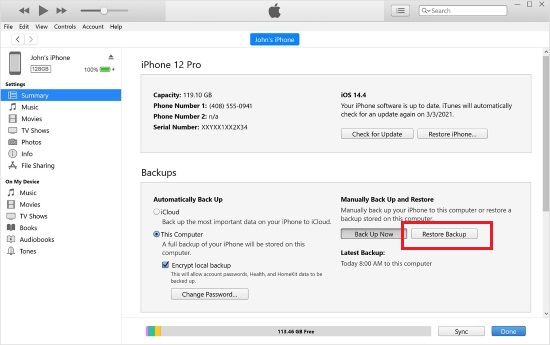
Step 2. You will be prompted to click OK on iTunes when it detects your iPad is in the Recovery Mode, then choose to Restore iPad from the Summary panel to erase all data from your iPad.
Step 3. Confirm the Restore option again and wait until the process comes to the end. You can then recover your data from iTunes or iCloud backup files. Ensure that the Restore option is confirmed again and wait for the process to finish. After this, you can get your data back from iTunes or iCloud backup files.
Method 5. Restore iPad from DFU Mode
Restoring it from DFU mode is one way to fix the iPad stuck on the Restore screen. Even if DFU Mode erases all the iPad data, it is still worthwhile to try if the previous methods don't work. You can put your iPad into DFU mode in different ways, depending on your device model. Here are the steps:
For iPad with Face ID:
Step 1. Turn off your iPad and plug it into your Mac or Windows computer.
Step 2. Ensure that iTunes or Finder are running.
Step 3. Keep holding the Side button on your device for about three seconds.
Step 4. Press and hold down the Volume Down button while continuing to hold down the Side button. Do this for 10 seconds.
Step 5. You can let go of the Side button now, but keep holding the Volume Down button for five seconds.
Step 6. Release Volume Down. If the screen is illuminated but blank, your iPad has now entered DFU mode.
For iPad with Home button:
Step 1. Plug your iPad into a computer and launch iTunes on the computer. Make sure your iPad is connected to iTunes.
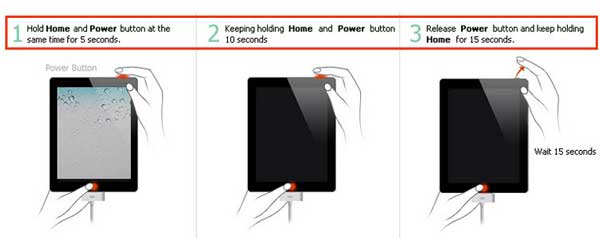
Step 2. Press and hold the Power button and Home button simultaneously until the iPad screen goes black.
Step 3. Release the Power button but keep holding the Home button.
Step 4. Keep holding the Home button until iTunes detects your iPad.
Summary
In short, this problem can always be easily solved with the help of experts. You should be able to fix the iPad 2, iPad 4th gen, iPad mini, or any other iPad models that get stuck in Recovery Mode by following the above instructions, and I am sure one of them will work. With the emerging restoration program, people's lives have been greatly simplified. Take a look at Joyoshare UltFix iOS System Recovery and you may be pleasantly surprised. If you encounter any errors while using it, you can contact our executive team for online email support or leave your comments. They will cost-effectively lend you a hand with satisfaction.
